
Thank you, Tags with Falliable Elements
Happy Thursday Friends! On today’s blog post, I’d like to share with you these 4 Thank you, Tags that, I created featuring the new; Fillable Tag with Pocket Die Set and Teardrop Tag with Fillable Elements Die Set from the new; Essentials-3 release by Pinkfresh Studio so, without further ado please, keep reading below ↓

For the first 2 tags, I kept it simple by using White and Kraft card stock so, to begin with, I started by running through the die-cutting machine the Tag Die from the Fillable Tag with Pocket Die Set to die-cut it 2X out of Kraft card stock. Next, I ran through the die-cutting machine the pocket die from the set to die-cut it 2X out of white card stock. This dies are so versatile as, you can create lots of different detailed tags with them. By the way, the die also comes with a die that creates a window which, I didn’t use today but, will use for sure in future projects.
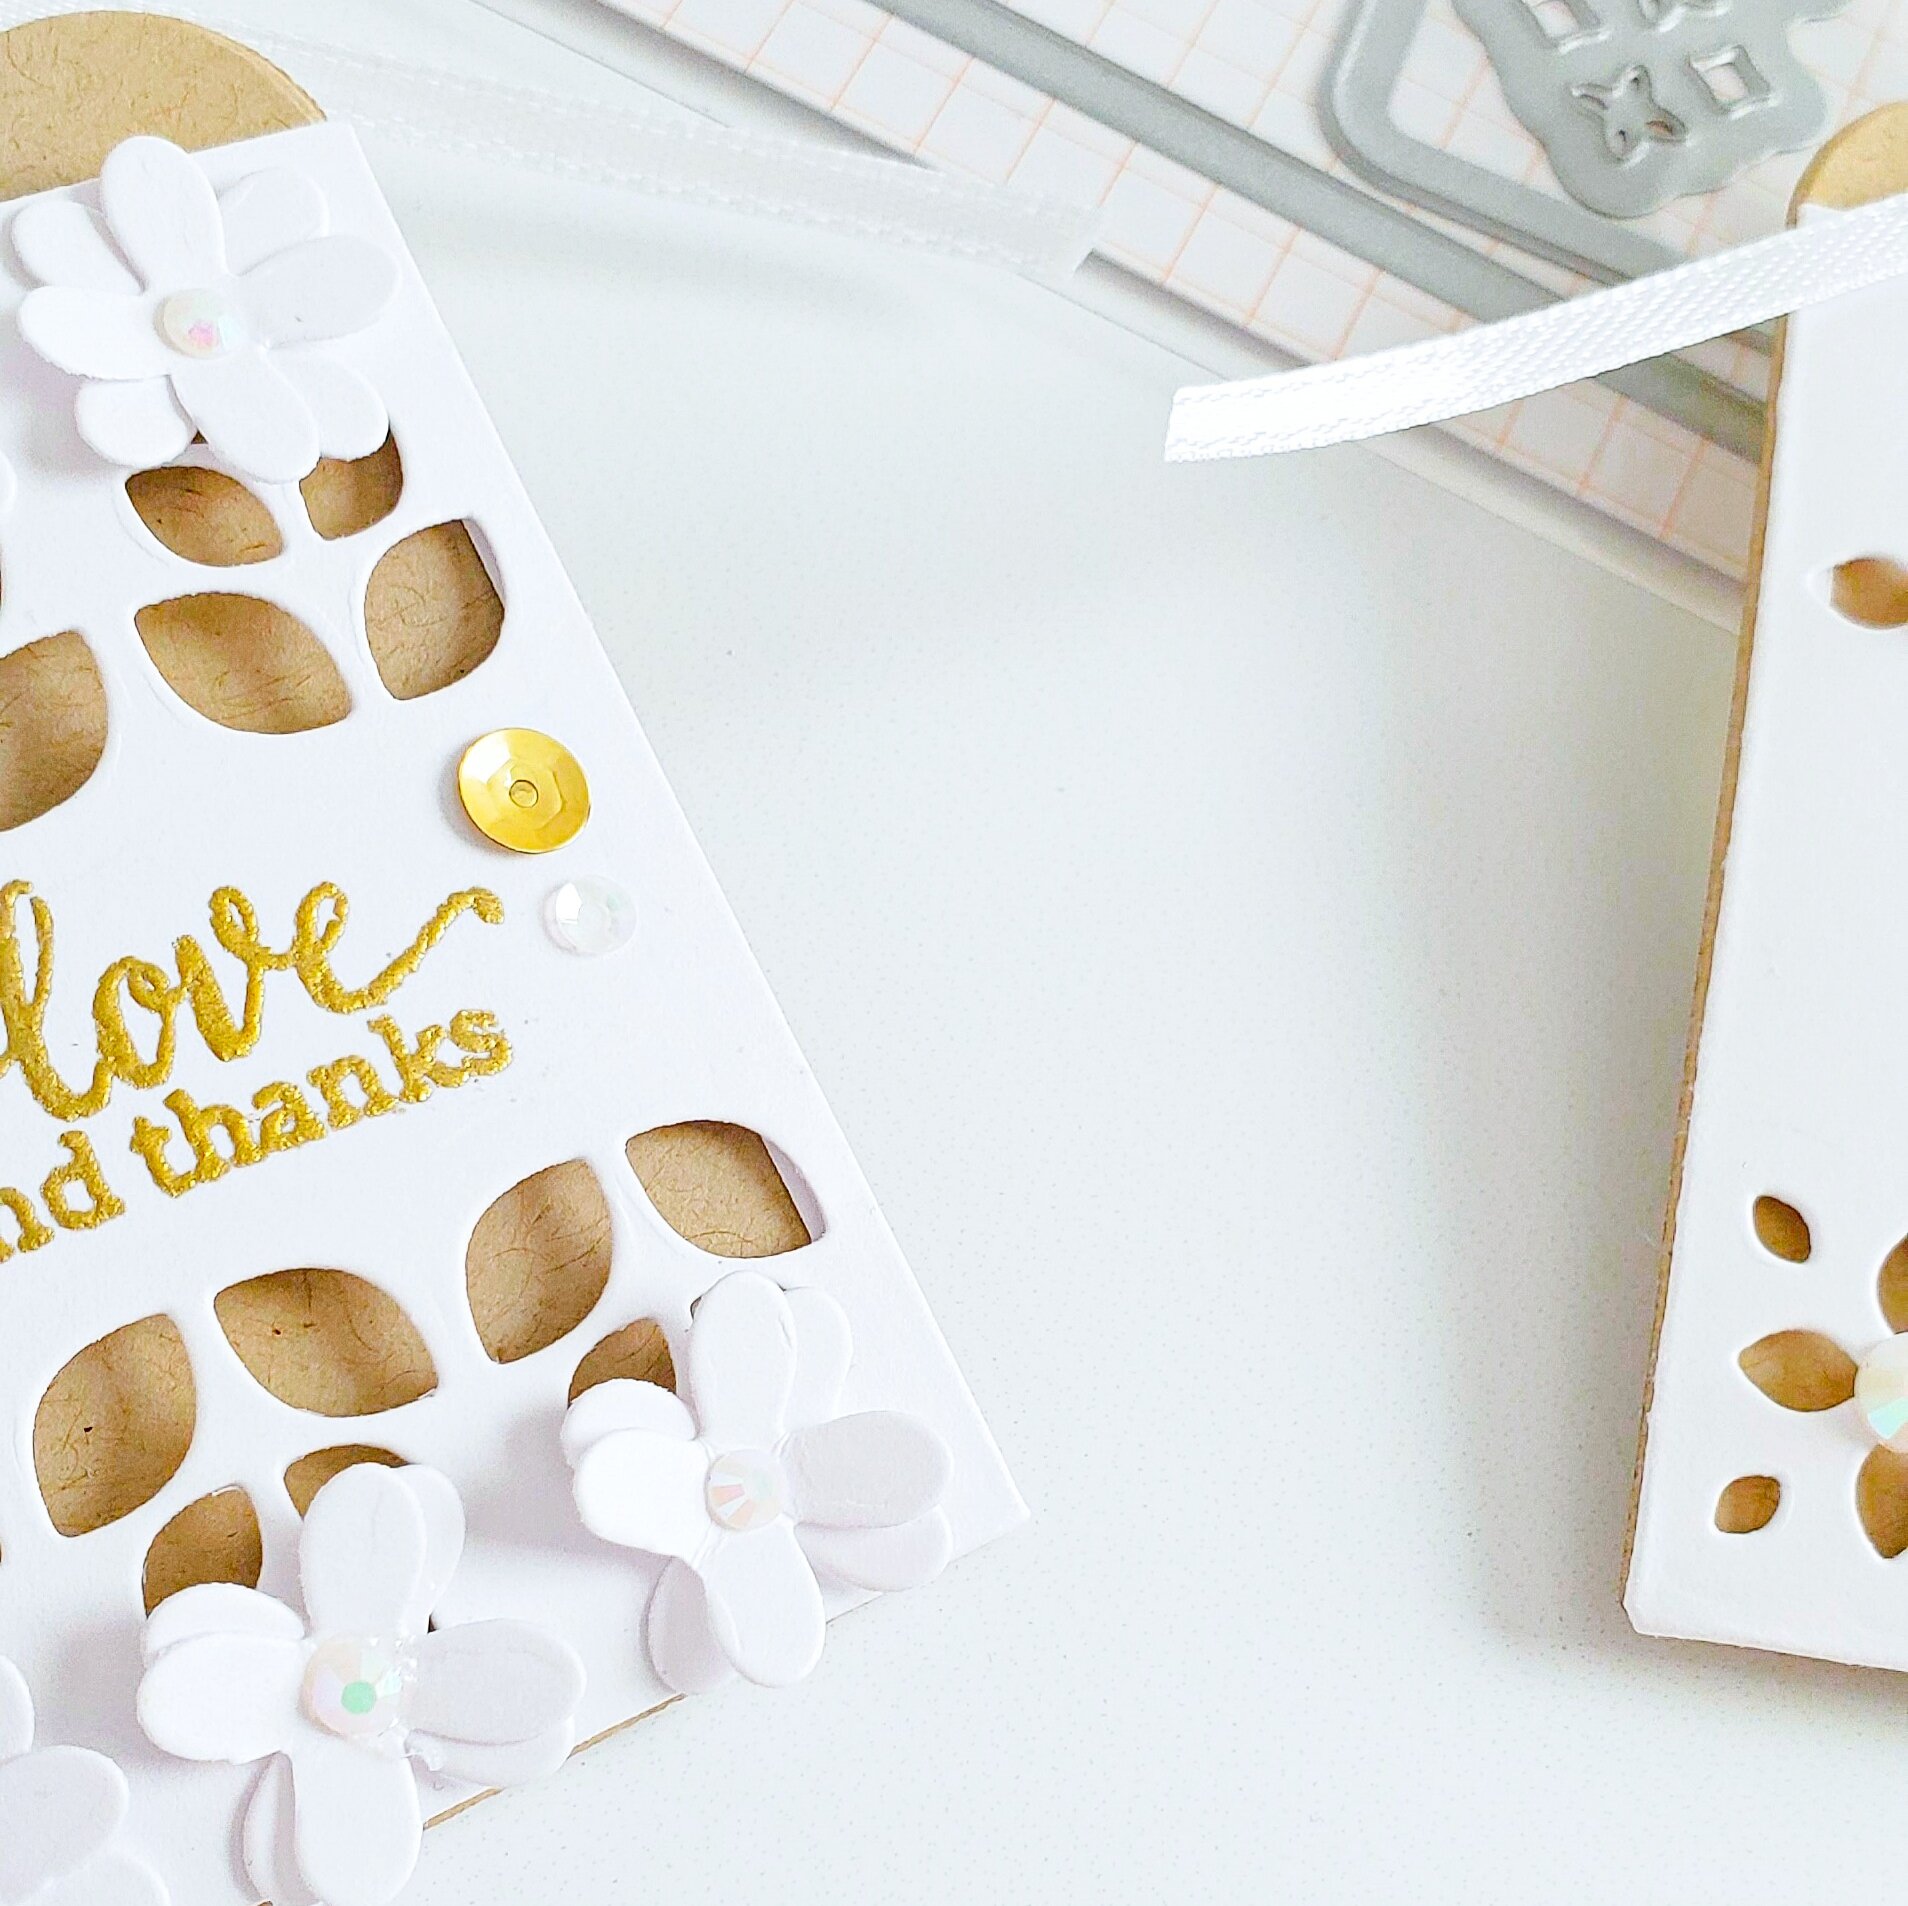
So, to keep going with the blog post… after die-cutting the tags and the pockets, I set the tag aside and I ran through the die-cutting machine the pocket along with one of the fillable dies to create the impression of leaves so, I could add flowers which, I had die-cut previously out white card stock. If you take a closer look on the left side in the picture above, you can see that, I left a space in between the cuts so, I could have enough space to add a sentiment. Right after die-cutting the first pocket, I proceeded to repeat the same steps for the second pocket however, I used 2 different fillables dies instead of 1 as I did previously for the first pocket.

Once, the die-cutting was done, I positioned the pocket on my stamping tool and, I gold heat embossed with Metallic Gold Rich Embossing Powder as, usual on each pocket the same sentiment from the Hanging Florals Stamp Set. Soon after the heat embossing, I folded the score lines created from the die and I adhered each pocket with liquid glue to the tags. Lastly, I ran through the die-cutting machine the reinforcement die included in the set to die-cut it 4X out Kraft card stock which, soon after the die-cutting, I adhered 1 in the back and 1 in the front on each tags. To finish the tags off, I adhered the flowers that, I had previously die-cut and stacked using a die from the Teardrop Tag with Fillable Elements Die Set which, you’ll see in the next example. Finally, I tied a piece of white ribbon and a bow to the tag and, to embellish the tags, I adhered a combination of sequins and jewels as you can see in the pictures above.
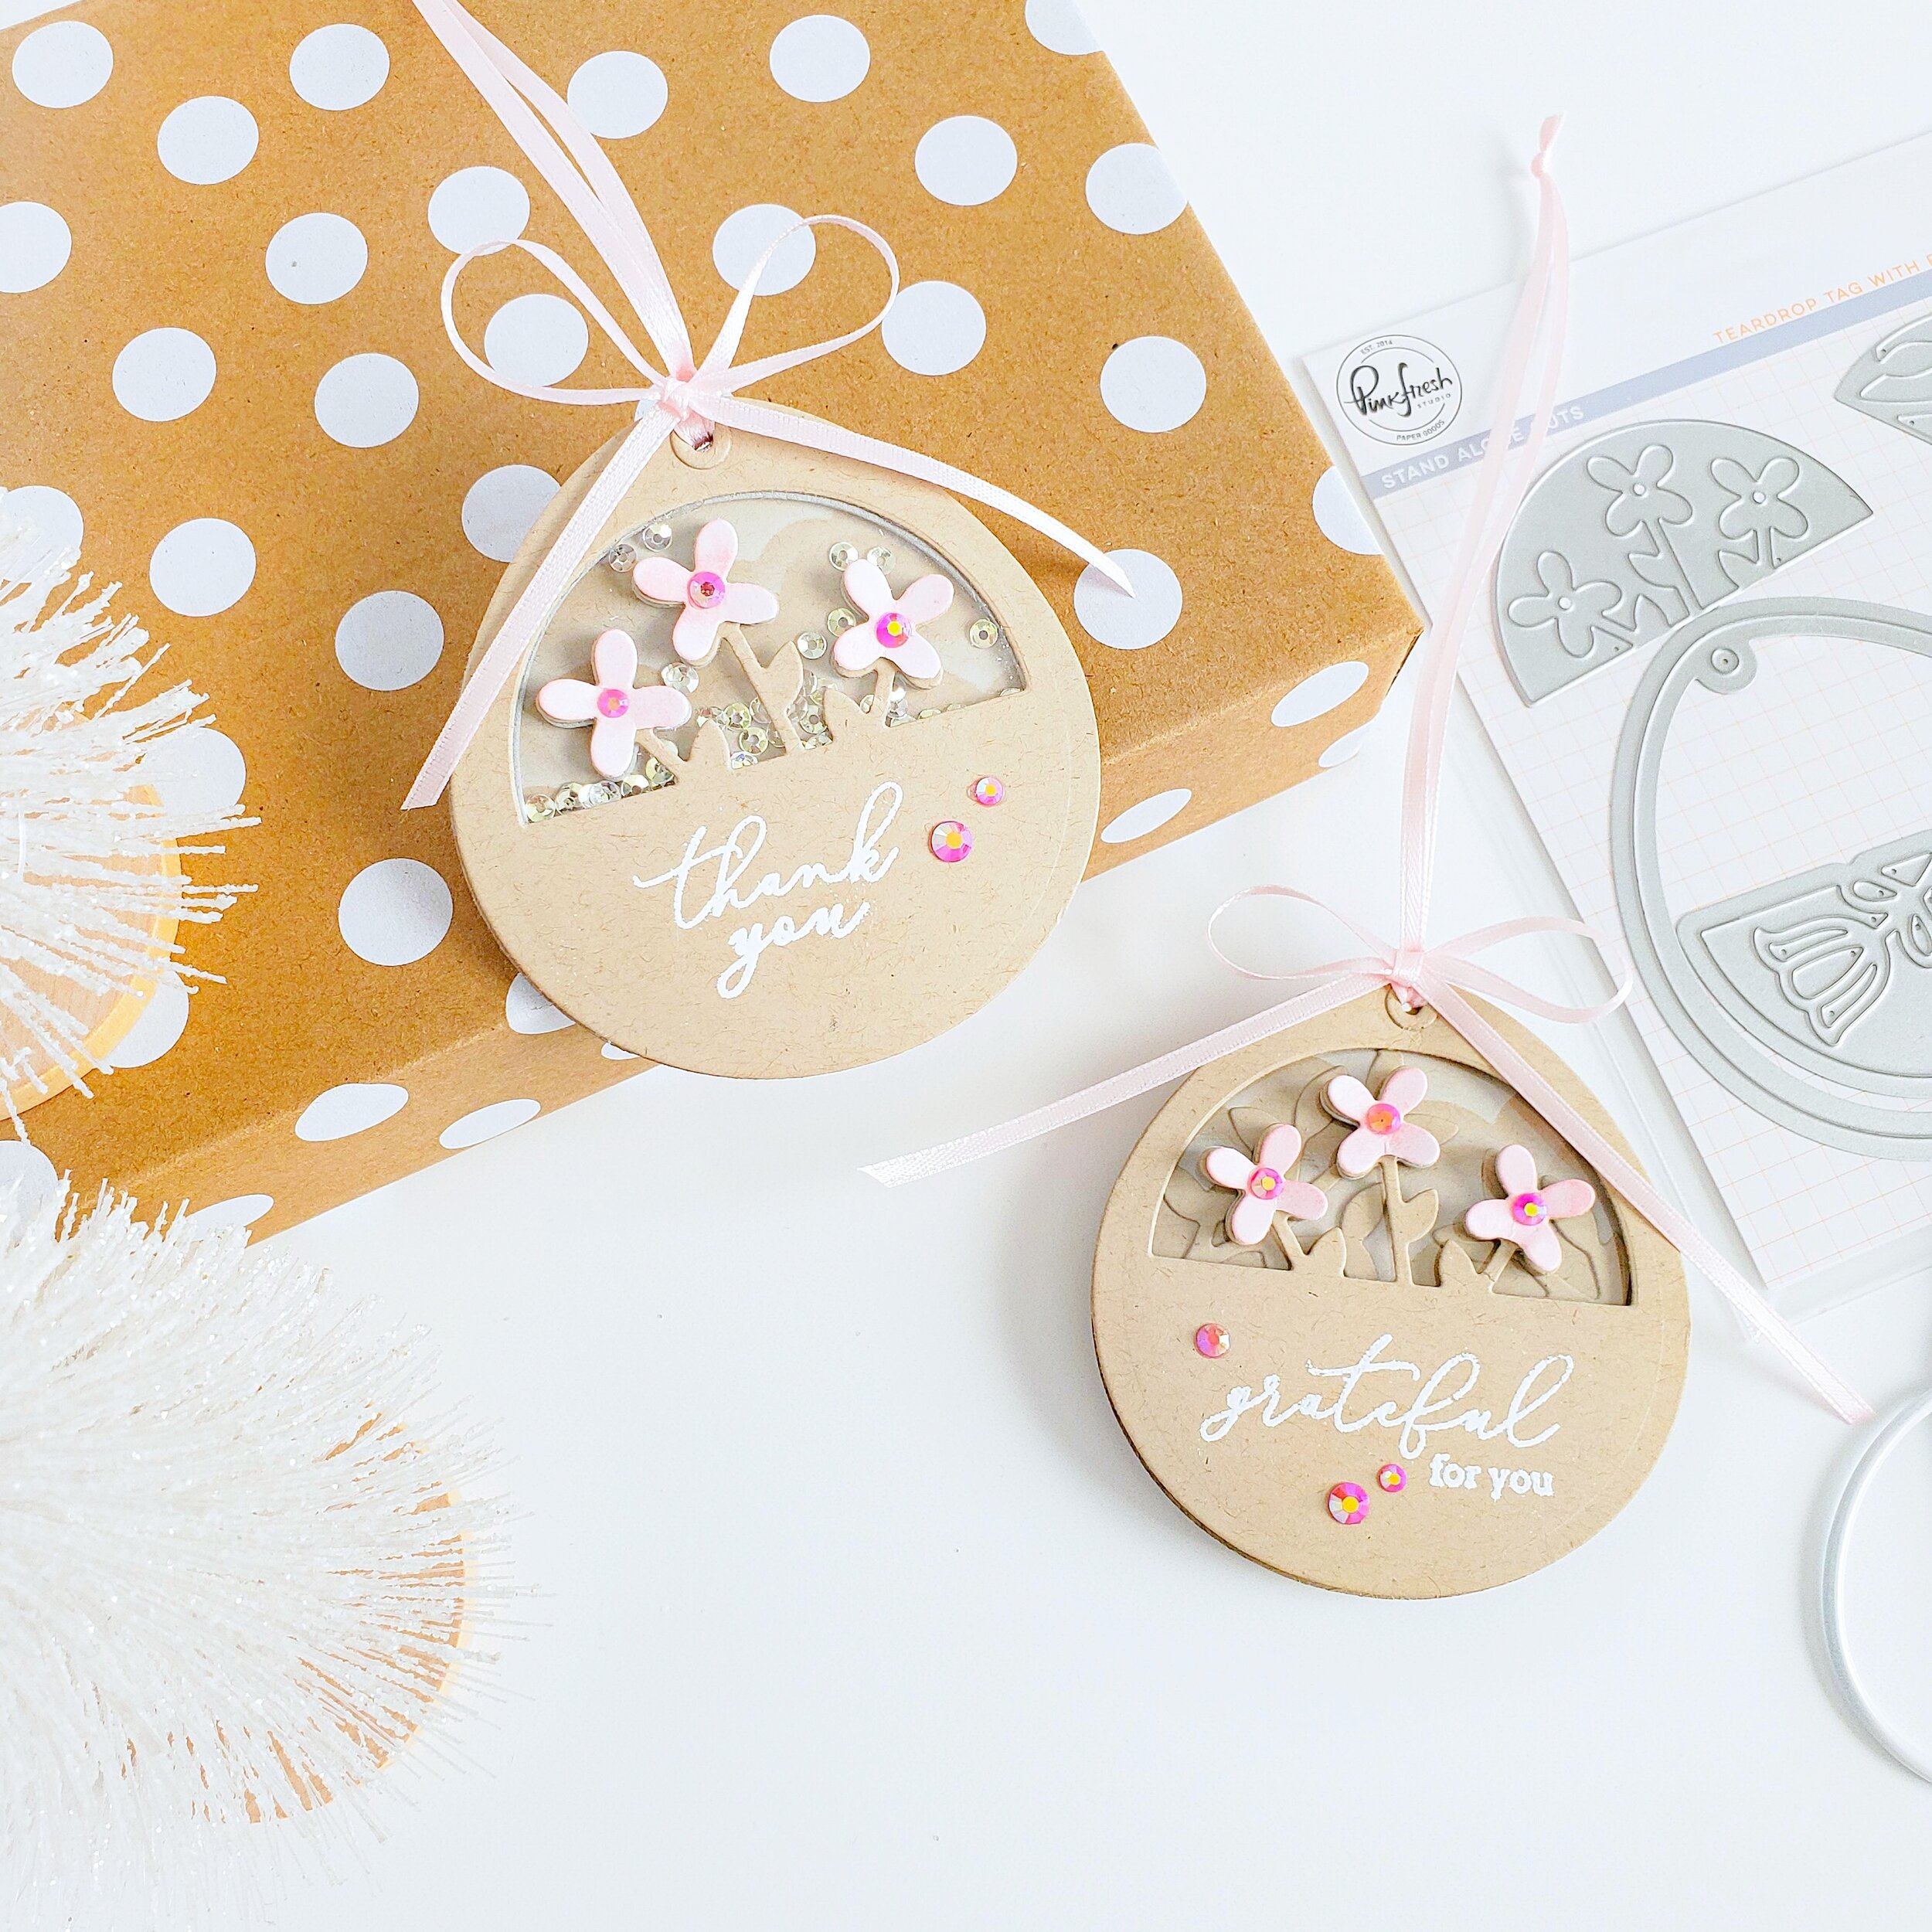
To make the second set of tags I used; the Teardrop Tag with Fillable Elements Die Set so, to begin with, I started by running through the die-cutting machine the tag die along with one of the fillable that, I had temporarily adhere with a piece of low tack tape in the top side of the tag to die-cut not just the tag but, the flowers too at the same time. With the same dies together, I die-cut it the tag 2X out of Kraft card stock and, 2X out of fun foam because, I wanted to add dimension to the one of tags and…because, I made a shaker card out of them.

Once, the detailed tags were die-cut out the Kraft card stock, I ran through the die-cutting machine the tag itself with the fillable to die-cut 2 more tags out the Kraft card stock. I made these die-cuttings so, I could place them in the back of each tag. So, after die-cutting the tags, I added white clouds to the from side of the tag which, was going to show up through the window created from the fillable. To make the clouds, I used the Cloud Mixable Stencil which, I inked up with Unicorn White Ink. Right after when I was done with the inking, I adhered the backing of the first fun foam die-cutting with liquid glue on top of one of the inked tags. Then, I added a few Crystal Clear 3MM Sequins as this was going to be a shaker tag. To seal the shaker tag, I ran through the die-cutting machine once again the tag die but, this time to die-cut it out of acetate once, the acetate was die-cutting was done, I carefully adhered it with strong adhesive to the fun foam. Lastly, I positioned the front of the tag in my stamping tool and, I white heat embossed as usual, a sentiment from the Delicate Wreath Stamp Set. Finally, after the heat embossing, I adhered the backing of the tag to the acetate and the assembling was completed.
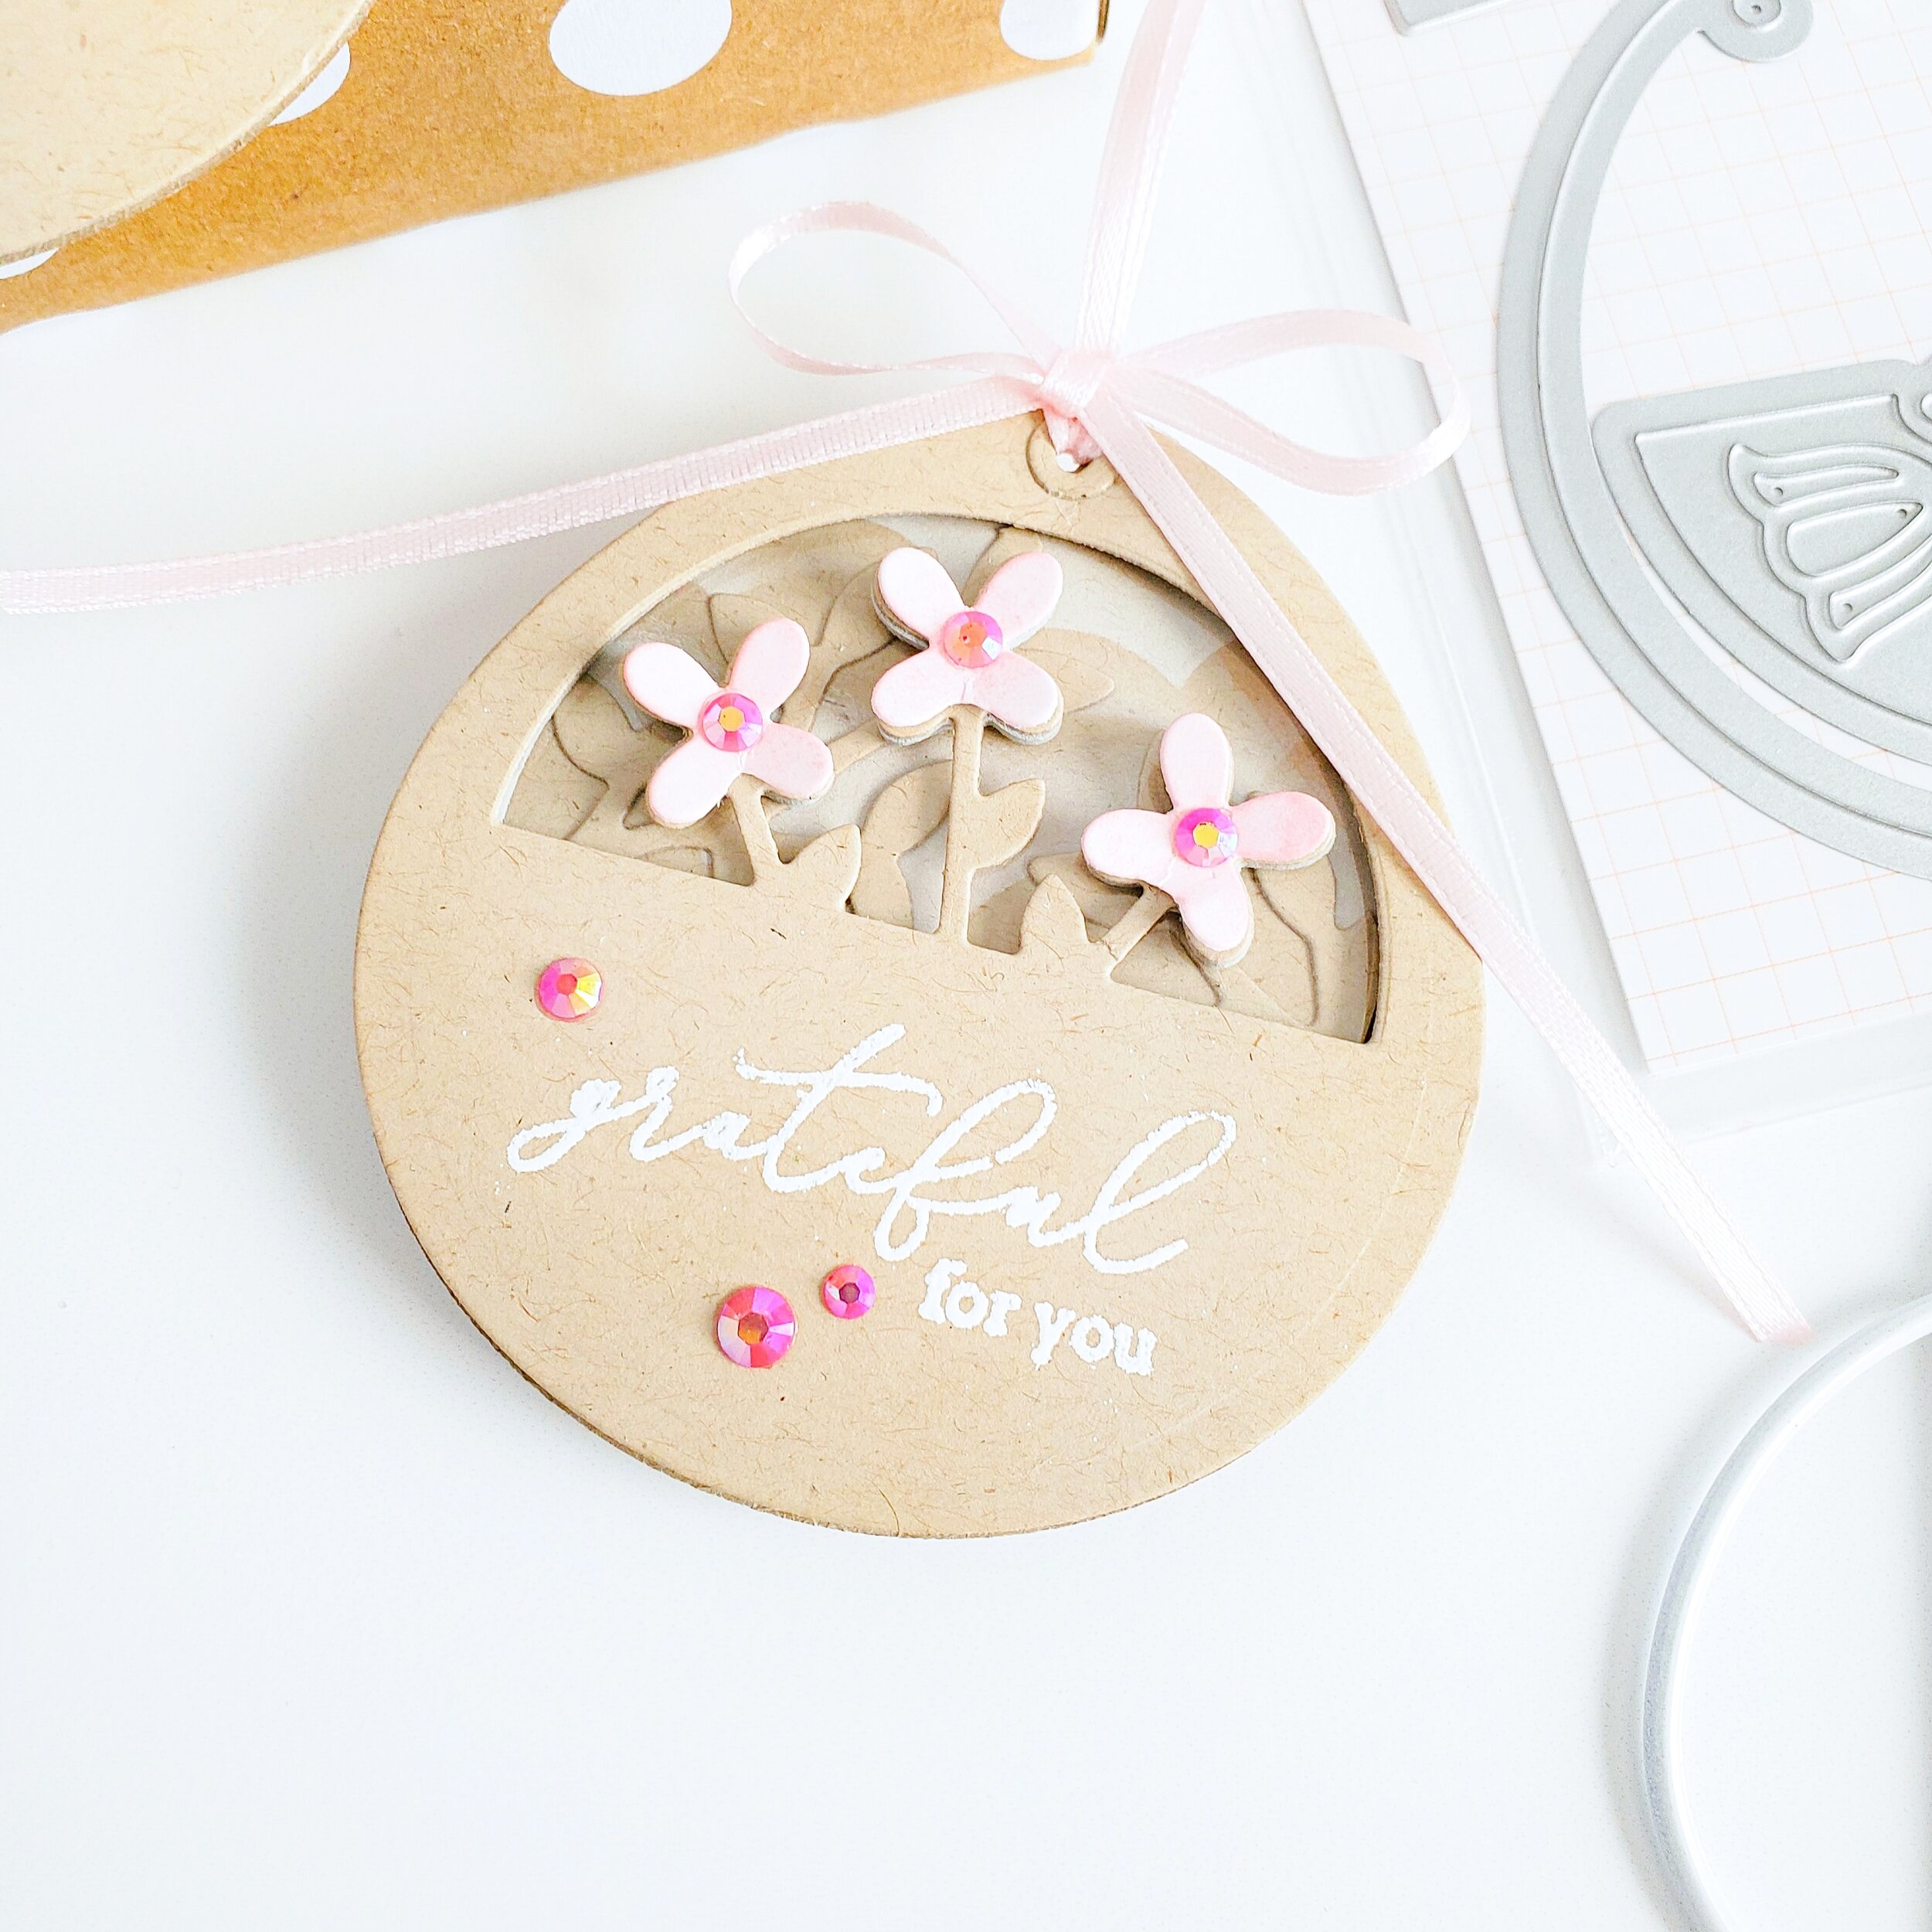
To create a different look from the previous example, I slightly changed things up by only leaving the sequins out and, by adding an extra die-cutting which, was created from a different fillable die for a greenery look. Also, I changed the sentiment other than that, I kept it the same even, the acetate because, I wanted the shiny look for the window. As a finishing touch, I decided not to use white so, instead I added a touch of pink to the flowers as, you can see in the picture above. So, to create the flowers, first; I ran through the die-cutting machine just the fillable die to die-cut the flowers 2X out white card stock. Once, the die-cutting flowers were done, I inked them up with Coral Reef Ink soon after, I fussy cut them with the scissors out of the card stock piece and, I adhered 3 flowers on each tag right afterwards. To finish the last 2 tags off, I adhered here and there with liquid glue a few Raspberry Mix Jewels for a touch of sparkle as well as a piece of pink ribbon and a bow which, I created out the same pink ribbon. With that being said friends, I hope these cards inspire you to give these designs a try! I appreciate the time you take to read my blog posts below; you’ll find the supply list for the products used on today’s blog post.
Thank you and happy crafting, your time is valuable.
Don't forget to keep spreading kindness, Today and Always.
Best,
Yasmin
Supply List
Fillable Tag with Pocket Die Set
Teardrop Tag with Fillable Elements Die Set
Delicate Wreath Stamp Set
Hanging Florals Stamp Set
Coral Reef Ink Pad
Jewels Mix
TE Blender Brushes
Raspberry Mix Jewels
Crystal Clear 3MM sequis
Unicorn White Ink
Cloud Mixable Stencil
Inkadinkado Embossing Powder Tool
Cougar 110# Heavy Weight Card Stock
Desert Storm Card Stock
Metallic Gold Rich Embossing Powder
WOW! Embossing Ink Pad
WOW! Heat Embossing Gun Tool

PLEASE NOTE
As part of the WOW! Designer Team, WOW! has provided me a code for all my lovely Subscribers to use. So, don’t forget to take the advantage of a crafty 10% off all purchase for both WOW!
US and UK by simply by using my code: WOWDTYD
Here are the links for both websites weather you’re a US or UK user.
WOW! Embossing Powder US
WOW! Embossing Powder UK
Your imagination is Your limit.
All photography provided by Yasmin Diaz


Creativity is contagious, pass it on.
–Albert Einstein
Disclosure
I am creating this blog with the purpose of sharing how I design my cards, the information provided here is base in my own opinion and creativity. I am not an expert by any means, and I only share the way that I design my cards. Most of the products used for my blog posts are personally purchased by me. However, I did receive the Essentials-3 sets by Pinkfresh Studio and, some of the WOW! Embossing Powder products used on today’s blog. Please, keep in mind that, all referral links were added for you to know from where I purchased or received the items from as, all of products shared and mentioned in each of my blog posts are simply because I use, and truly love them.