
Happy Tuesday, Friends! Today, I’m happy to share with you this set of “Christmas” cards inspiration made using the newest Clear Stamp of the Month Club by Spellbinders. This beautiful stamp set it’s called “Christmas Gem” and the possibilities are endless. So, without further ado, let’s jump into the step-by-step on how I made them ↓
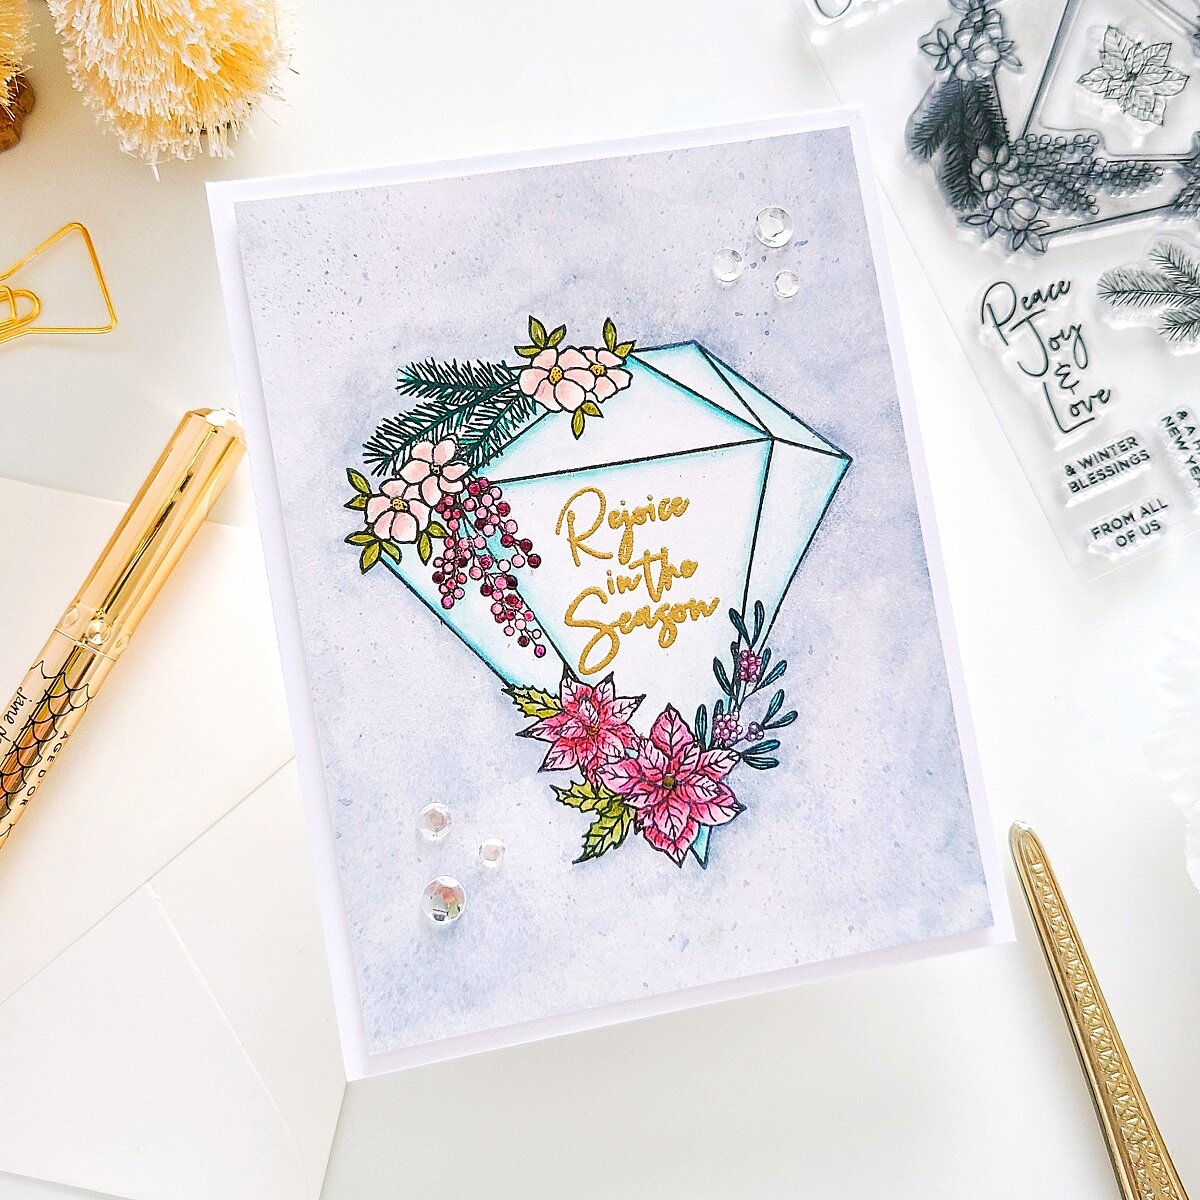
To begin with, I’ve started by making a one layer card so therefore, I’ve gone ahead to line up the gem stamp image from Clear Stamp of the Month Club over a Strathmore Watercolor Paper. Thus, after I’ve them both line up, I’ve gone ahead to stamp the image over the card panel using Detail Black Ink and my MISTI Stamping Tool for a better precision. So, after I’ve had finished stamping the image, I’ve gone ahead to temporarily tape down the card panel over my Make Art Mini Stay-Tion All-in-One Magnetic Surface. Once, I’ve had finished that step, I’ve gone ahead to do a quick water-coloring over the stamp image using a mix of soft hues which I’ve had previously mixed on my mixing palette.

Moving on, after I’ve had finished water-coloring the Christmas gem and the card panel background I’ve gone ahead to set it aside to let the painted image air dry. Therefore, after I’ve made sure that it was completely dry, I’ve gone ahead to trim the edges off from the card panel and then, I’ve gone ahead to mount the card panel with craft foam tape to add a bit of dimension over an A2 top folding white card base.
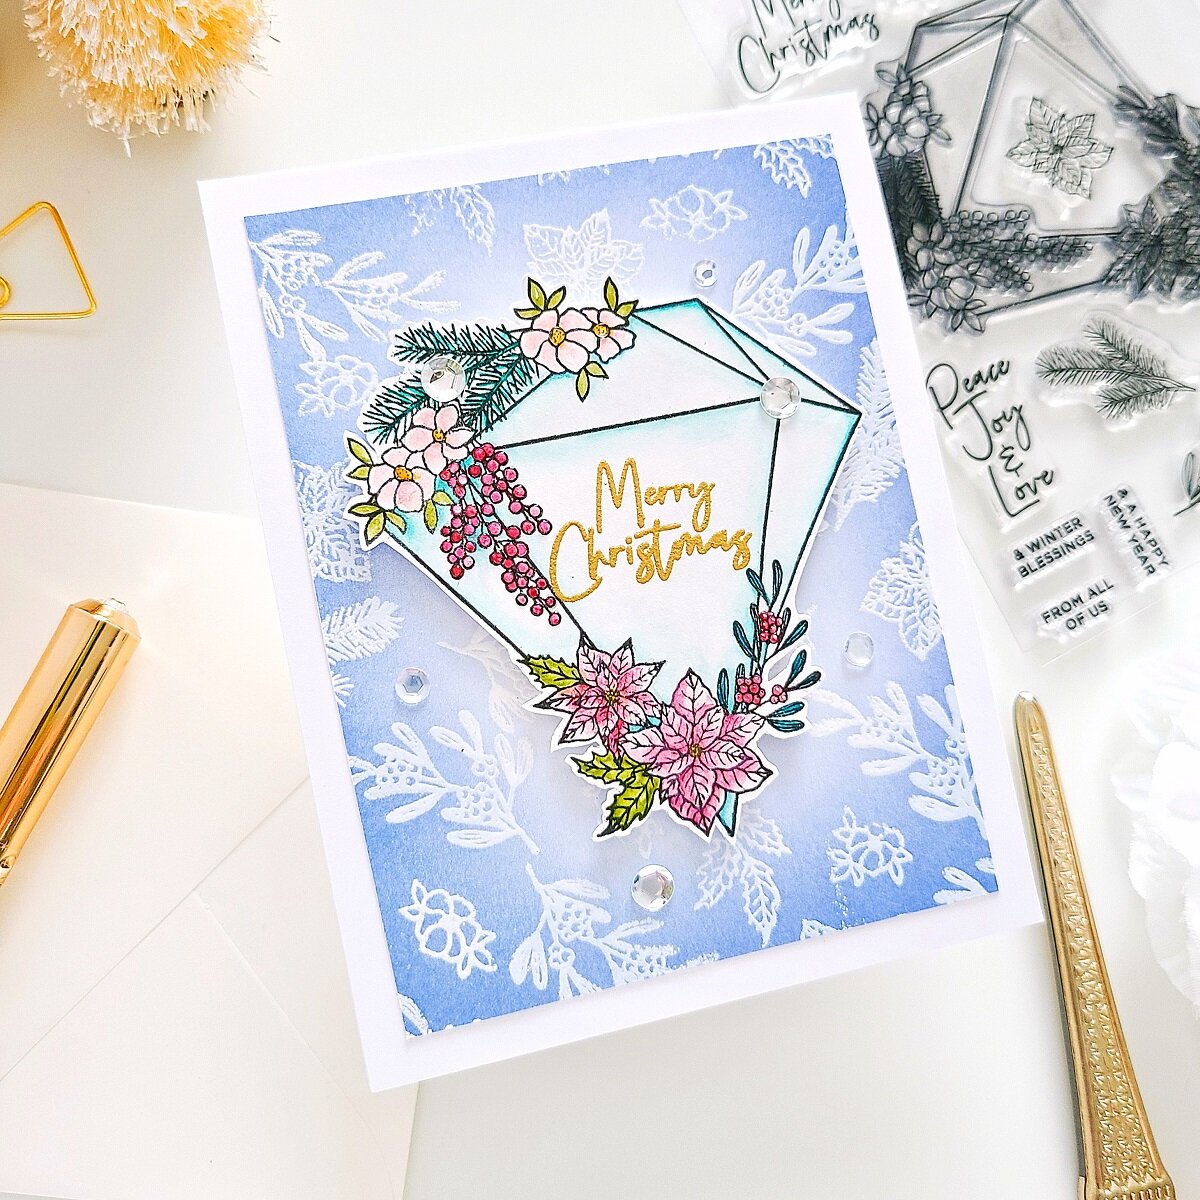
This set also includes small stamp images so, for the second example I’ve gone ahead to use them to create the heat embossed background panel for the card. With that said, I’ve gone ahead to place each small stamp image over small acrylic blocks and then, I’ve gone ahead to prep one Strathmore Smooth Bristol card panel using Embossing Tool Powder.

Therefore, after I’ve had finished prepping the card panel, I’ve gone ahead to stamp each image around the perimeter of it using WOW! Embossing Pad. Once, I’ve had finished the stamping, I’ve gone ahead to sprinkle WOW! Opaque Bright White over each stamped image and to finish it off, I’ve gone ahead to heat set the embossing powder using my WOW! Heat Embossing Gun Tool.

Thus, after I’ve had finished the heat embossing, I’ve decided to add a pop of color so therefore, I’ve gone ahead to softly ink up the heat embossed card panel using a blending brush and Faded Jeans distress oxide ink. Thus, after I’ve had finished ink blending the card panel, I’ve gone ahead to trim the edges off from the card panel and same as I did for the first example, I’ve gone ahead to mount the card panel with craft foam tape to an A2 top folding white card base. I could have stopped right here and just pop a sentiment to make a very simple card however, I’ve decided to take a step further by stamping and fussy cutting with a small scissors a second Christmas Gem which I’ve had previously water-colored in a similar way as I did in the previous example. So, after I’ve finished fussy cutting the gem, I’ve gone ahead to mount it to the card (as shown in the image above)

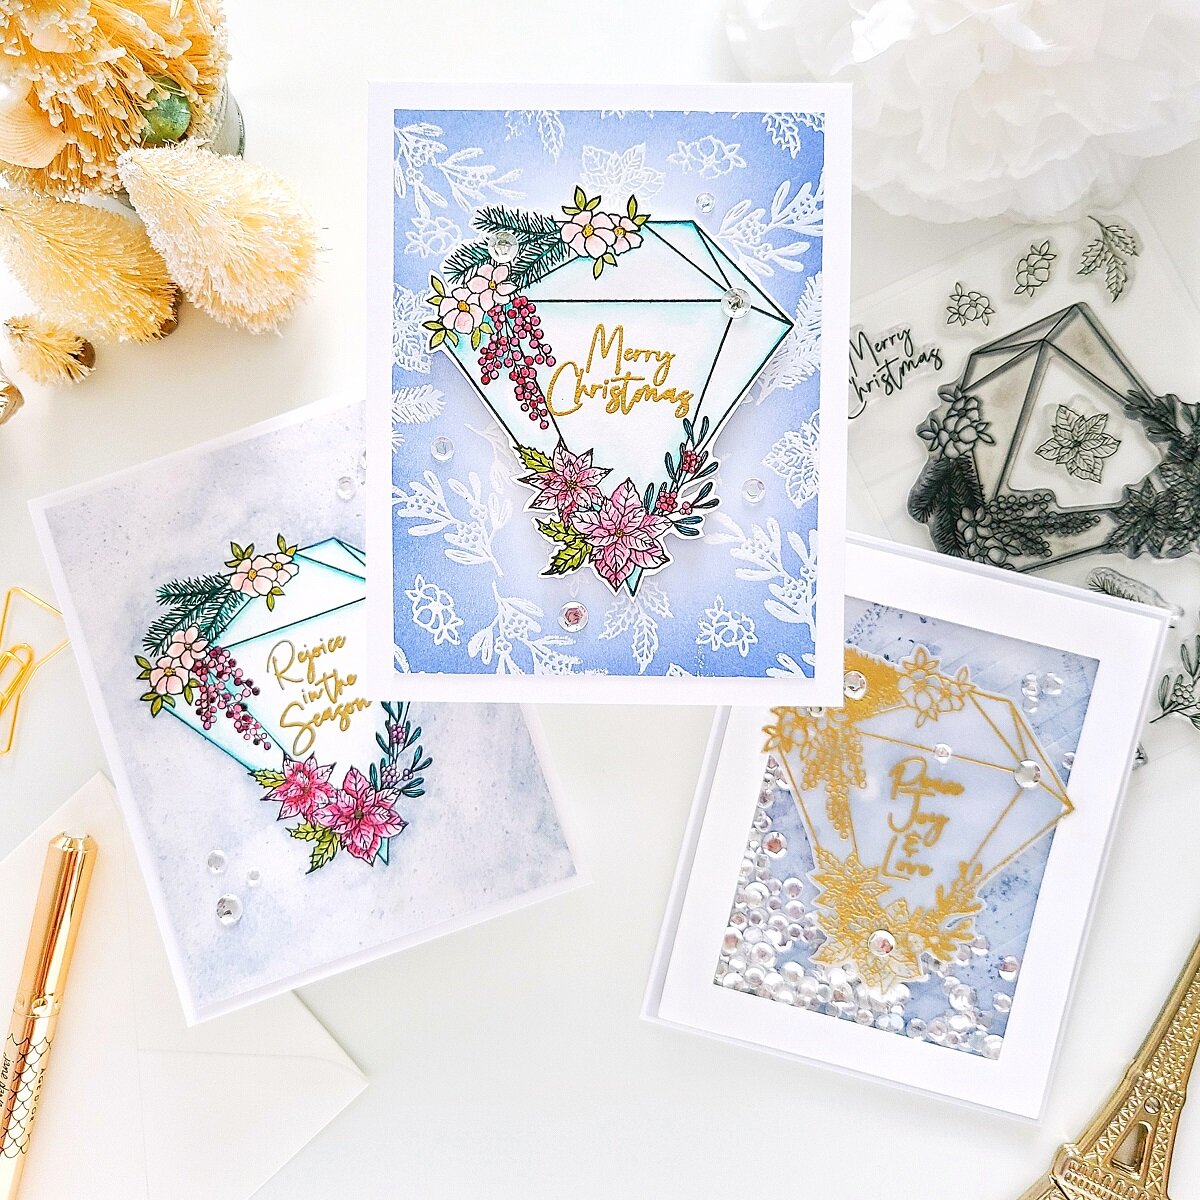
For the third and last example, I’ve made a shaker card so therefore, I’ve gone ahead to get a card panel watercolor. Next, after I’ve finished water-coloring the card panel and this was completely dry, I’ve gone ahead to add texture by dry embossing it. For the dry embossing, I’ve used Love Stripes Embossing Folder along with the 2 larger dies from Nestabilities Essential Rectangles Etched Dies to create the frame for the shaker window.

Thus, after I’ve finished die-cutting the frame and adding texture to the water-colored card panel, I’ve gone ahead to start the assembling for the card. Therefore, I’ve gone ahead to adhere with double-sided tape the water-colored card panel to an A2 top folding white card base. Next, I’ve gone ahead to add Crystal Confetti over it and then, I’ve gone ahead to adhere a piece of acetate to the backing of the die-cutting frame. Lastly, I’ve gone ahead to mount the frame over the card panel and to finish the card off, I’ve gone ahead to stamp and gold heat emboss once again the Christmas Gem over a large piece of vellum. So, to keep it simple I’ve gone ahead to fussy cut the gem out of the vellum and then I’ve gone ahead to glue it down over the shaker window (as shown in the image above) By the way, the sentiments on each card are also included in the stamp set.
Finally, to finish the cards off, I’ve gone ahead to glue down here and there with liquid glue some Crystals, I’ve also added Glossy Accent to the tiny berries to add an extra touch of dimensional shine. With that being said friends, I hope you’ve enjoyed reading the step-by-step on how I’ve created this set of “Christmas” cards inspiration using the newest Clear Stamp of the Month Club by Spellbinders. As always, I appreciate the time that takes you to read my blog posts. Below, you’ll find the supply list for the products used on today’s blog post. If you get inspired by today’s projects, be sure to tag me on Instagram ➝@cardsandcraftsbyyaz I’d love to see what you’re creating.
Thank you and happy crafting.
Stay Awesome & Beautiful
— Today & Always —
Love,
Yasmin
Supply List
Clear Stamp of the Month Club
Tool ‘n One
Love Stripes Embossing Folder
Nestabilities Essential Rectangles Etched Dies
Platinum 6 Die Cutting and Embossing Machine
Detail Black Ink
WOW! Opaque Bright White
WOW! Metallic Gold Rich
WOW! Embossing Pad
WOW! Heat Embossing Gun Tool
Embossing Tool Powder
Crystal Confetti
White Nights Watercolor Palette
MISTI Stamping Tool
Strathmore Watercolor Paper
Strathmore Smooth Bristol Paper
Cougar 110# Heavy Weight Card Stock
Make Art Mini Stay-Tion All-in-One Magnetic Surface


More INFORMATION
FAQ About Spellbinders Kits
Your imagination is Your limit.
All photography provided by Yasmin Diaz


Creativity is contagious, pass it on.
–Albert Einstein
Disclosure
I am creating this blog post with the purpose of sharing the way that I design my cards, the information provided here is based in my own opinion and creativity. I am not an expert by any means and I only share the way that I design my cards. Most of the products use on my blog posts are personally purchased by me. However, the products used on today’s blog post by Spellbinders and WOW! Embossing Powder were sent to me. Please, keep in mind, all referral links were added for you to know from where I purchased or received the items from, as all of products shared and mentioned in each of my blog posts are simply because I use, and truly love them.