
Happy Release Day Crafters! Today, Pinkfresh Studio is celebrating their JUNE-2022 Stamp, Die, Stencil & Hot Foil Release with a fabulous blog hop. So therefore, if you’re hopping along with us, welcome as you should have arrived here from Wanda’s Blog but, if this is your starting point, I’d like to invite you to start from → Pinkfresh ‘Blog or by clicking the direct link provided below which will take you directly to the full list for this wonderful blog hop.
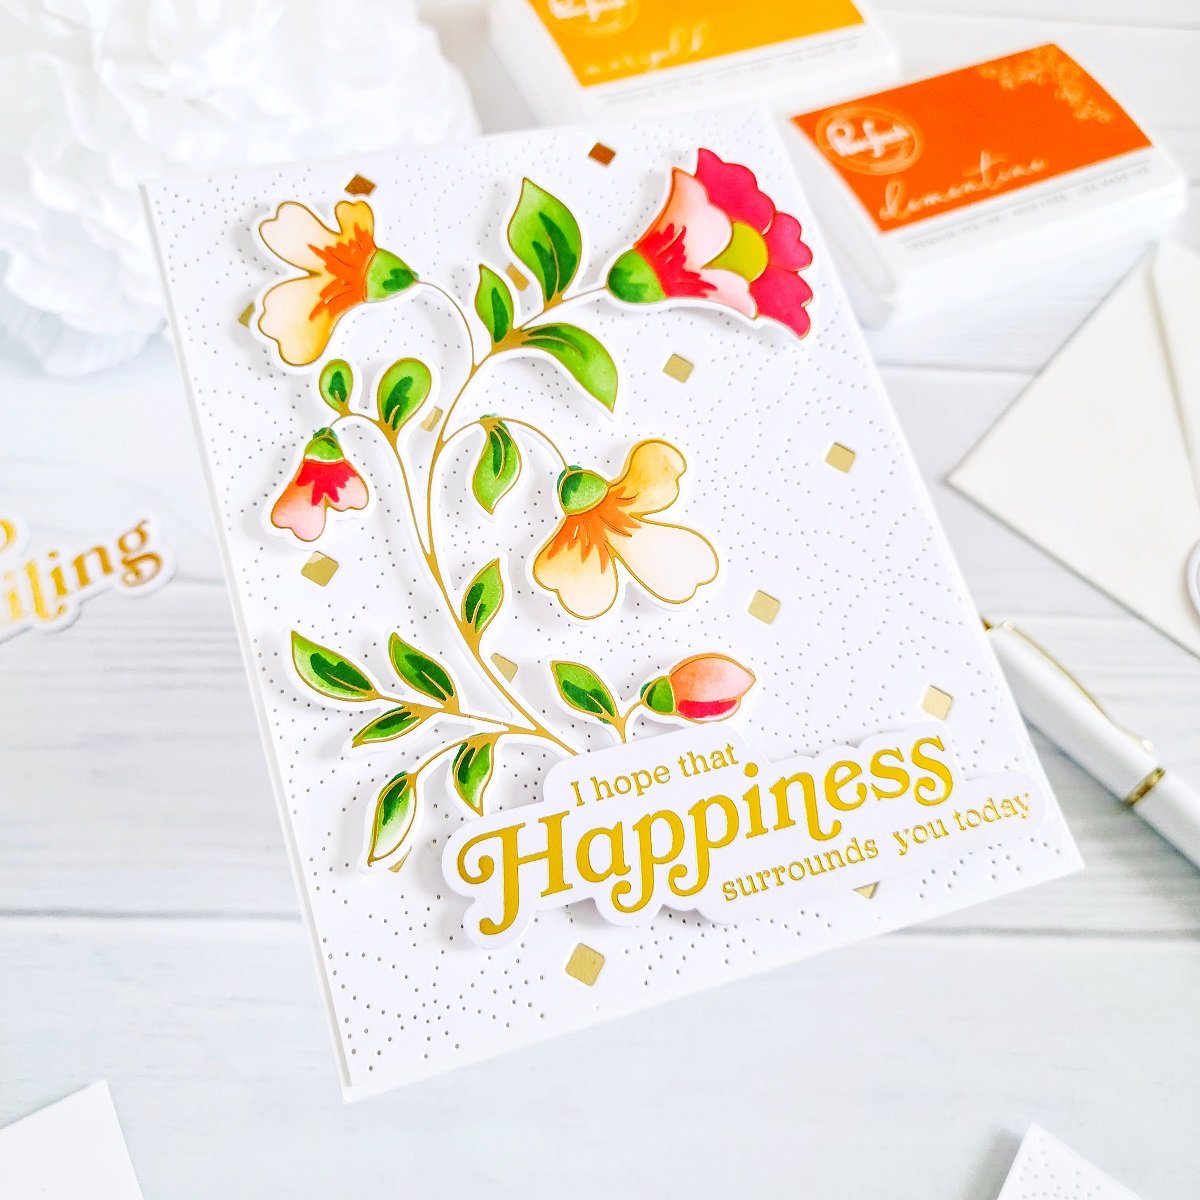
With that being said, today I’d like to share with you a clean and simple yet extra detailed and glimmering inspiration card with a “Floral” look made using the just released: Ornate Medallion Cover Plate to add the detailed background front card panel. Also, Folk Floral Stem Hot Foil to add the floral and hot foil stamping touch + Folk Floral Stem Layering Stencil and PFS- Inks for the pop of color process along with Folk Floral Stem Die to cut out the floral stem. Lastly, Foiled Sentiments 3 for the card sentiment. So, without further ado let me share how I made it ↓
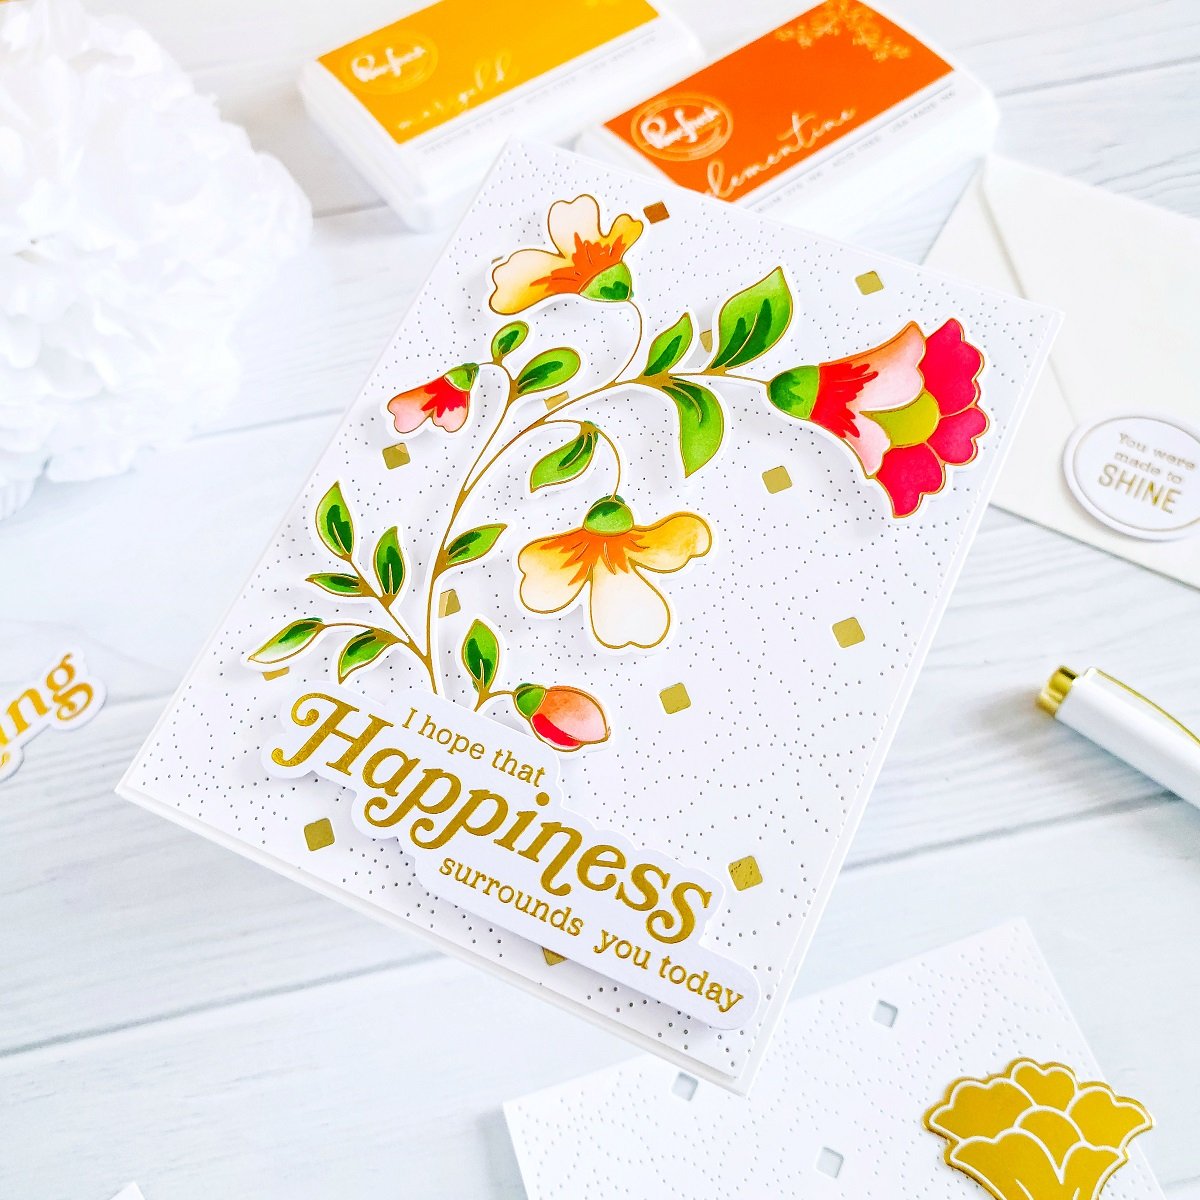
Therefore, I started off by getting the hot foil stamping process done so, to do that, I went ahead to line up the Folk Floral Stem Hot Foil plate over my Glimmer Hot Foil System Platform and then, I continued to get the hot foil stamping done over a white card panel using a piece of Glimmer Hot Foil Roll - Polished Brass and Platinum 6 Die Cutting and Embossing Machine to complete the process.
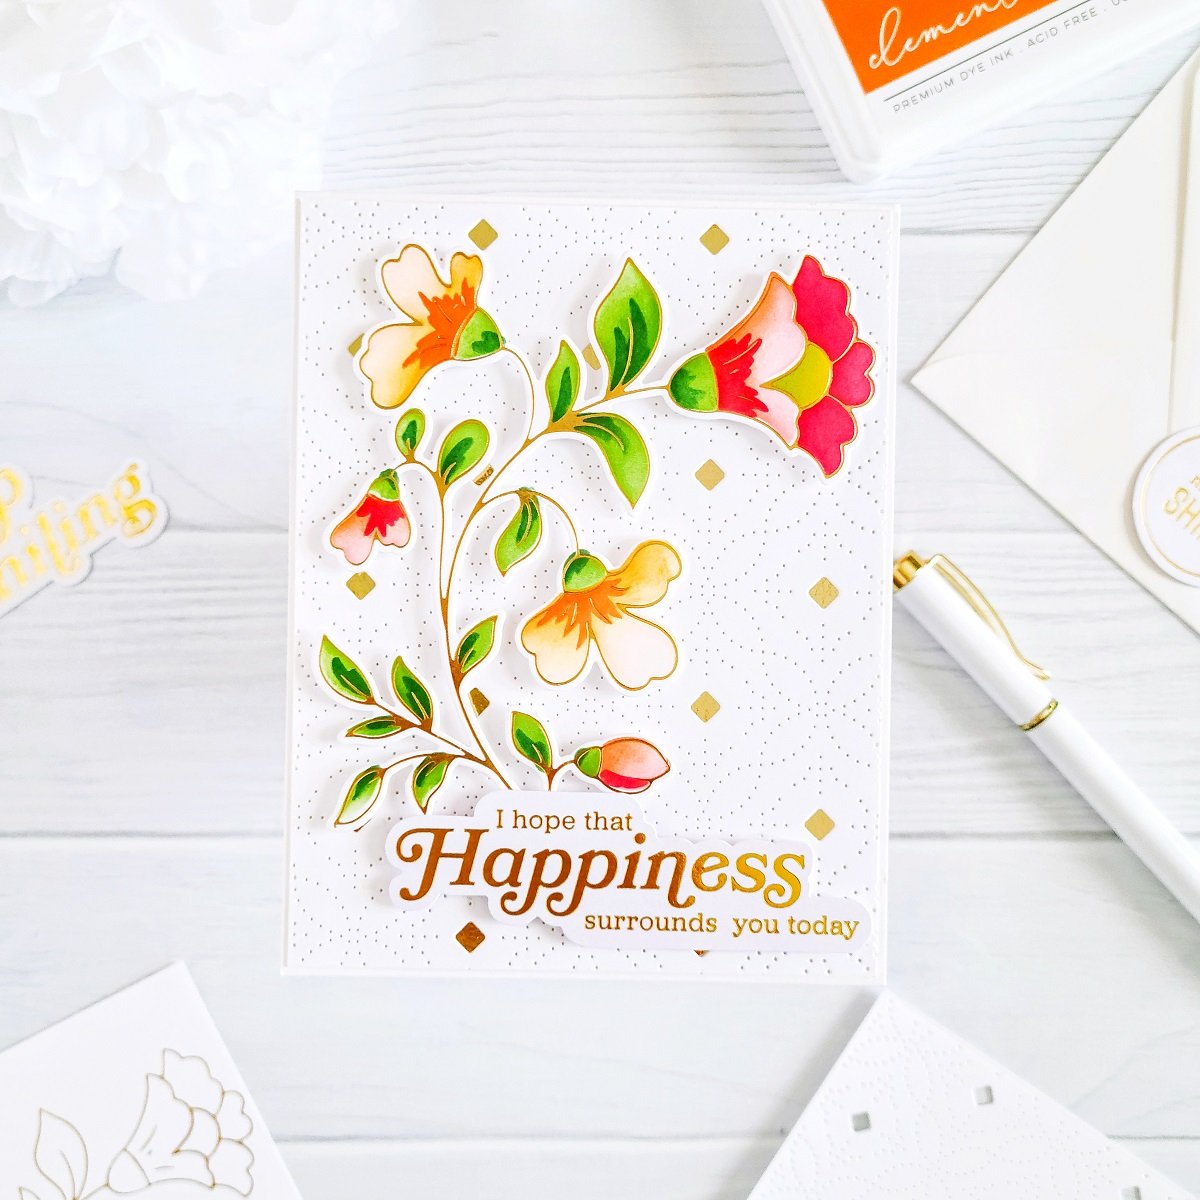
Next, I I used each stencil included in Folk Floral Stem Layering Stencil along with some ink blending brushes and the following color inks: Coral Reef Ink, Candy Apple Ink, Peach Fuzz Ink, Clementine Ink, Persimmon Ink for the flowers and Grassy Knoll Ink, Olive Ink and Evergreen Ink for the leaves. Once, I had gotten the layered stenciling process done, I used the coordinating Folk Floral Stem Die to cut out the stem from the cardstock piece and then, to continuing with the die-cutting process, I used the Ornate Medallion Cover Plate along with a white card panel and the die cut machine to add the cutting stitching details to create the detailed white front card background.

Moving on, as soon as, I had finished adding the stitching details to the card panel, I went ahead to trim off 1/8 of an inch from each side of it using my Paper Trimmer and then, I got the backing of it adhered with Permanent Tape Runner to a gold mirrored panel to make the gold pop through the die-cutting parts. Next, I got the floral stem mounted with small pieces of Double Sided Adhesive Foam to add dimension and last but certainly not least, I proceeded to finish the card off by getting the backing of the layered front card panel adhered to an A2 size top folding white card base and by getting one of the pre-made hot foiled sentiment mounted to the lower right side of the card. By the way, the sentiment is part from the latest Foiled Sentiments 3 pack.

And, with that being said friends, I hope this clean and simple yet extra detailed and glimmering inspiration card with a “Floral” look inspires you to give these sets a try! Don’t forget to leave a comment in the COMMENT SECTION below for a chance to win 1 out (10) $25.00 gift cards. Also, make sure to follow the Link Party and to check out all details below for the fabulous GIVEAWAY. Good luck and have fun hopping along with us for more inspiration projects as well as more chances to win. Next Stop → Anett’s Blog.
You are invited to the Inlinkz link party!
→ Click here to enter
Supply List
Ornate Medallion Cover Plate
Folk Floral Stem Stamp
Folk Floral Stem Die
Folk Floral Stem Hot Foil
Folk Floral Stem Layering Stencil
Foiled Sentiments 3
Solid Hot Foil Plate
PFS- Inks
Coral Reef Ink
Candy Apple Ink
Peach Fuzz Ink
Clementine Ink
Persimmon Ink
Grassy Knoll Ink
Olive Ink
Evergreen Ink
Tool ‘n One
Bearly Art Precision Craft Glue
Tool and Accessories Main Attraction
Glimmer Hot Foil Roll - Polished Brass
Glimmer Hot Foil System Platform
Platinum 6 Die Cutting and Embossing Machine
Memory MISTI
MISTI Stamp Tool
MISTI Mini Stamp Tool
Permanent Tape Runner
Double Sided Adhesive Foam Strips
Double Sided Adhesive Foam 1/4 Roll
Double Sided Adhesive Foam Roll 1'‘
Clear Double Sided Adhesive Roll - 1/4 Inch
Precision Tip Scissors
Porcelain Watercolor Paint Palette
Scoring Board
Jewels Picker
Rhinestones Sunlight Gold
Comfort Paper Trimmer
Glossy Accent
Nuvo Aqua Shimmer Pen
Mini Desktop Vacuum Cleaner
Recollections Gold Foil Cardstock
Craft Treat Teflon Bone Folder
Acrylic Heart Brush/Pen Holder
Mini Ink Blending Brushes
Sizzix - Big Shot Switch Plus Machine
VersaMark Ink Pad
Embossing Powder Ultra Fine Alabaster
Metallic Embossing Powder- Gilded
Inkadinkado Embossing Powder Tool
Wow Embossing Powder Dual Speed Heat Tool
Hammermill Cardstock 100lb - 100 Bright 8.5x11 6 Pack
Hammermill Cardstock 80lb -100 Bright 8.5x11 8 Pack
Hammermill Cardstock 100 lb - 100 Bright 17x11
Hammermill Cardstock 80lb - 100 Bright 17x11
Crafter's Essential Cutting and Alignment Mat
Giveaway

Pinkfresh Studio will be giving away the full June 2022 Stamp, Die, Stencil & Hot Foil Release over Pinkfresh Studio’s Blog as well as over their YouTube Channel YAY!!! Plus, you will have a total of 10 chances to win a $25 gift card from each stop along the way. As, per usual with blog hops - the winners will be picked from the comment sections, and the winners will be announced on July 5th, 2022 over their Pinkfresh Studio → GIVEAWAY PAGE. So, you must check their page & claim the prize within 2 weeks.
Thank you and happy crafting.
Stay Awesome & Beautiful
— Today & Always —
Love,
Yasmin
Your imagination is Your limit.
All photography provided by Yasmin Diaz


Be sure to follow me on Instagram for more as I share fun mini tutorial for how I made the cards in my reel section there!
Creativity is contagious, pass it on.
–Albert Einstein
Disclosure
I am creating this blog post with the purpose of sharing how I design my cards, the information provided here is base in my own opinion and creativity. I am not an expert by any means, I only share the way that I design my cards. Most of the products used for my blog posts are personally purchased by me. However, I did receive the products by Pinkfresh Studio.
Please, keep in mind that, all referral links are added for you to know from where either, I purchase or receive the items from as, all products shared and mentioned in each of my blog posts are simply because I use and genuinely love them.
However, I’d like to mention that links from Amazon Associates, Altenew, Pinkfresh, Pigment Craft Co, Scrapbook.com, Spellbinders and Waffle Flower Crafts are affiliated links which means that I get paid a small commission when a purchase is made thru that particular link at no additional cost to you.
Also, I am not paid by any company to promote their products, nor any company sponsors my blog. I pay for my own website, I take my photography, I personally type my blog post, I enter links and even better I make every single card. I try my best working every day a little bit here and a little bit there striving for a professional and friendly use to you. With that said, your support is so much appreciated as if you use those links your help will help me to keep this website running.
Thank you and have a wonderful crafty-shopping!