
SSS Hey Bestie Handmade Wall Decor/Wall Art
Hello Crafters! Are you ready to create an easy Handmade Wall Decor/Wall Art with me? If so, I can ensure that, you’re going to love the 9x12 Bursting Hearts Stencil from the new; Hey Bestie Release by Simon Says Stamp so, without further ado, let’s jump into the blog below ↓

As the new 9x12 Bursting Hearts Stencil it’s a pretty large stencil… the first thing that I did was to, trim a 9x12 white sheet out of a 11x14 Strathmore Bristol Smooth Pad because, I wanted a smooth surface to be able to ink blend the hearts from the stencil. Once, the sheet was trimmed, I lined up the stencil over it and, I temporarily adhered them both to avoid them to shift during the ink blending. Right after that, I selected a combination of Pinks, Peach and Coral hues for the ink blending. As, for the ink blending itself, I started from the bottom with the darkest to the top finishing the ink blending with the lightest color from the selection for a gradient look as shown above.
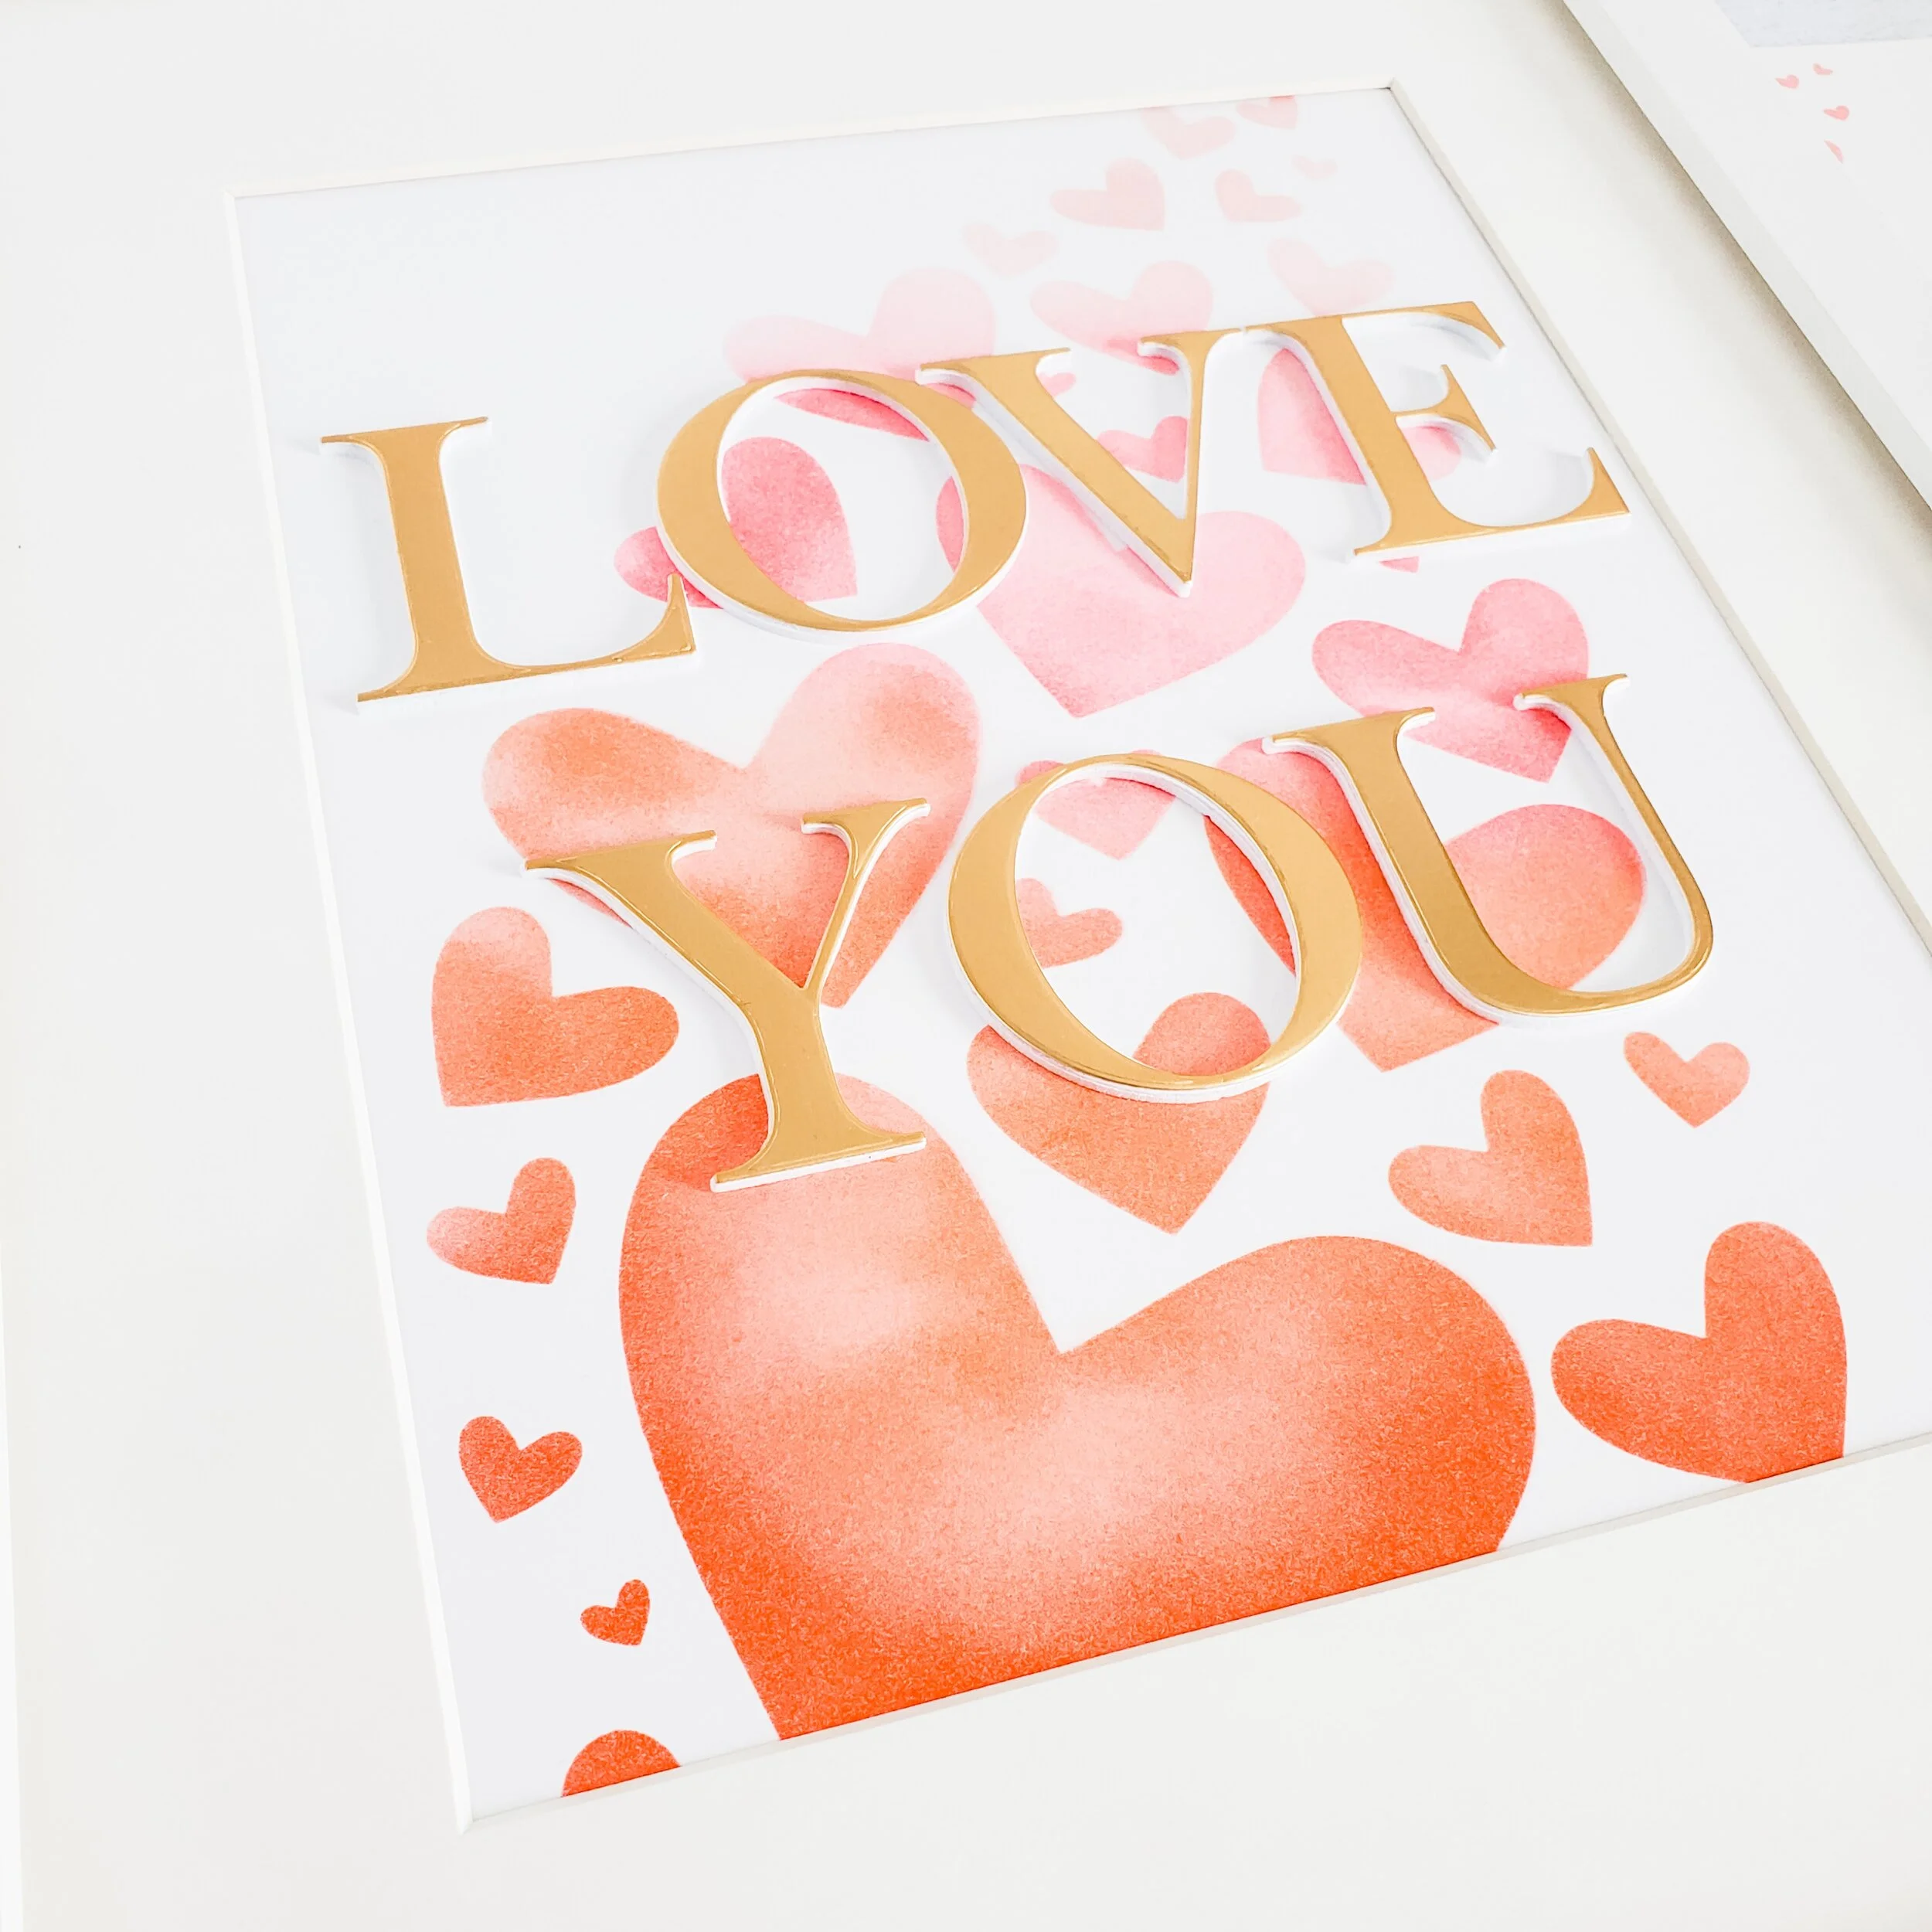
Once the ink blending part was done, I set it aside to dry. In the meantime, I ran through the die-cutting machine the letters I, L, O, V, E, Y and U from the Altenew Classic Alphabet Dies Set to die-cut them 1X out of white heavy weight white cardstock. 1X out of Gold cardstock and 1X out of fun foam. Right after when all die-cuttings were done, I stacked each of the layers from each of the coordinated die-cuttings creating that way dimensional letters.

Before, I adhered the letters to the ink blending, I trimmed off the edges from it at the mark of W 8 1/2’’x H 11’’. Then, I placed the ink blending on my Laser Square Tool for a precise measuring. As, for the measurements, I left 3’’in space from the top and, 3’’in space from the bottom. Then, 3/4’’in space from side to side. That being said, I adhered the backing of the first 4 letters creating that way the LOVE word then, the last 3 letters underneath creating that way the YOU word by the way, I left 1’’in space in between the LOVE and the YOU also, I left 1 1/4’’in space from side to side for the YOU word in case you wonder. I’d like to mention that, with the amount of space, I could have been able to add the I letter too for a full I LOVE YOU sentiment but, I decided to skip and leave it as LOVE YOU because, I wanted the inked hearts to stand out.

Finally, right after when I was done adhering the letters, I started the assembling to complete the frame. As, for the frame itself, I used an 11x14 White Picture Frame which by the way, I removed the glass just for the photography purposes but, I’d like to mention that, even when the letters are dimensional, I didn’t have a problem inserting the design in the frame. So, I hope that this super easy Wall Decor/Art design using the new; 9x12 Bursting Hearts Stencil inspires you to give it a try as its simple and quick. Not only that but, it’s also ideal as, a Valentine’s Handmade Gift! With that being said, I appreciate the time that took you to read this blog post. Below; you’ll find the supply list for the products used on today’s blog bye now…
Thank you and happy crafting, your time is valuable.
Don't forget to keep spreading kindness, Today and Always.
Best,
Yasmin
Your imagination is Your limit.
All photography provided by Yasmin Diaz


Creativity is contagious, pass it on.
–Albert Einstein
Disclosure
I am creating this blog with the purpose of sharing how I design my cards, the information provided here is base in my own opinion and creativity. I am not an expert by any means, and I only share the way that I design my cards. Most of the products used for my blog posts are personally purchased by me. However, I did receive the 9x12 Bursting Hearts Stencil from the new; Hey Bestie Release by Simon Says Stamp for today’s blog post. Please, keep in mind that, all referral links were added for you to know from where I purchased or received the items from as, all of products shared and mentioned in each of my blog posts are simply because I use, and truly love them.