
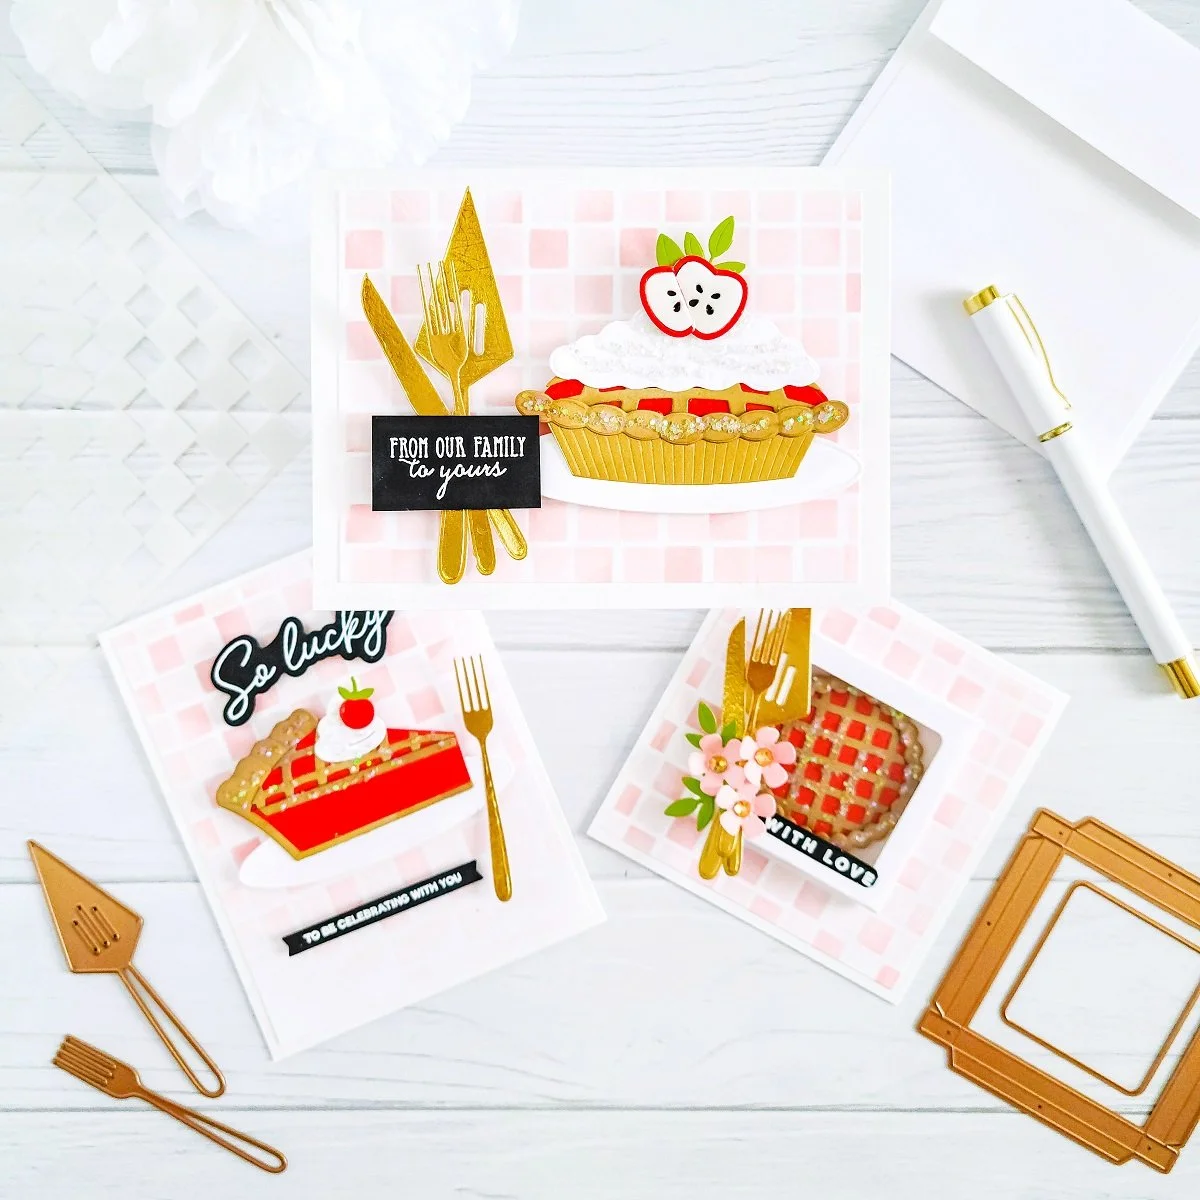
Happy Wednesday, Friends! On today’s blog, I’d like to share with you a very decorative and delicate set of inspiration cards with a “Sweet & Baking” look showcasing the latest Pie Perfection Collection by Spellbinders which includes: Sky View Pies Etched Dies, The Bakers Box Etched Dies, Dish it Up Etched Dies, Serve a Slice Etched Dies, Perfect Pies Etched Dies, Delicious Decorations Etched Dies, and Picnic Checkerboard Stencil. So, without further ado let’s jump right into the step-by-step on how I made them ↓
To begin with, I started off by creating the checkerboard patterns over three white card panel so, to do that, I went ahead to use Picnic Checkerboard Stencil from this collection along with an ink blending brush and Saltwater Taffy Distress Oxide ink. As for the inking process, I went ahead to line up the stencil over the card panel and then, I added ink throughout the stencil with a slightly heavy hand first. Next, I went ahead to slightly move the stencil to the right to complete the rest of checkerboard pattern by inking it up with whatever ink was left on the ink blending brush to achieve a subtle look over it.
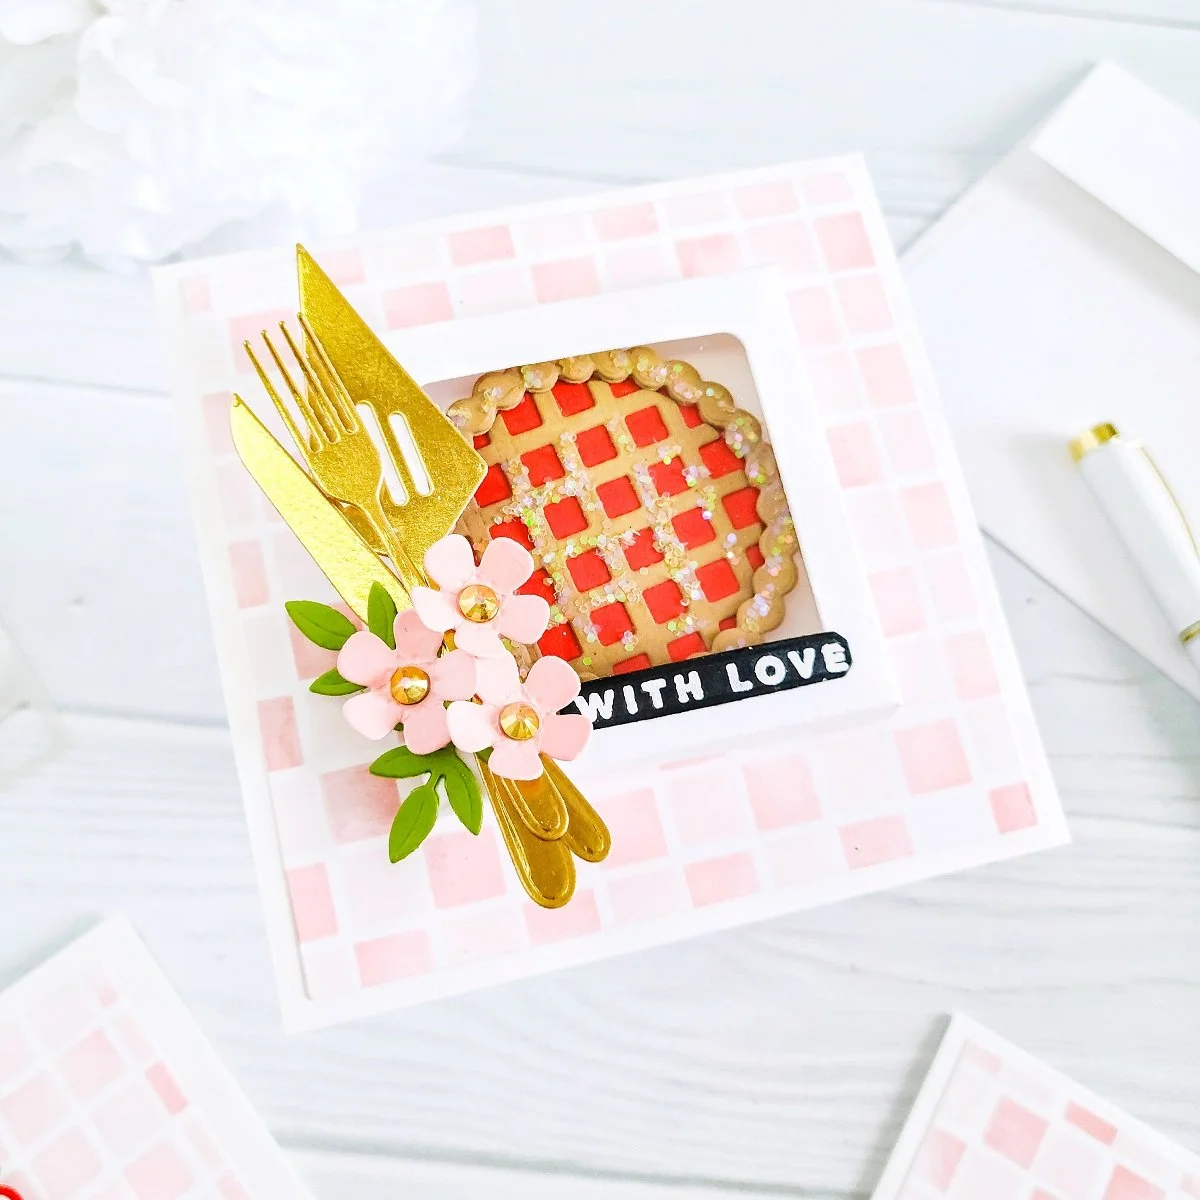
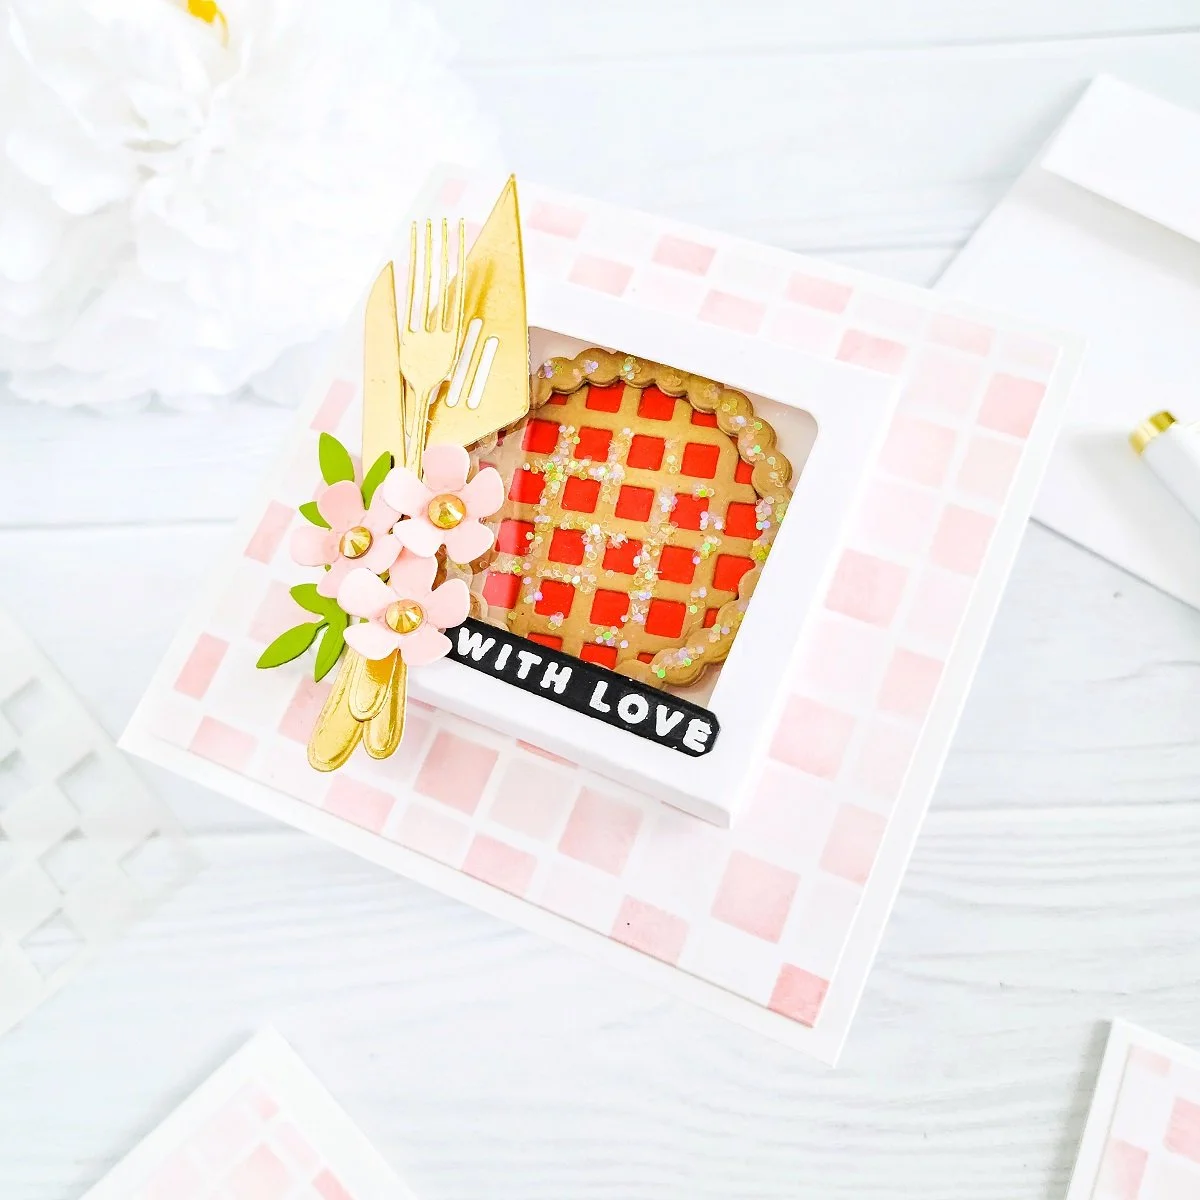
Thus, as soon as, I’ve had finished creating each checkerboard background pattern over the card panels, I went ahead to put two off to the side and then, I proceeded to get one of them trim down to 4 x 4 inches using my Paper Trimmer. Having that said, after got it trimmed down, I’ve gone ahead to get the backing of it adhered to a 4-1/4 x 4-1/4 inches top folding white card base. So, as soon as, I had finished adhering the card panel to the card base, I went ahead to get the die-cutting process done for the packaged pie and its serving utensils.
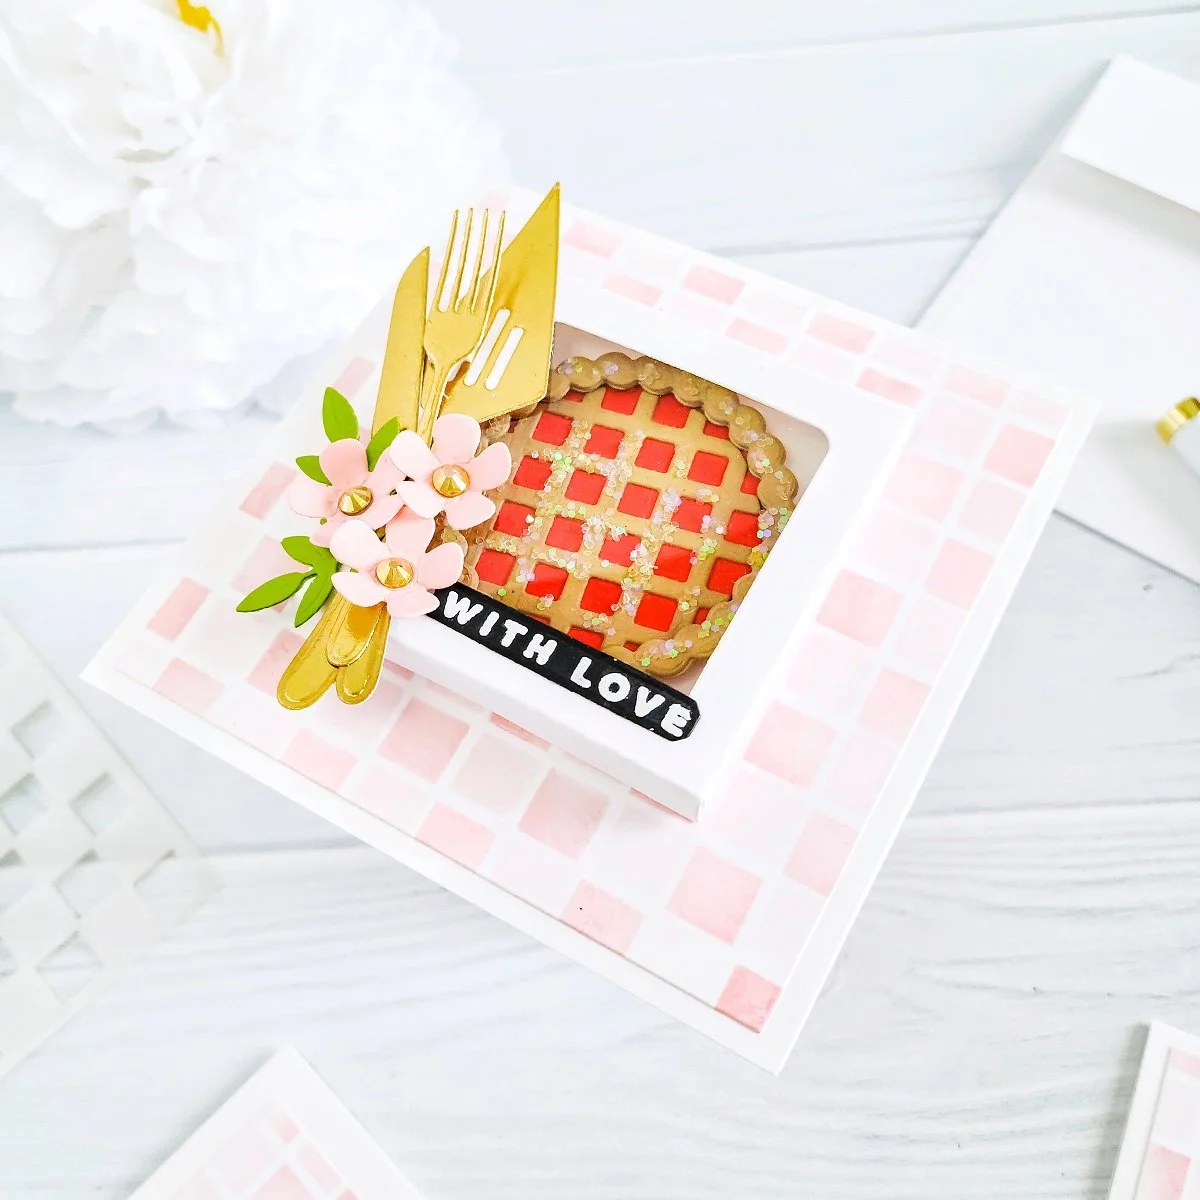
So, to create the 3D packaging box for the pie, I went ahead to line up over a piece of white cardstock the die and its insert die included in The Bakers Box Etched Dies and then, I proceeded to run them through my Platinum 6 Die Cutting and Embossing Machine to cut the box from it. Next, I used the dies included in Sky View Pies Etched Dies to cut out the pie crust from Kraft cardstock and the filling from Red cardstock. Once, I had finished die-cutting out the pie pieces, I went ahead to use the dies included in Dish it Up Etched Dies to cut out the serving utensils from Gold cardstock. Lastly, to finish the die-cutting process, I went ahead to use the dies included in Delicious Decorations Etched Dies to cut out the small flowers from light Pink cardstock and the greenery from light Green cardstock.
Moving on, as soon as, I had finished die-cutting all pieces, I went ahead to add a little toasty look to the pie crust using a combination of Brushed Corduroy Distress Oxide and Gathered Twigs Distress Oxide inks. Next, I got the pie crust gluing down over its filling and then, I added a sprinkling sugar look to it using glitter. Then, I went ahead to get the assembling done for the packaging pie box and then, I added the pie inside of it; by the way, I used a piece of acetate to add the shiny plastic-ly look to it as well. Lastly, I went ahead to glue down the packaged pie over the front card panel and then, I proceeded to get the embellished down over the box using the rest of the die-cutting pieces.

Therefore, I went ahead to glue down the die-cutting serving utensils over the left side of the card and then, I finished it of the embellishing for the card by creating a small floral cluster over them using, the small die-cutting flowers and greenery. Last but certainly not least, I went ahead to add a sweet sentiment as well. A sentiment which, I had have previously stamped and white heat emboss it on a piece of black cardstock using one of the sentiments from one of the clear stamp from my stash along with VersaMark Ink Pad, Embossing Powder Ultra Fine Alabaster and Wow Embossing Powder Dual Speed Heat Tool for the stamping and heat embossing process.
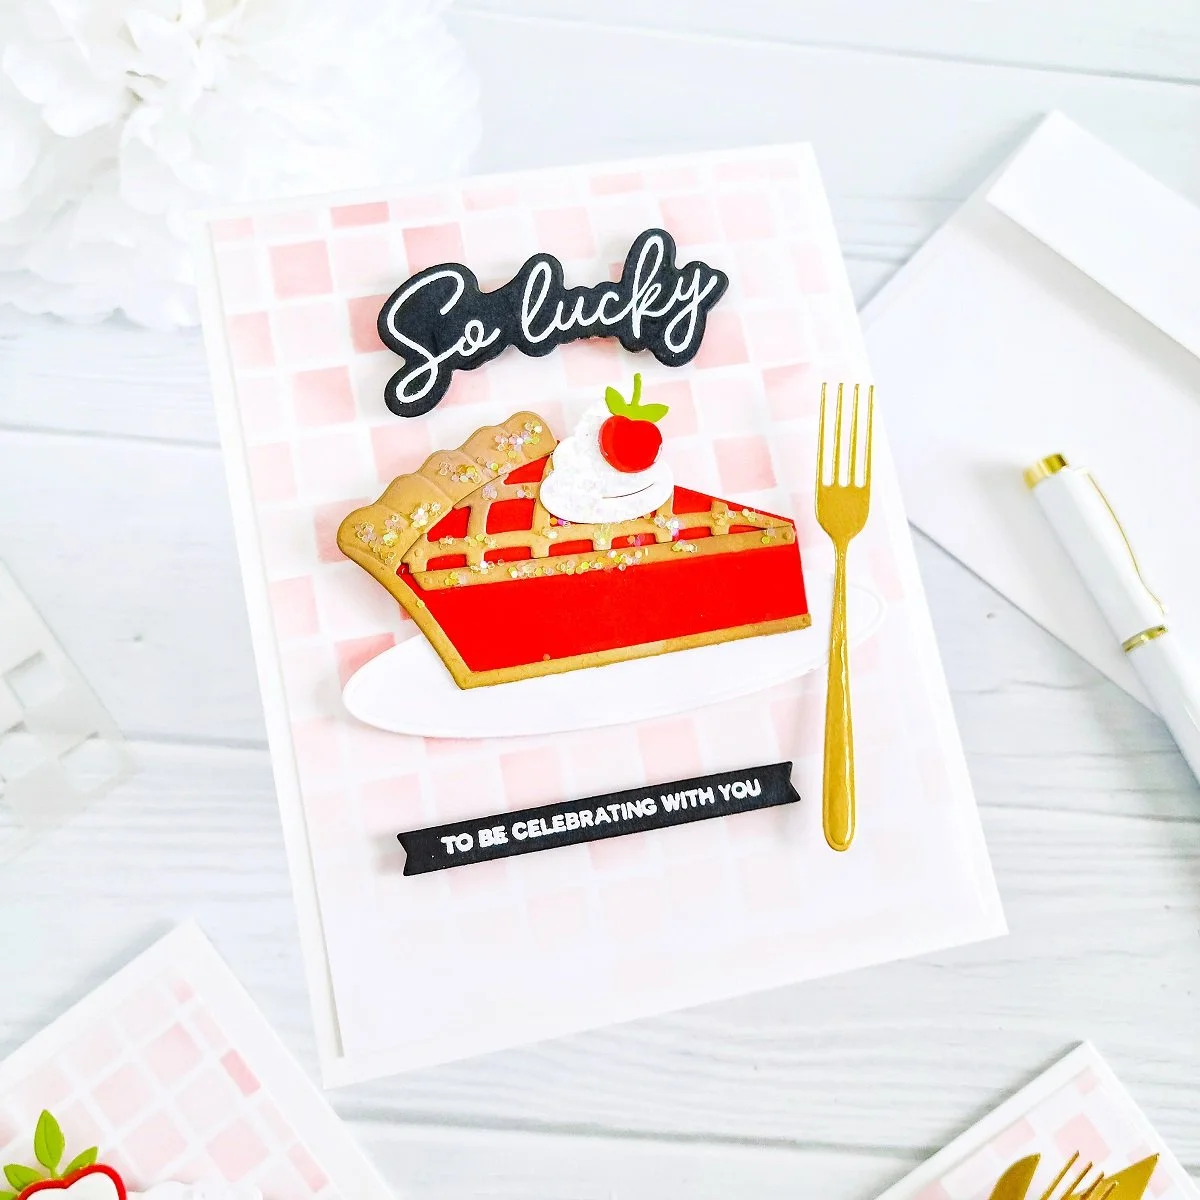
For the next example, I created a standard A2 size card so, to do that, I went ahead to trim off 1/4 of an inch from each side of the second front card panel with the checkerboard pattern that I created earlier and then, I got the backing of adhered with double-sided adhesive to an A2 size top folding white card base.
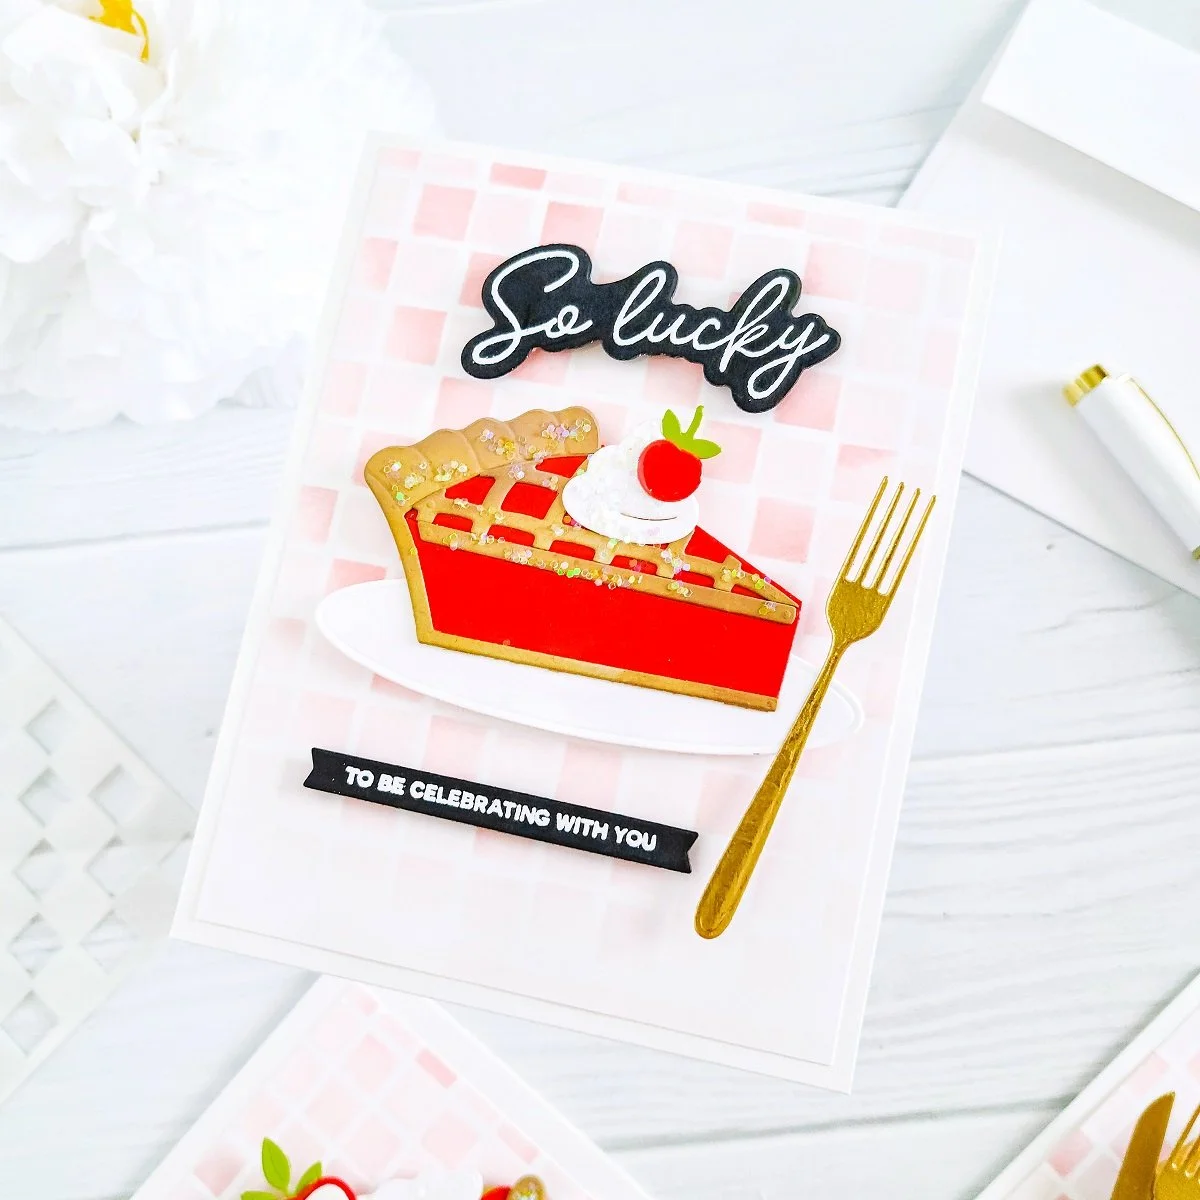
Once, I had that step done, I went ahead to use the dies included in Serve a Slice Etched Dies along with the same-colored cardstocks that I used in the previous example to create the serving pie with the profile side look. Having that said, I went ahead to glue down the pie slice over the die-cutting dish and then, I got the card embellished with it along with its fork, whipped cream and a glossy cherry plus, two card sentiments. Two card sentiments which, I had created with the same look as the previous example using, some card sentiments from stamp sets from my stash.
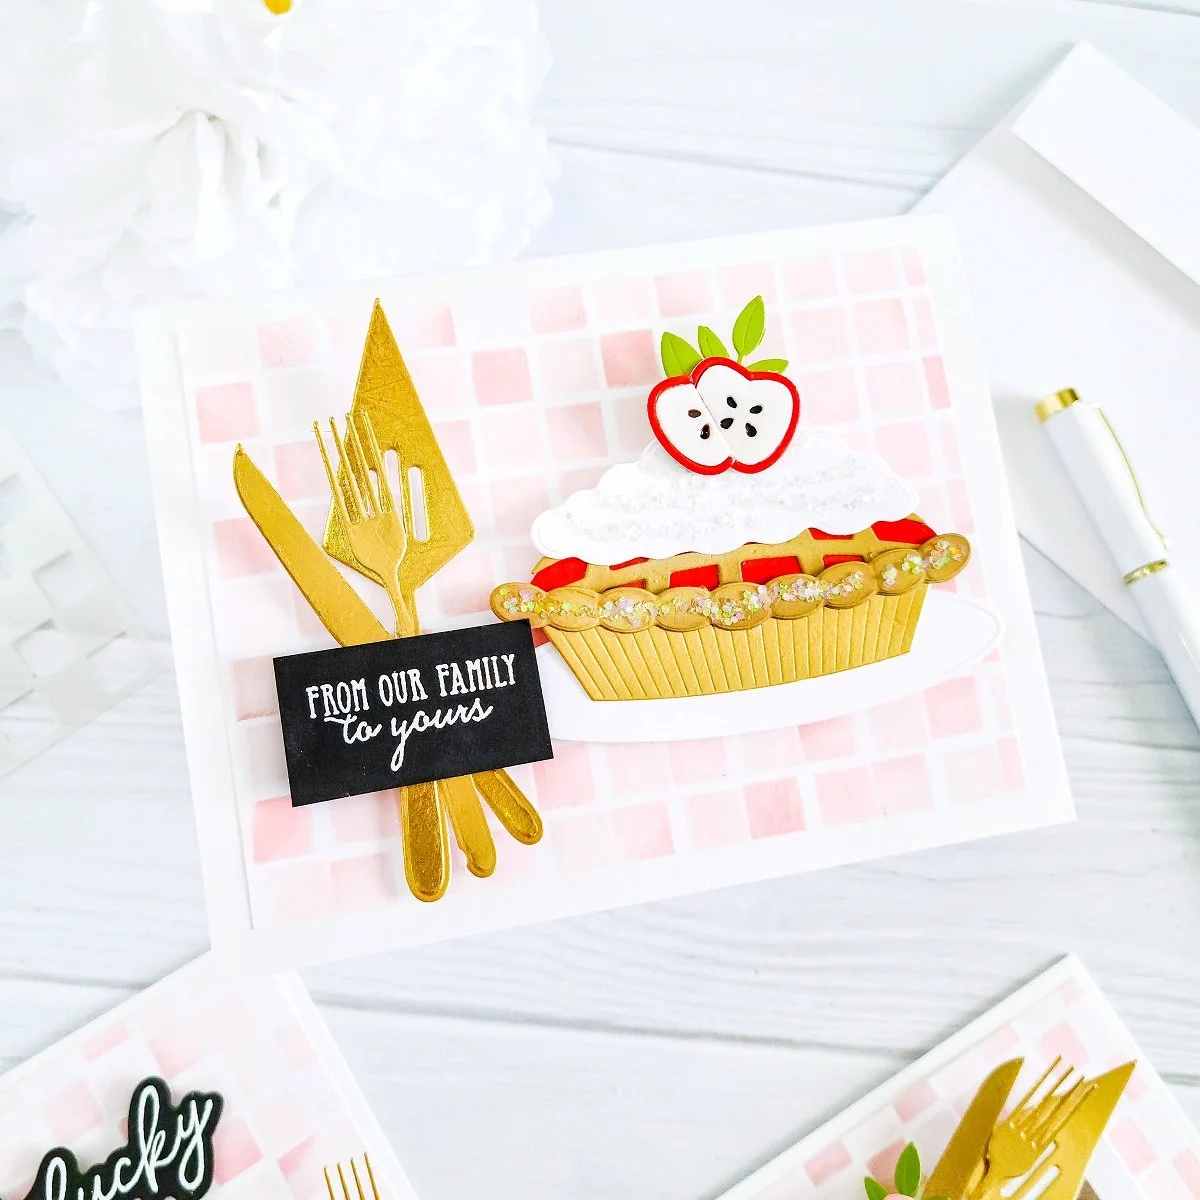
Lastly, for the last example, I created a landscaping form card so, to do that, I went ahead to trim off 1/2 of an inch from each side of the last inked checkerboard panel and then, I proceeded to get the backing of adhered with double-sided adhesive on a landscaping form as I previously mentioned to an A2 size side folding white card base. Next, I used the same dies as preview to cut out the serving utensils from gold cardstock and then, I used the dies included in Perfect Pies Etched Dies to create the pie and its decoration.
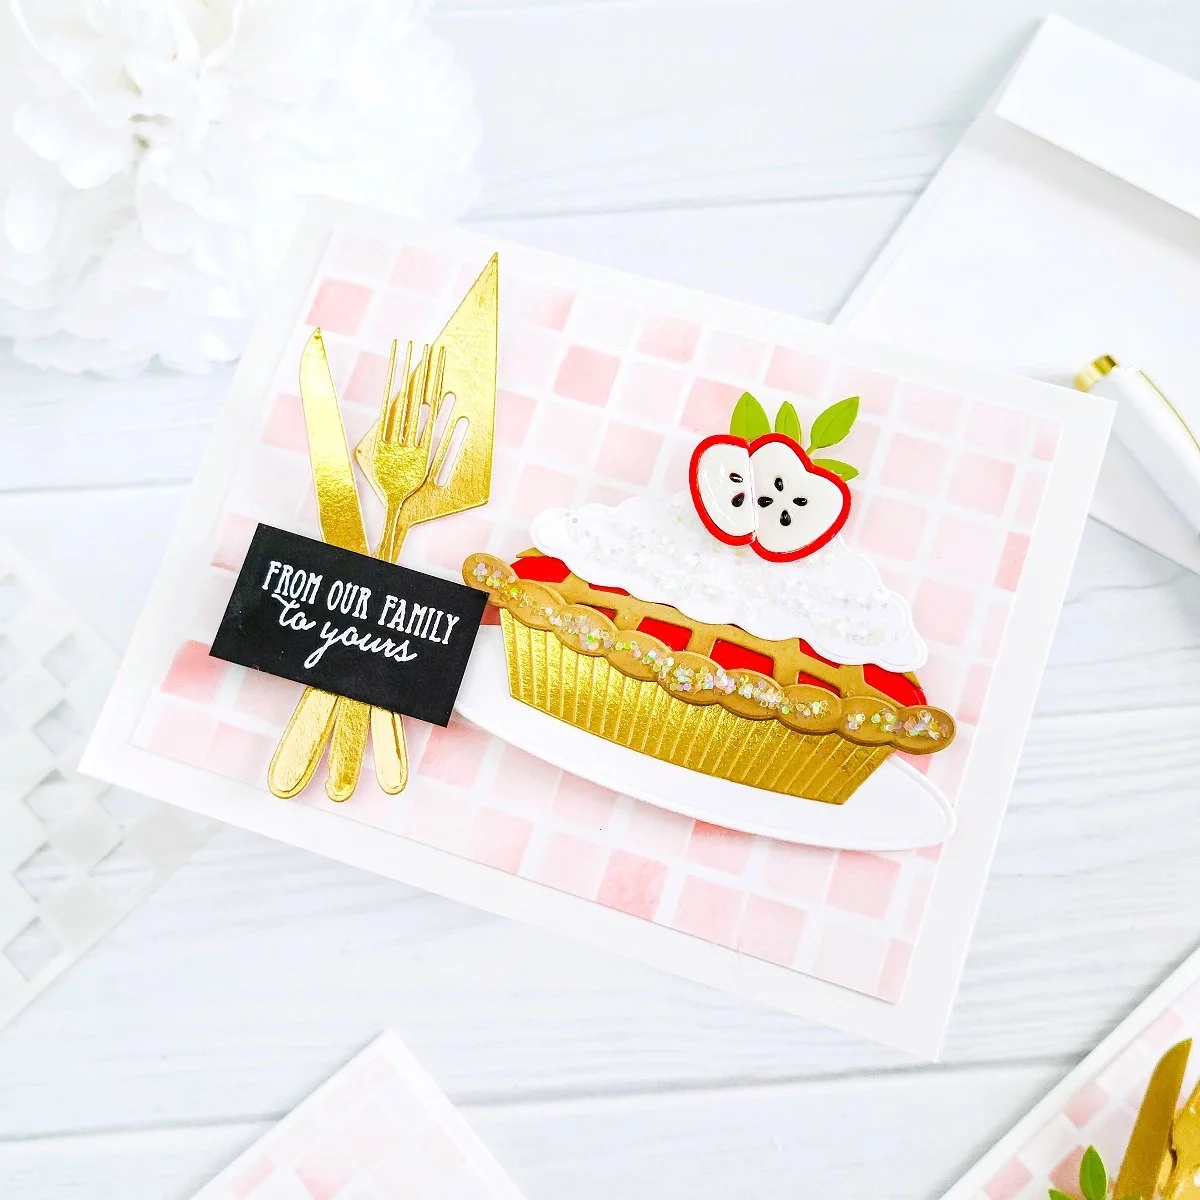
Having that said, I went ahead to get the card embellished with the serving utensils along with the pie and then, I got the pie decorated it by adding the whipped cream and some glossy and dimensional apple slices. Apple slices which, I created using some of the dies included in Delicious Decorations Etched Dies. Lastly, to finish the card off, I went ahead to get the card sentiment mounted over the serving utensils and last but not least, I added glitter to the pie for the sprinkling sugar look.
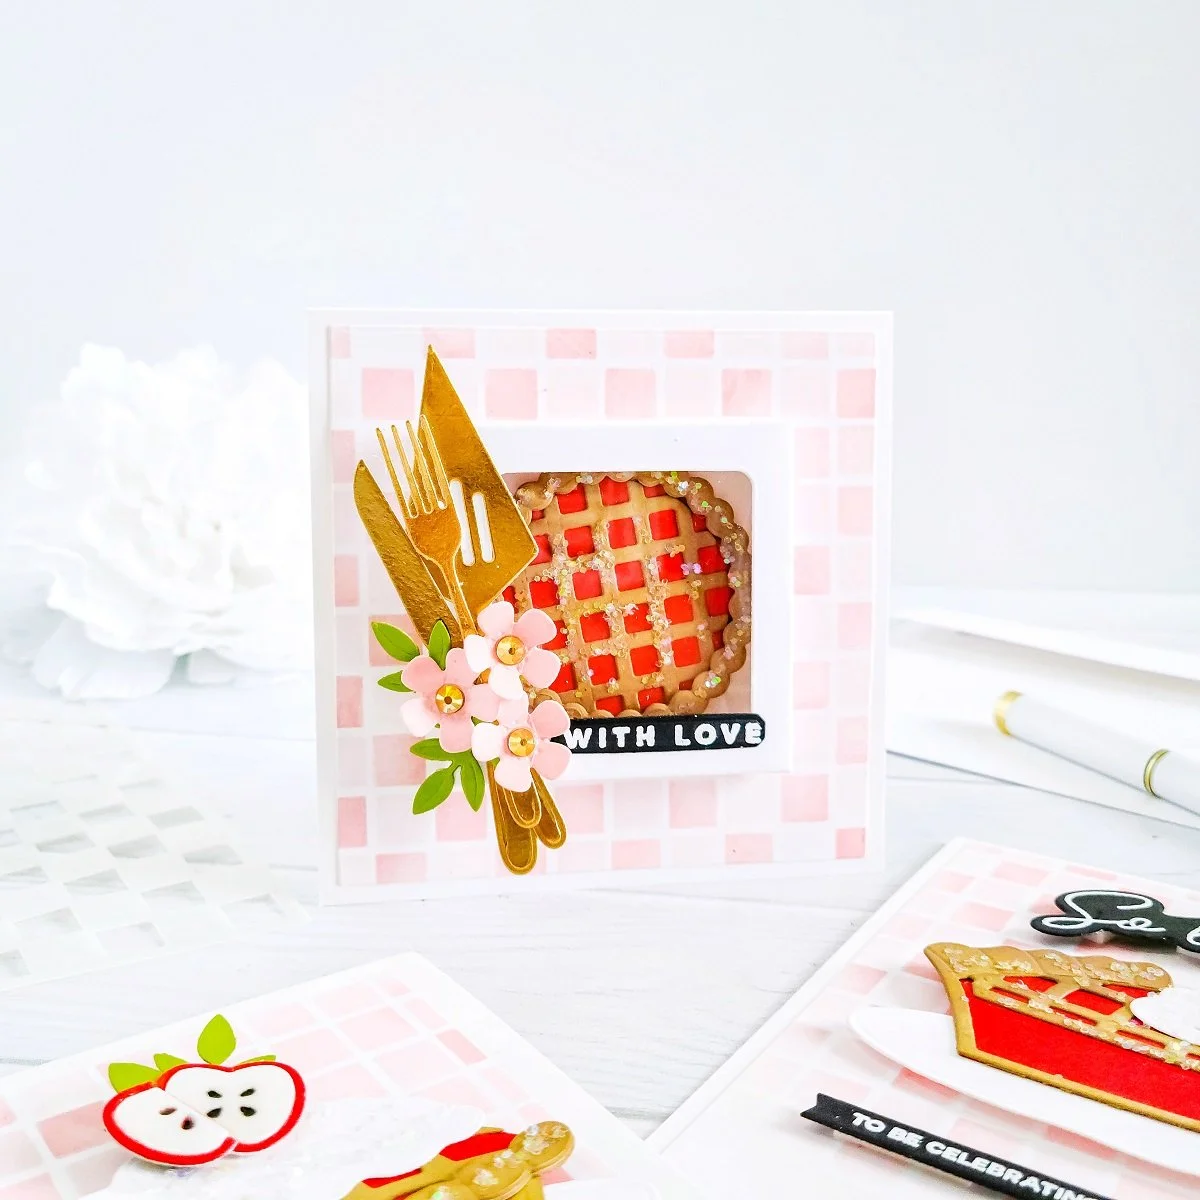
Finally, as finishing touches, I went ahead to use my Jewels Picker along with Bearly Art Precision Craft Glue to glue down some Rhinestones Sunlight Gold to the center of the flowers in the first example. As for the rest, I added Nuvo Aqua Shimmer Pen and Glossy Accent to the apple slices and cherry to add them a very dimensional glossy/shimmering look. And, with that being said friends, I hope you’ve enjoyed reading the step-by-step for how I’ve made this decorative and delicate set of inspiration cards with a “Sweet & Baking” look showcasing the latest Pie Perfection Collection by Spellbinders. As always, I appreciate the time that takes you to read my blog posts. Below, you’ll find the supply list for the products used on today’s blog post. And, if you get inspired by today’s projects, be sure to tag me on Instagram ➝@cardsandcraftsbyyaz I’d love to see what you’re creating.
Thank you and happy crafting.
Stay Awesome & Beautiful
— Today & Always —
Love,
Yasmin
Supply List
Pie Perfection Collection
Sky View Pies Etched Dies
The Bakers Box Etched Dies
Dish it Up Etched Dies
Serve a Slice Etched Dies
Perfect Pies Etched Dies
Delicious Decorations Etched Dies
Picnic Checkerboard Stencil
Bearly Art Precision Craft Glue
Tool and Accessories Main Attraction
Platinum 6 Die Cutting and Embossing Machine
Tool ‘n One
MISTI Stamp Tool
MISTI Mini Stamp Tool
Rotary Cutter
Scoring Board
Jewels Picker
Saltwater Taffy Distress Oxide
Brushed Corduroy Distress Oxide
Gathered Twigs Distress Oxide
Rhinestones Sunlight Gold
Comfort Paper Trimmer
Glossy Accent
Nuvo Aqua Shimmer Pen
Mini Desktop Vacuum Cleaner
Recollections Gold Foil Cardstock
Craft Treat Teflon Bone Folder
Acrylic Heart Brush/Pen Holder
Mini Ink Blending Brushes
Sizzix - Big Shot Switch Plus Machine
VersaMark Ink Pad
Embossing Powder Ultra Fine Alabaster
Metallic Embossing Powder- Gilded
Wow Embossing Powder Dual Speed Heat Tool
Hammermill Cardstock 100lb - 100 Bright 8.5x11 6 Pack
Hammermill Cardstock 80lb -100 Bright 8.5x11 8 Pack
Hammermill Cardstock 100 lb - 100 Bright 17x11
Hammermill Cardstock 80lb - 100 Bright 17x11
Crafter's Essential Cutting and Alignment Mat
More INFORMATION
FAQ About Spellbinders Kits
Spellbinders Club Kit Options
Small Die of the Month Club
Large Die of the Month Club
Card Kit of the Month Club
Glimmer Hot Foil Kit Of The Month Club
Amazing Paper Grace Die of the Month Club
Clear Stamp of the Month Club
Clear Stamp & Die of the Month Club
Embossing Folder of the Month Club
Die Hard Value Club
Die & Stamp Addict Club Membership
Kit & Caboodle Value Club
The Total Package Club Membership
Your imagination is Your limit.
All photography provided by Yasmin Diaz


Be sure to follow me on Instagram for more as, I share fun mini tutorial for how I made the cards in my reel section there!
Creativity is contagious, pass it on.
–Albert Einstein
Disclosure
I am creating this blog post with the purpose of sharing how I design my cards, the information provided here is base in my own opinion and creativity. I am not an expert by any means, I only share the way that I design my cards. Most of the products used for my blog posts are personally purchased by me. However, I did receive the products by Spellbinders.
Please, keep in mind that, all referral links are added for you to know from where either, I purchase or receive the items from as, all products shared and mentioned in each of my blog posts are simply because I use and genuinely love them.
However, I’d like to mention that links from Amazon Associates, Altenew, Pinkfresh, Pigment Craft Co, Scrapbook.com, Spellbinders and Waffle Flower Crafts are affiliated links which means that I get paid a small commission when a purchase is made thru that particular link at no additional cost to you.
Also, I am not paid by any company to promote their products, nor any company sponsors my blog. I pay for my own website, I take my photography, I personally type my blog post, I enter links and even better I make every single card. I try my best working every day a little bit here and a little bit there striving for a professional and friendly use to you. With that said, your support is so much appreciated as if you use those links your help will help me to keep this website running.
Thank you and have a wonderful crafty-shopping!