
Spellbinders JUNE-2020 Card Kit of the Month┃Inspiration Cards
Happy Sunday, Friends! On today’s blog, I’ll be sharing with you the cards that, I’ve created with the Die Cut Shapes, Stickers, Stamp Set and Patterned Paper Pad included in JUNE-2020 “Life is a Party” Card Kit of the Month by Spellbinders. So, without further ado let’s jump right into the step by step on how I’ve created them ↓

To begin with, as usual, I started by selecting the die cut shapes and the patterned paper sheets that I was going to use to create these cards.

Therefore, after the patterned papers and die cut shapes were selected, I trimmed the edges off from the first patterned paper to H 5.0’’ x W 3-3/4’’ inches and I adhered it down with the double-sided tape to one of the textured white card bases that are included in the Card Kit.

Then, I mounted one of the floral die cut shapes with dimensional square adhesives on the bottom left corner of the card and I also mounted with dimensional square adhesives the tassel garland die cut shape (as shown in the image above) on the top side of the card. So, after I had those 2 shapes mounted to the card, I adhered down 5 foam patterned letters which are also included in the kit to create the HELLO and thus after I was done adhering them, I finished the card by gluing with liquid on each end of the tassel garland 2 tied bows that I had previously created out of metallic gold thread. Lastly, to finish the card off I mounted a sentiment which I had previously heat emboss and trimmed down into a flag shape to complement the big Hello.
NOTE: The sentiment is part of the stamp set included in the kit.

The second example was much simpler as, all I did was to trim off the edges from one of the patterned papers and I adhere it down with double-sided tape to one of the white card bases.
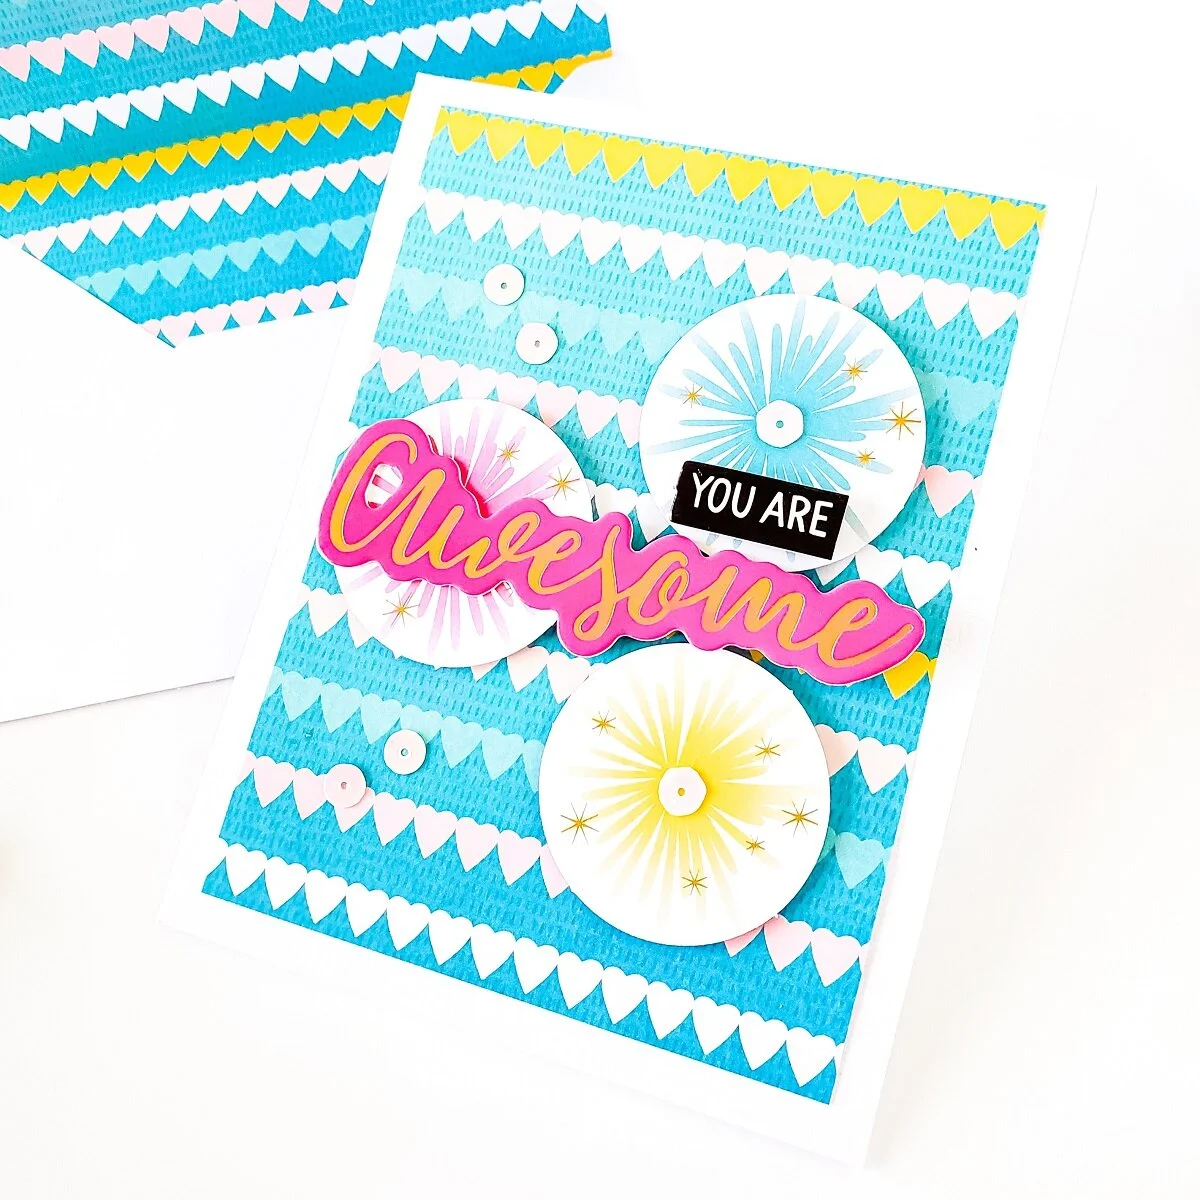
And, then after I was done adhering the card panel, I adhered 3 of the circle die cut shapes with dimensional square adhesives and 2 chipboard words (as shown in the image above) creating that way the You Are Awesome sentiment. So, to finish the card off I glued down here and there sequins with liquid glue to add an extra touch of shine.

For the third example, I trimmed off into slightly uneven squares from the leftover strips that I had left from the previous panels. Therefore, after I was done trimming the squares off into W 2.0’’ X H 1-3/4’’ inches squares, I adhered them down to one of the white card bases with double-sided tape to create the background card panel.

So, once I had the card panel adhered to the card base, I mounted over it 2 Circles, the Best Day word and the Together Time die cut shapes with dimensional square adhesives. And last but certainly not least, I finished the card off by gluing one of the chipboard hearts and some sequins with liquid glue for a touch of shine.

I seriously had lots of fun making cards with this kit, as the cardkit name is “Life is a Party” I created the next 2 cards (see the image above) with a Picnic or Fiesta (party) Vibe in mind.

So therefore, for this example I trimmed the edges off from one of the patterned papers and I’ve got it adhered with double-sided tape to one of the white card bases.

And, then to embellish the card I adhered some of the die cut shapes with liquid glue and some with dimensional square adhesives to created dimension between each shape, and lastly to finish the card off I mounted with craft foam and double-sided tape the backing of the white card panel to the card base creating that way even more dimension.
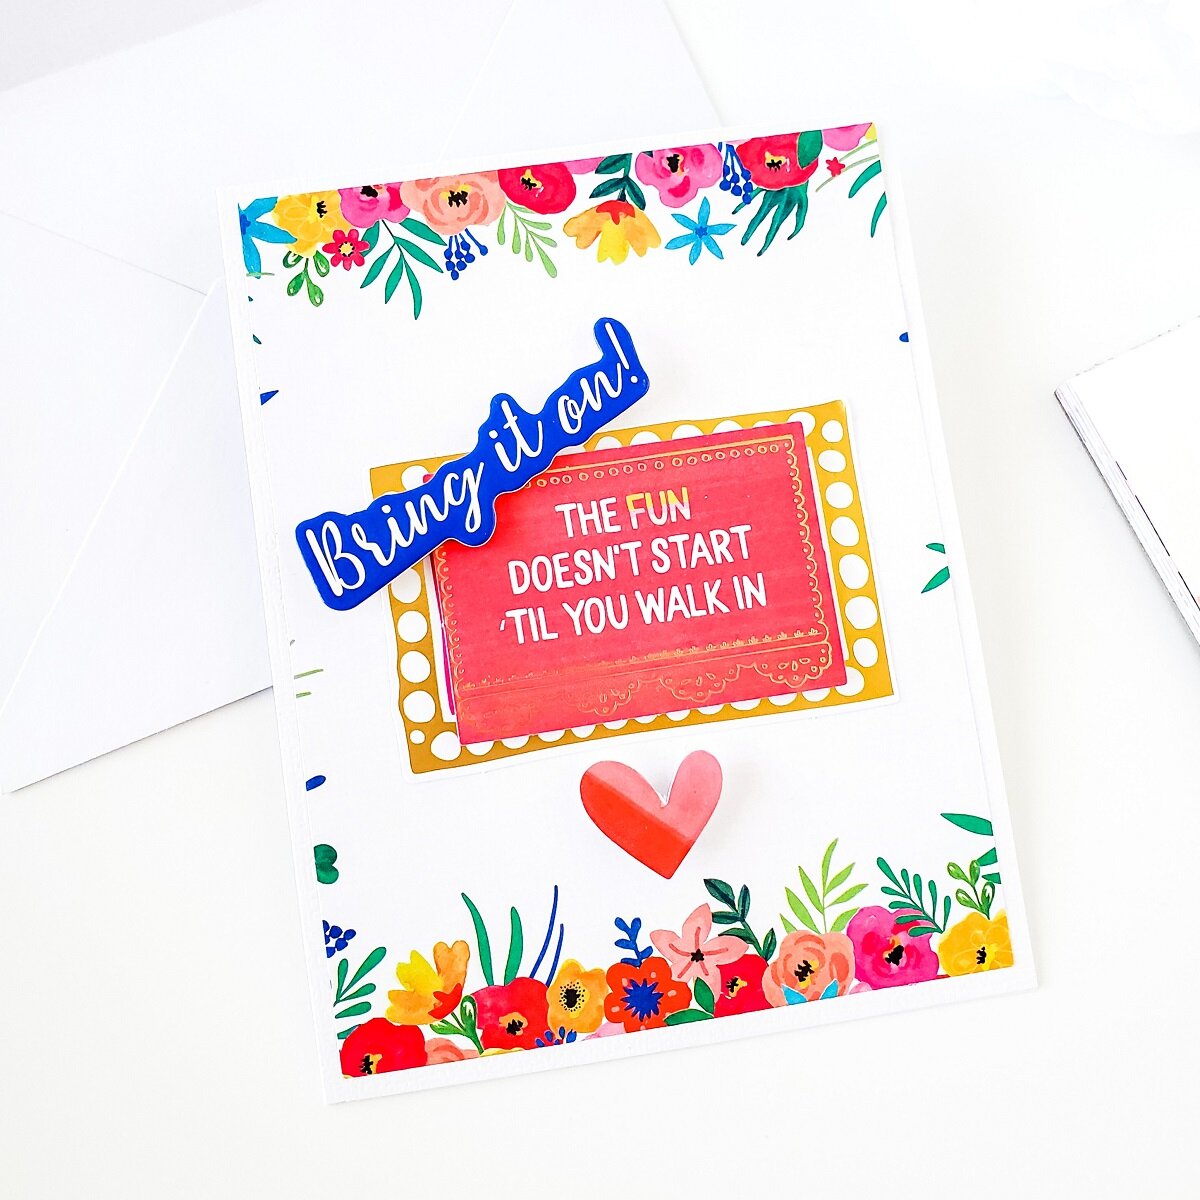
So, for the second example from these 2 examples, I trimmed off the edges from this gorgeous floral-patterned sheet and I adhered it with double-sided tape to one of the card bases.

Then, I adhered one of the die-cut shapes with the form of a frame with double-sided tape, and I mounted a second shape on top of it with dimensional square adhesives to add dimension.

Finally, to finish the card off, I mounted with square adhesives a chipboard heart in the bottom and the Bring it on! chipboard word over one of frame sides.
NOTE: Although, I skipped the sequins for these 2 cards, I did added Glossy Accent to the red heart on the second example and to the center of the guitar on the first example for an shiny look.
Envelope Liner

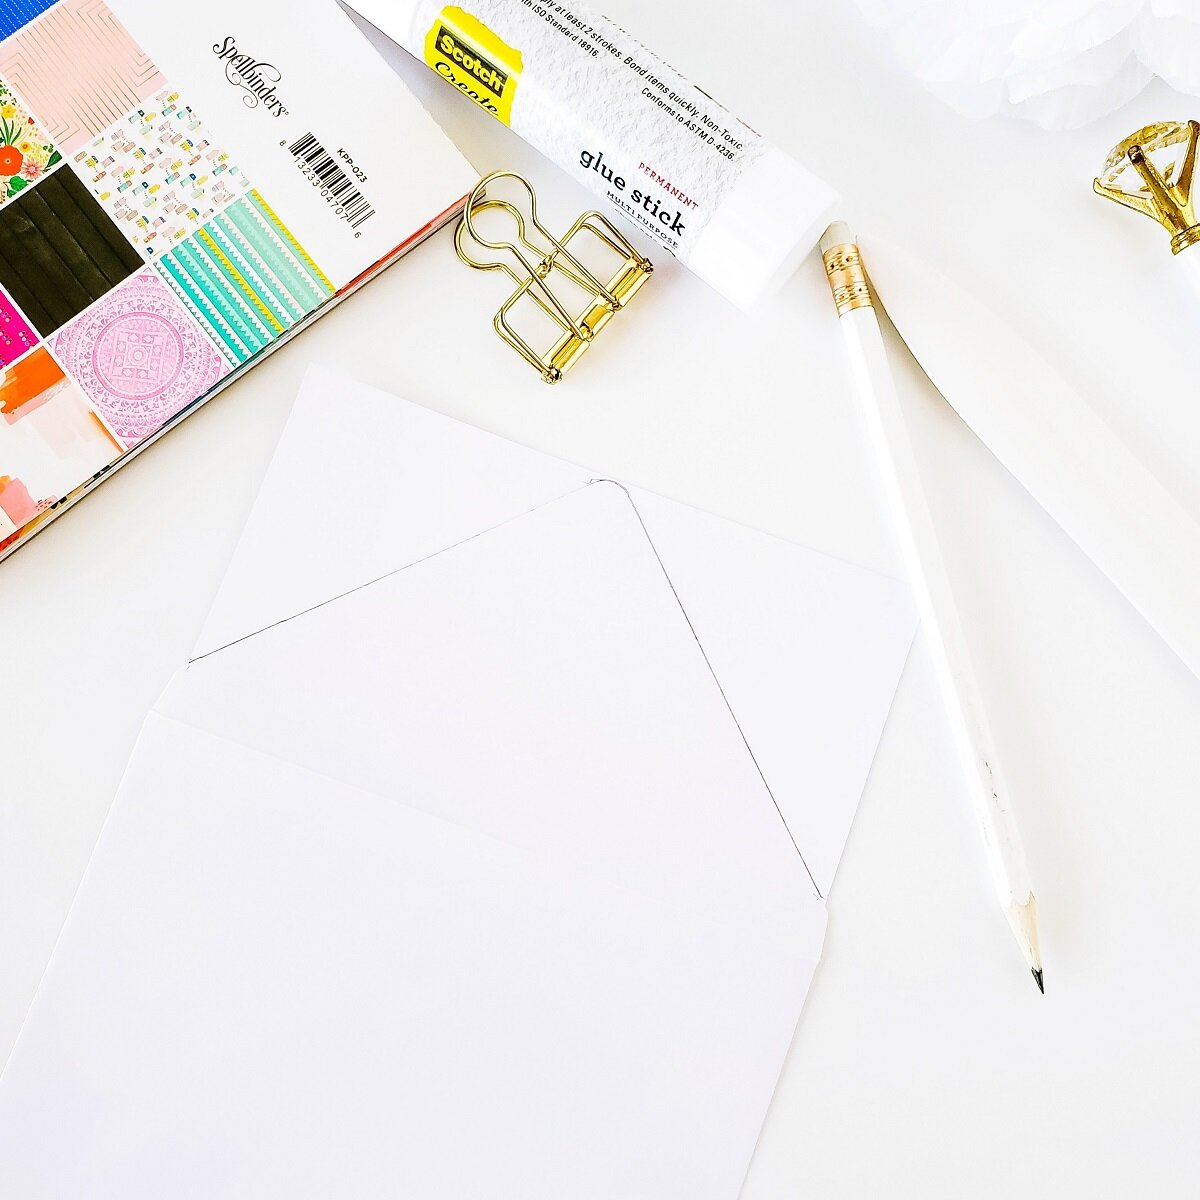
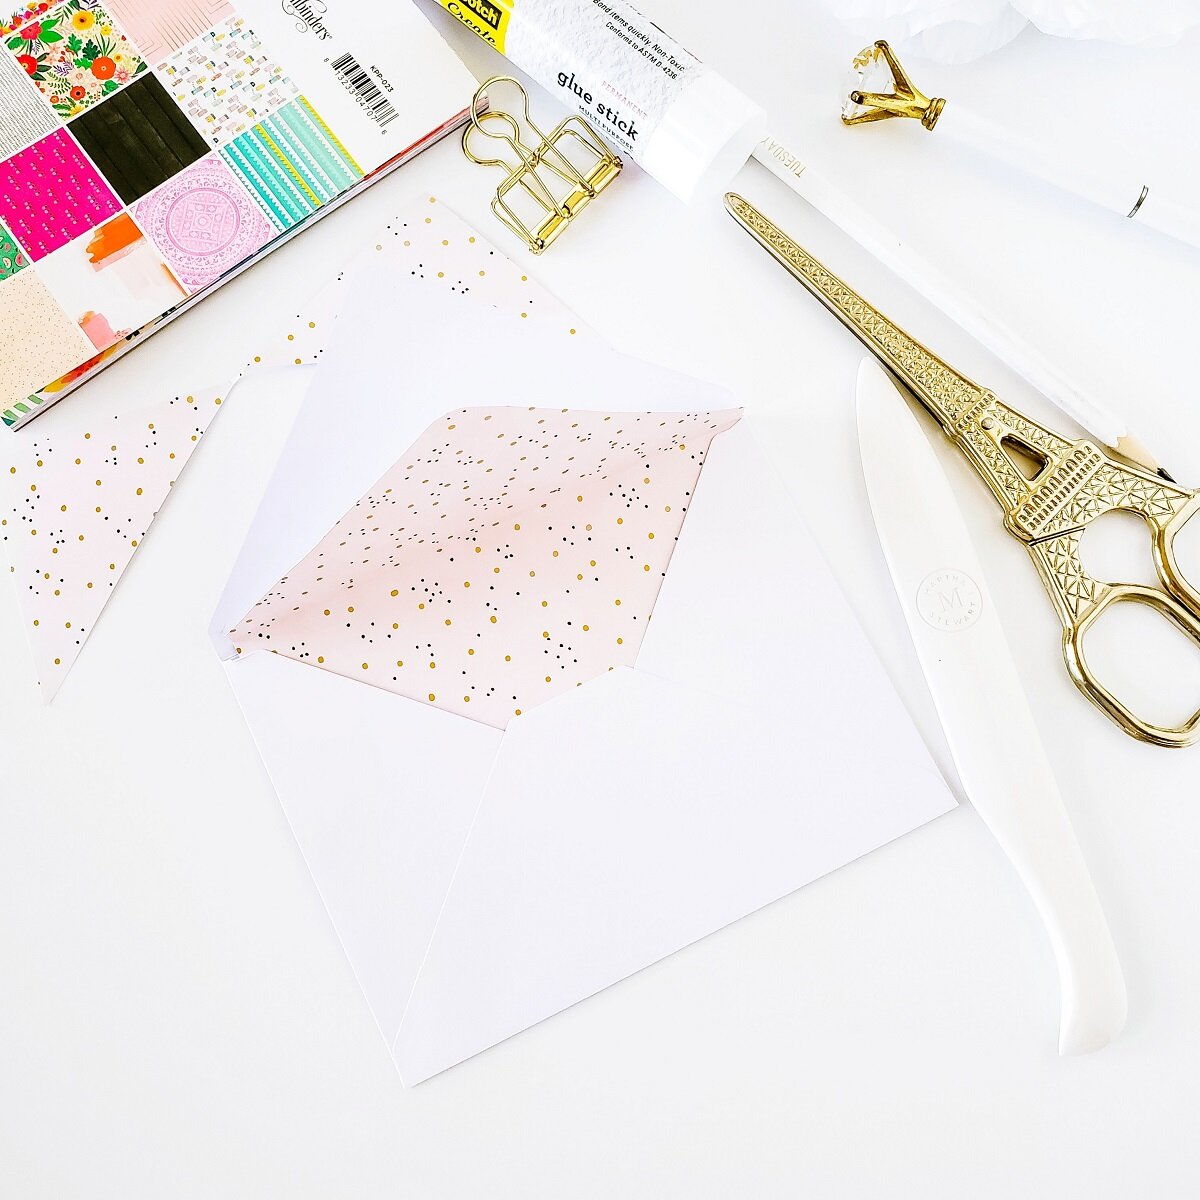
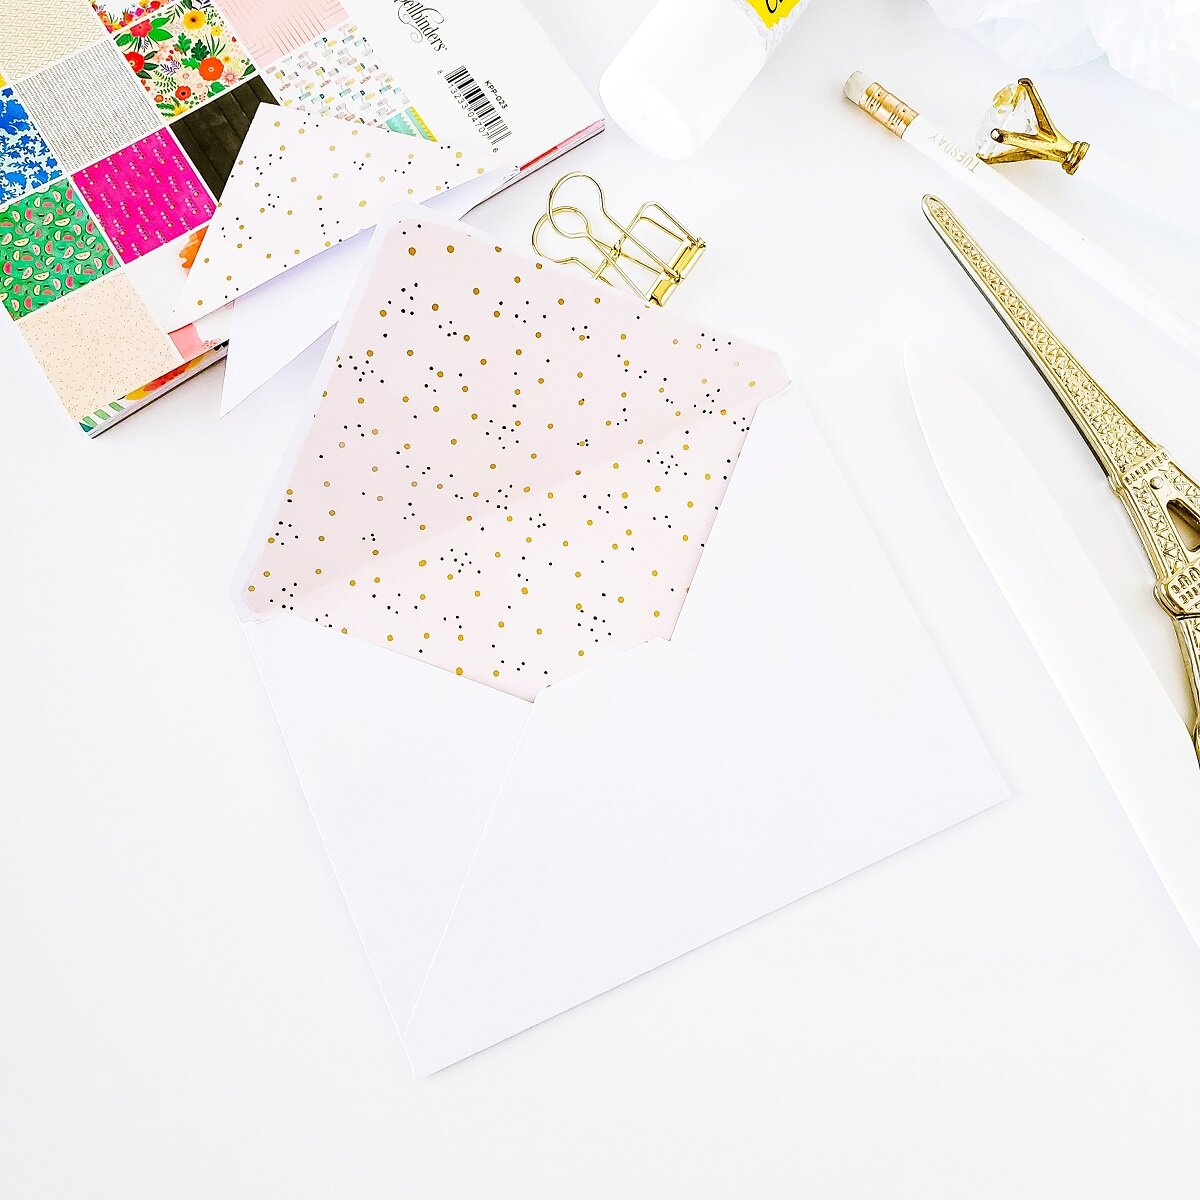
If you read the previous blog on which I shared the cards using the May-2020 Card Kit of the month… you might remember that I told you that I was going to share with you how I created the linings for the envelopes so, in the image above you can see the quick and easy process.
1- Trim one of the patterned papers into W 5-1/2 X 6.0’’ and insert it inside the envelope.
2- Place the envelope and patterned paper facing down edge to edge and trace the envelope flap with a pencil.
3- Fussy-cut the traced edge from the patterned paper using a pair of scissors and fold the flap along with the pattern paper.
4- Adhere both flaps with double-sided tape or a glue stick as it works best in this case. And, as simple as that there you have a matching envelope liner for each of your handmade cards.

Moving on, after I was done creating the envelope liners for each of the previous examples I found myself thinking what I could do with the leftover pieces so, I adhered them all with double-sided tape to a large piece of white cardstock. And at that point after I was done adhering them, I wasn’t sure if I liked it or not that layout, however I ended up deciding to create the shaped card which you can see in the image above. So, to create this example I lined up over one of the card bases the largest die from the Nestabilities Candlewick Circles Etched Dies, and I ran them through my Platinum 6 Die Cutting and Embossing Machine, but making sure not to cut all the way through, as I wanted to create a partial die-cutting so the card base could have a hinge to open and close.

That said, after I was done creating the card base I set it aside and I lined up the intricate die along with the largest die from set to die-cut the intricate frame out of white cardstock. So, after I was done die-cutting the frame, I repeated the same process but this time to die-cut a smaller white frame therefore, after I was done die-cutting both frames I set them aside and I ran through the die-cutting machine the largest die from the Nestabilities Standard Circles LG Etched Dies along with the patterned panel that I had created with the leftover pieces. Thus, after I was done die-cutting the patterned paper, I adhered the largest frame with double-sided tape to the card base, then I adhered also with double-sided tape the backing of the patterned circle panel to the frame, and last but not least I mounted the smaller white detailed frame with square adhesives in the center of the card. At this point all I needed to add was a sentiment so, to finish the card off, I adhered a dimensional foiled Thank you sentiment which I had on my stash from a previous project.
NOTE: The Thank you sentiment is from the Yana's Sentiments Glimmer Hot Foil Plate & Die Set Foiled Basics Collection.

Lastly, after creating 6 cards with the die cut shapes and patterned papers, I was dying to make a card or maybe 2 with the die included in this month’s kit. So, that said in the image above you can see that I created a card with a matching envelope liner and bookmark or tag if you will.

So, for the card I trimmed the edges off from this beautiful pattern paper and I adhered it with doubled-sided tape to one of the card bases. Next, I created the envelope liner in the same exact way as I created the rest. Therefore, after the envelope and card base were done, I set them aside and I moved on to the die-cutting process.

As, for the die-cutting process I ran through the die-cutting machine each of the dies included in the kit to die-cut the flowers and greenery out of Light Pink, Peach, Coral, Gold and Green hues so, right after that I was done die-cutting each piece, I created a floral cluster with them and I adhered some of them with liquid glue while others with foam square adhesives to add dimension. Lastly, to finish the card off I placed the card base inside my stamping tool, and I’ve got 2 of the sentiments from the stamp set stamped and gold heat embossed on the right top corner of the card.

And then, for the bookmark/tag I kept it simple by adhering over a heavy weight white cardstock the leftover piece from the pattern paper with double-sided tape. Then, I adhered a mini floral cluster that I created with the leftover flowers and leaves on the bottom part of it and I also adhered sequins to add shine.

And to finish it off, I got a sentiment heated emboss so, to that I heated emboss the IT’S A over the tag while I gold heated emboss the Surprise over a white cardstock piece. I did it this way to add dimension as, I wanted to fussy cut the word and have part of it hanging outside the bookmark/tag.

With that being said friends, I hope that you’ve enjoyed reading about how, I’ve created these cards, envelope liners and bookmark/tag with the Die Cut Shapes, Stickers, Stamp Set, Die Set and the Patterned Paper Pad included in the; JUNE-2020 “Life is a Party” Card Kit of the Month by Spellbinders. As always, I appreciate the time that takes you to read my blog posts. Below, you’ll find the supply list for the products used on today’s blog post. If, you get inspired by today’s projects and you give it a try, be sure to tag me on Instagram➝@cardsandcraftsbyyaz I’d love to see what you create.
Thank you and happy crafting, your time is valuable.
Don't forget to keep spreading kindness
Today and Always.
Love,
Yasmin
Supply List
Card Kit of the Month
Yana's Sentiments Glimmer Hot Foil Plate & Die Set
Nestabilities Standard Circles LG Etched Dies
Nestabilities Candlewick Circles Etched Dies
Assorted Cardstock Pack
Glimmer Hot Foil Roll - Champagne
Glimmer Hot Foil System Platform
Platinum 6 Die Cutting and Embossing Machine
Glossy Accent
Cougar 110# Heavy Weight Card Stock
Metallic Gold Rich Embossing Powder
WOW! Embossing Ink Pad
WOW! Heat Embossing Gun Tool
Embossing Powder Tool


More INFORMATION
FAQ About Spellbinders Kits

PLEASE NOTE
As part of the WOW! Designer Team, WOW! has provided me a code for all my lovely Subscribers to use. So, don’t forget to take the advantage of a crafty 10% off all purchase for both WOW!
US and UK by simply using my code: WOWDTYD
Here are the links for both websites weather you’re a US or UK user.
WOW! Embossing Powder US
WOW! Embossing Powder UK
Your imagination is Your limit.
All photography provided by Yasmin Diaz


Creativity is contagious, pass it on.
–Albert Einstein
Disclosure
I am creating this blog post with the purpose of sharing the way that I design my cards, the information provided here is based in my own opinion and creativity. I am not an expert by any means, and I only share the way that I design my cards. Most of the products use on my blog posts are personally purchased by me. However, I did receive the products used on today’s blog post by Spellbinders and WOW! Embossing Powder. Please, keep in mind that all referral links are added for you to know from either I purchase or receive the items from as, all of products shared and mentioned in each of my blog posts are simply because I use, and truly love them.