
Pinkfresh Studio February 2020 Background Stamp Release Blog Hop
Hello Crafty Friends! Welcome to the Fabulous Pinkfresh Studio’s February 2020 Background Stamp Release Blog Hop. If you have arrived here from Pinfresh Studio’s Blog you’re in the right track as, I’m your second stop from the list. With that being said, today I’d like to share with you these 3 Modern/Distressed Encouragement cards that, I’ve created featuring the beautiful; Diagonal Bars Background Stamp and Do What You Love Background Stamp. So, without further ado, let’s dive into the post ↓
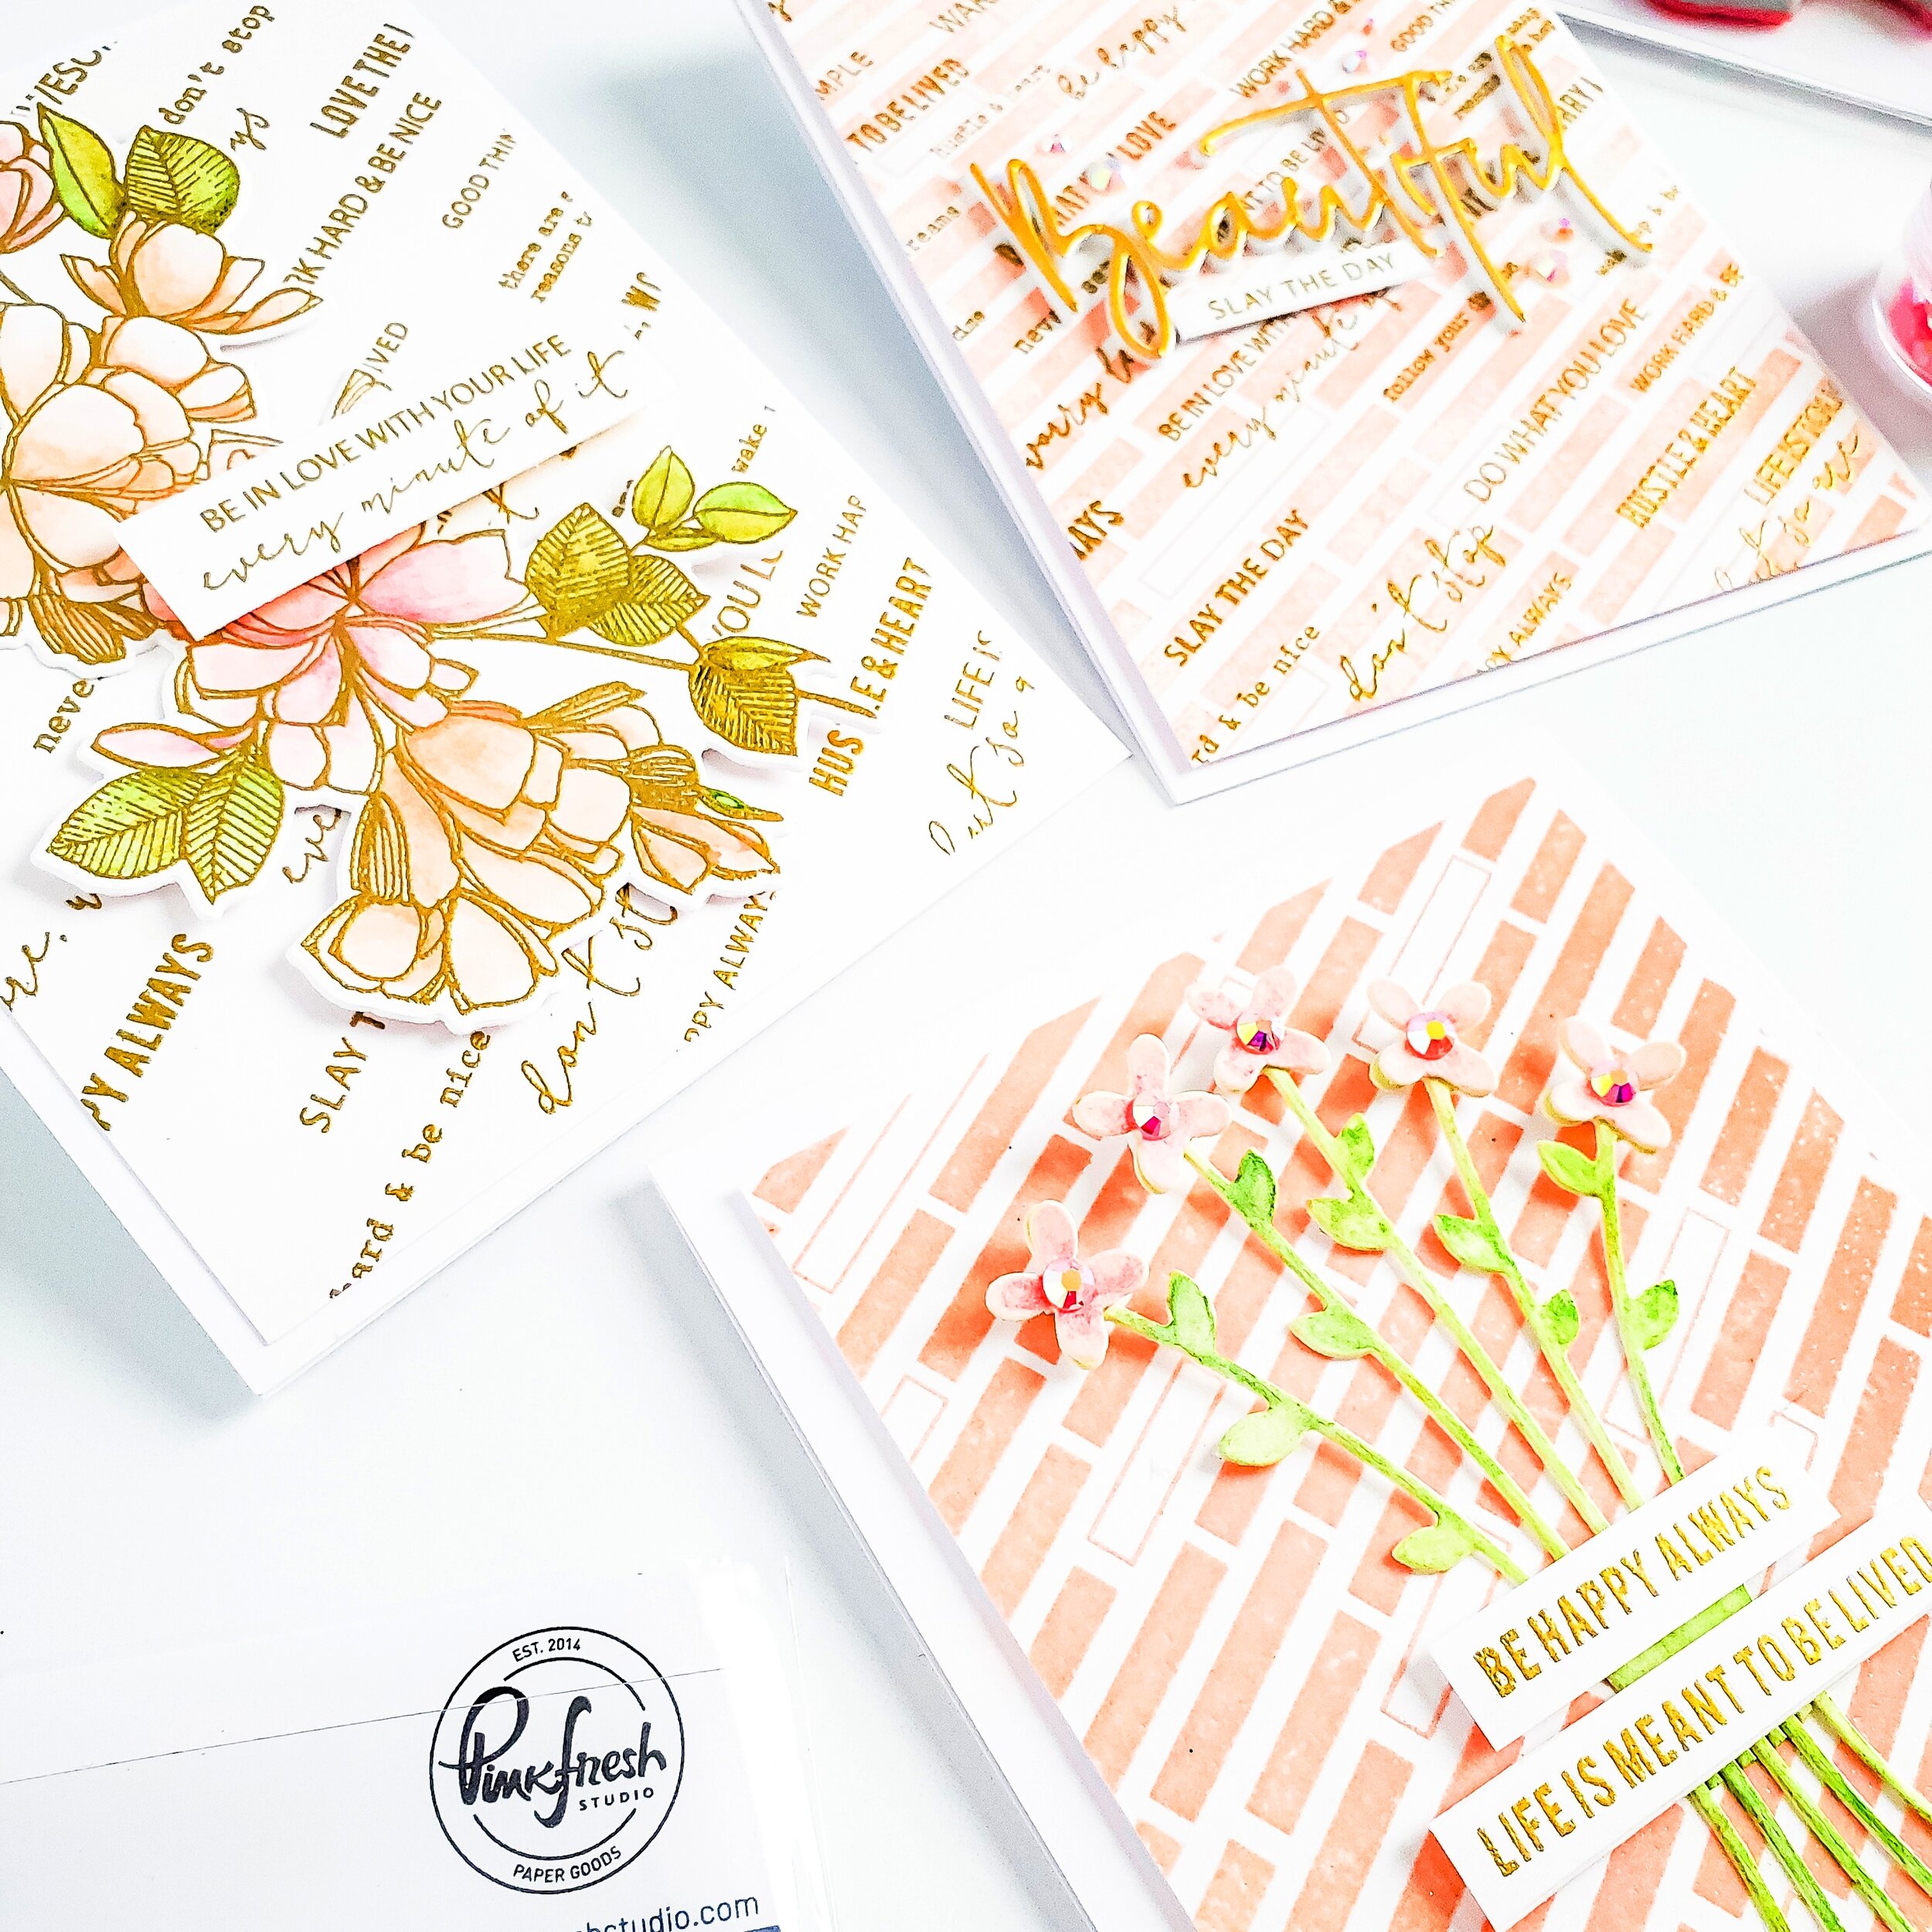

For the first example, I started by gold heat embossing the cluster floral from the; Just Because Stamp Set with Metallic Gold Rich Embossing Powder on a piece of Strathmore Bristol Smooth Paper. Next, after the heat embossing, I temporarily tape down the piece of paper on a clipboard, and I created a mix of colors using my Derwent Watercolor Paint Set to watercolor the cluster in Peachy-Pink and Light Greens hues. Right after when the water-coloring was done, I set the clipboard aside to let it dry.
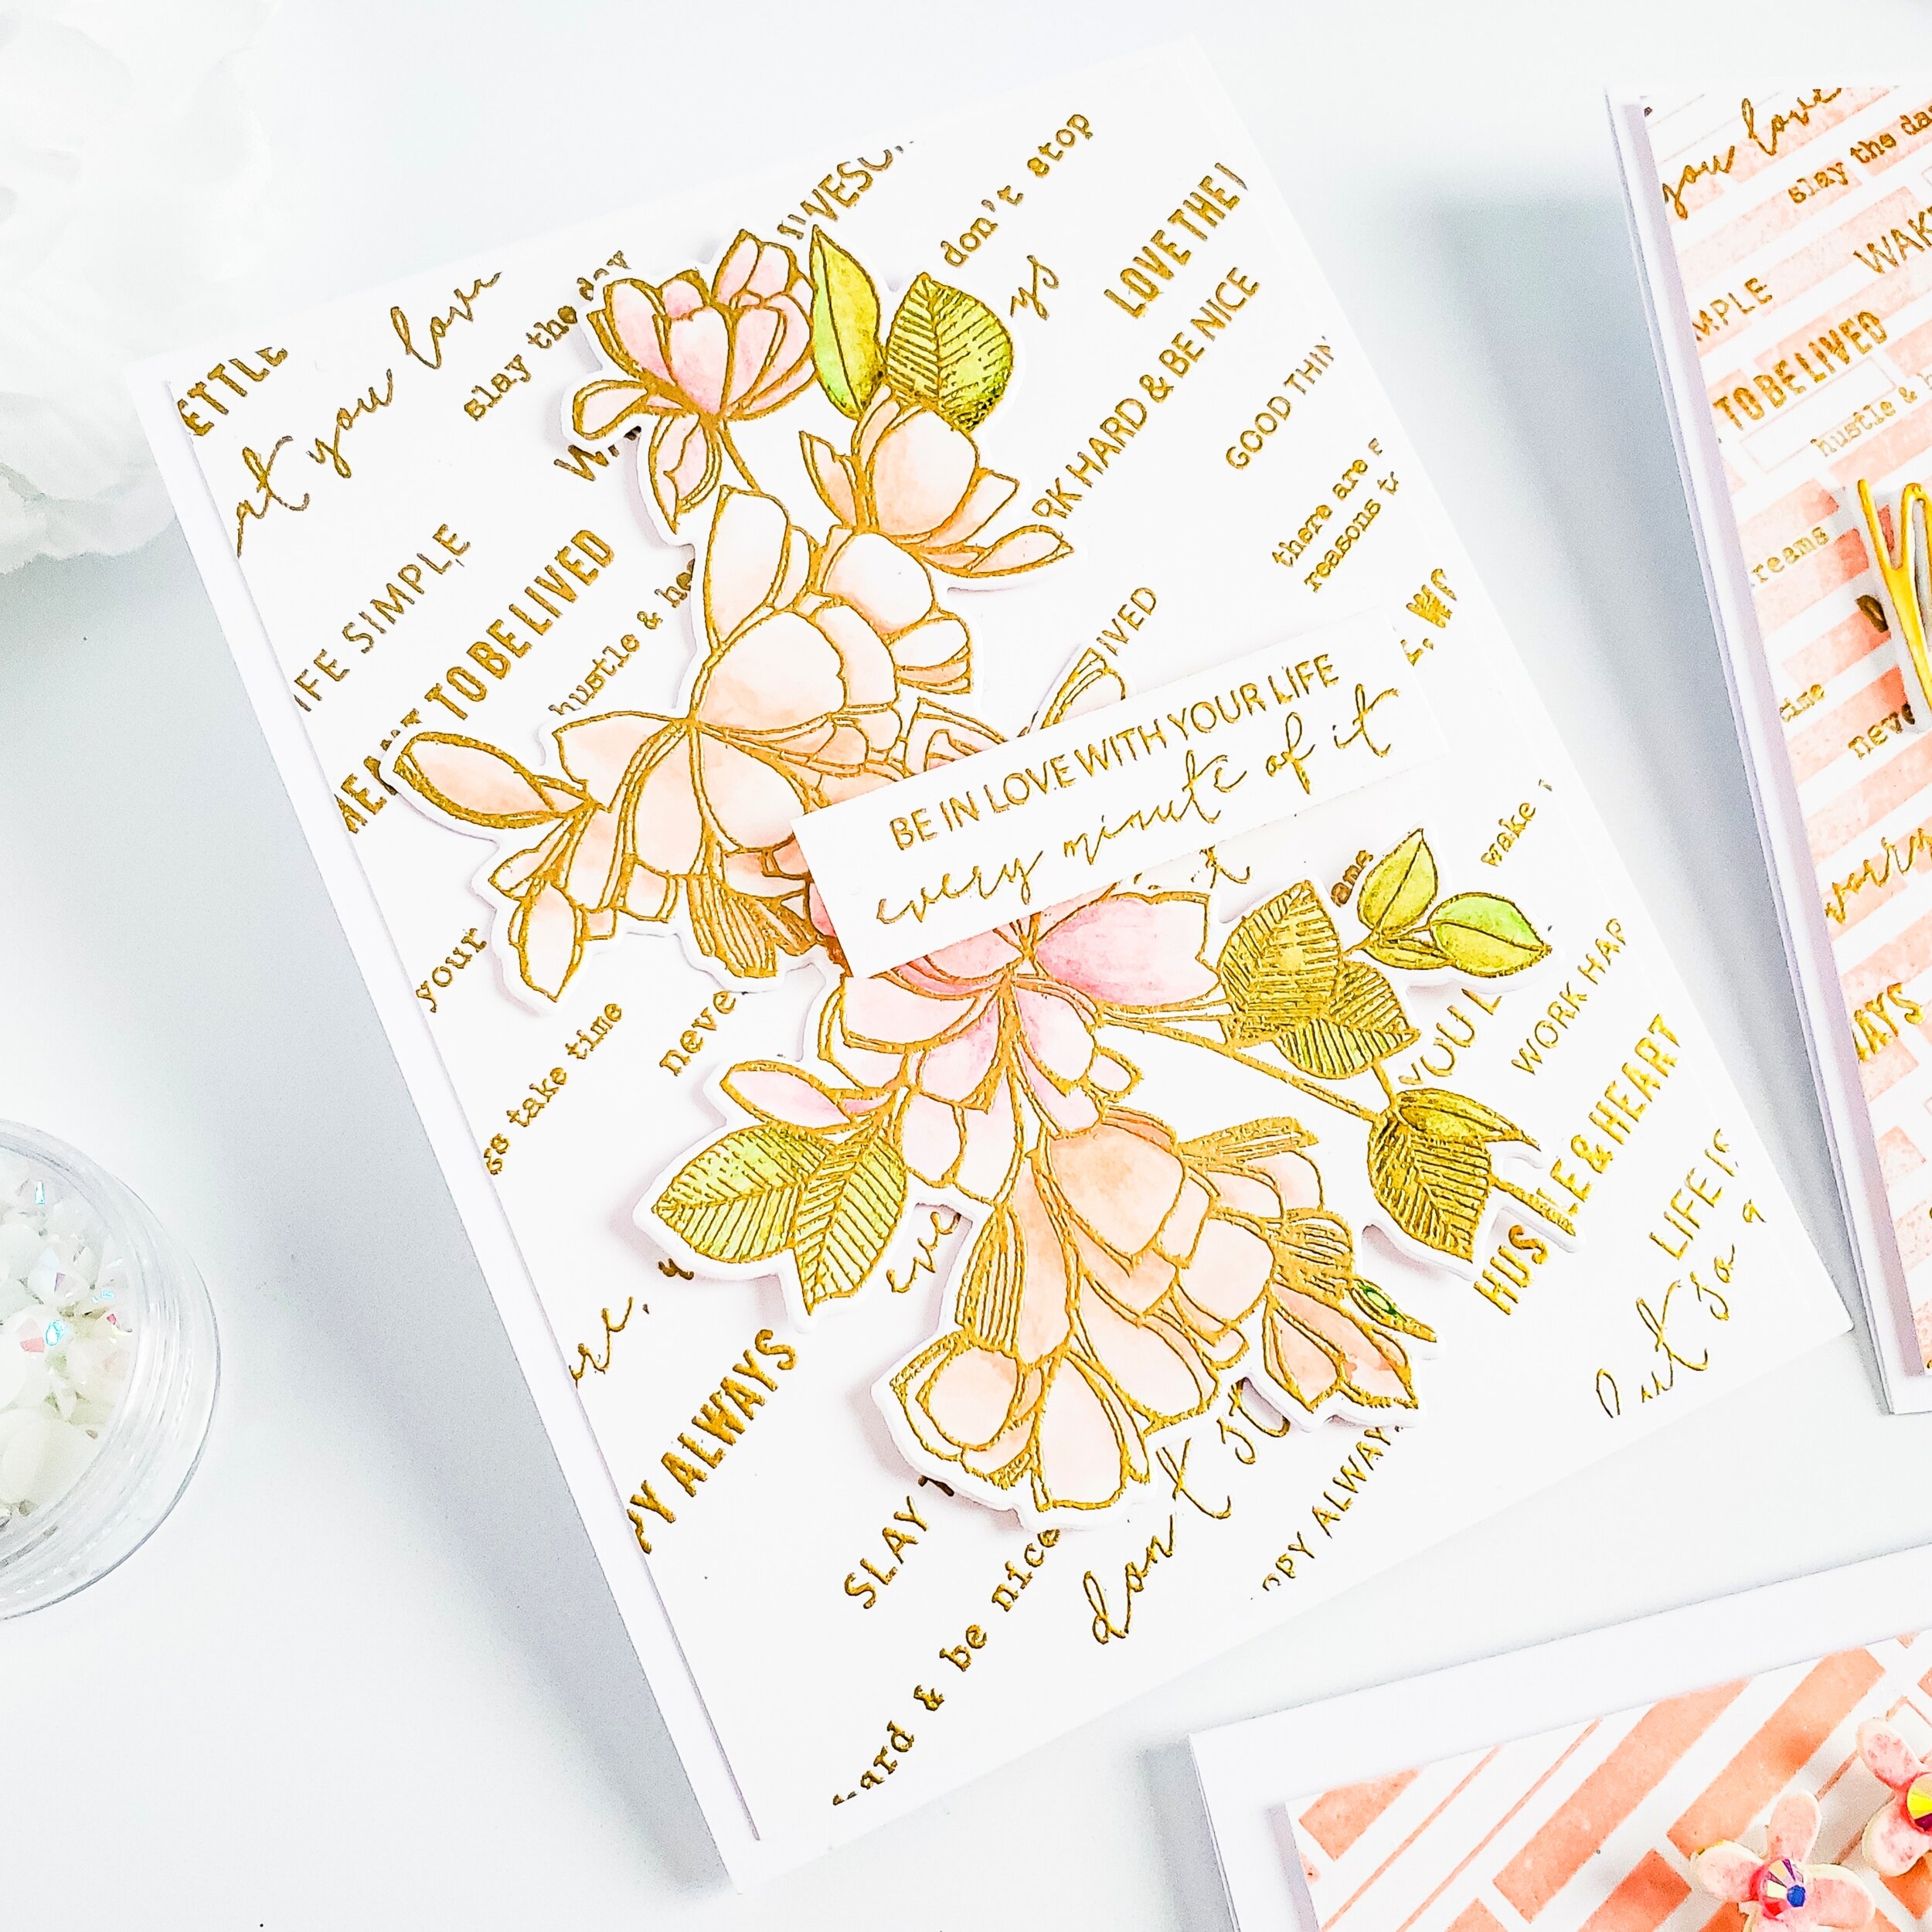
In the meantime, I placed inside my stamping tool an A2 size white card panel and I placed it over it the; Do What You Love Background Stamp. Then, I added lots of Embossing Powder Tool to the card panel because, I was going to gold heat emboss it. So, after gold heat embossing not only 1 but 2 white card panels, I trimmed the edges off slightly smaller from one of them, and I adhered the backing it with double-sided tape to an A2 top folding white card base. Next, I came back to my water-coloring and I ran it through my Platinum 6 Die Cutting and Embossing Machine - 6" Platform along with the; Just Because Die to die-cut it out from the Bristol cardstock.

Once, the die-cutting cluster was done, I foam mounted it to the card (as shown above.) To finish the card off, I ran through the die-cutting machine the second gold heat embossed car panel that I created earlier along with one of the Sentiment Labels Wafer Dies to die-cut a sentiment from it. Isn’t that cool?? You not only have a sentiment background but, you also can die-cut sentiments from it by using a die or any paper trimmer just like I did for today’s card. Finally, I foam mounted the sentiment and my first example was done.
Diagonal Bars Background Stamp

For the second example, I started my placing a white card panel inside my stamping tool. Next, I placed over the card panel the; Diagonal Bars Background Stamp and I stamped the bars with Distress Oxide Tattered Rose Ink. Because, I made the stamping with Distress Oxide Ink, I took a step further so, I clear heat embossed the background for a distressed yet, shiny look.

Right after when the clear embossing process was done, I trimmed the edges off from the card panel H 5’’x W 3-3/4’’ in and I foam mounted it to an A2 top folding white card base. Soon after that, I set the card base aside and I ran through the die-cutting machine the; Partial Cut Bouquet and A Bow Die Set to die-cut the bouquet out watercolor cardstock. Because this die does a partial cut, I fussy cut the stems and flowers with the help of my scissor. So, once I had the fussy cut part done, I water-colored the stems and flowers with the leftover mixing that I had from the previous example.

Lastly, after my water-coloring bouquet was dry, I adhered the backing part of the stems with liquid glue and I adhered the flowers with dimensional. To finish the card off, I foam mounted 2 sentiments which, I had die-cut out the gold heat embossed card panel. And, as a finishing touch, I adhered with liquid glue pink jewels from the; Essentials: Jewel Mix for a very sparkly look.
Diagonal Bars Background Stamp and Do What You Love Background Stamp

For the third and last example, I did nothing but to combine both card panels from my previous examples in one. These background stamps were designed to work along or combine so, I’d like to share with you what I did over here.
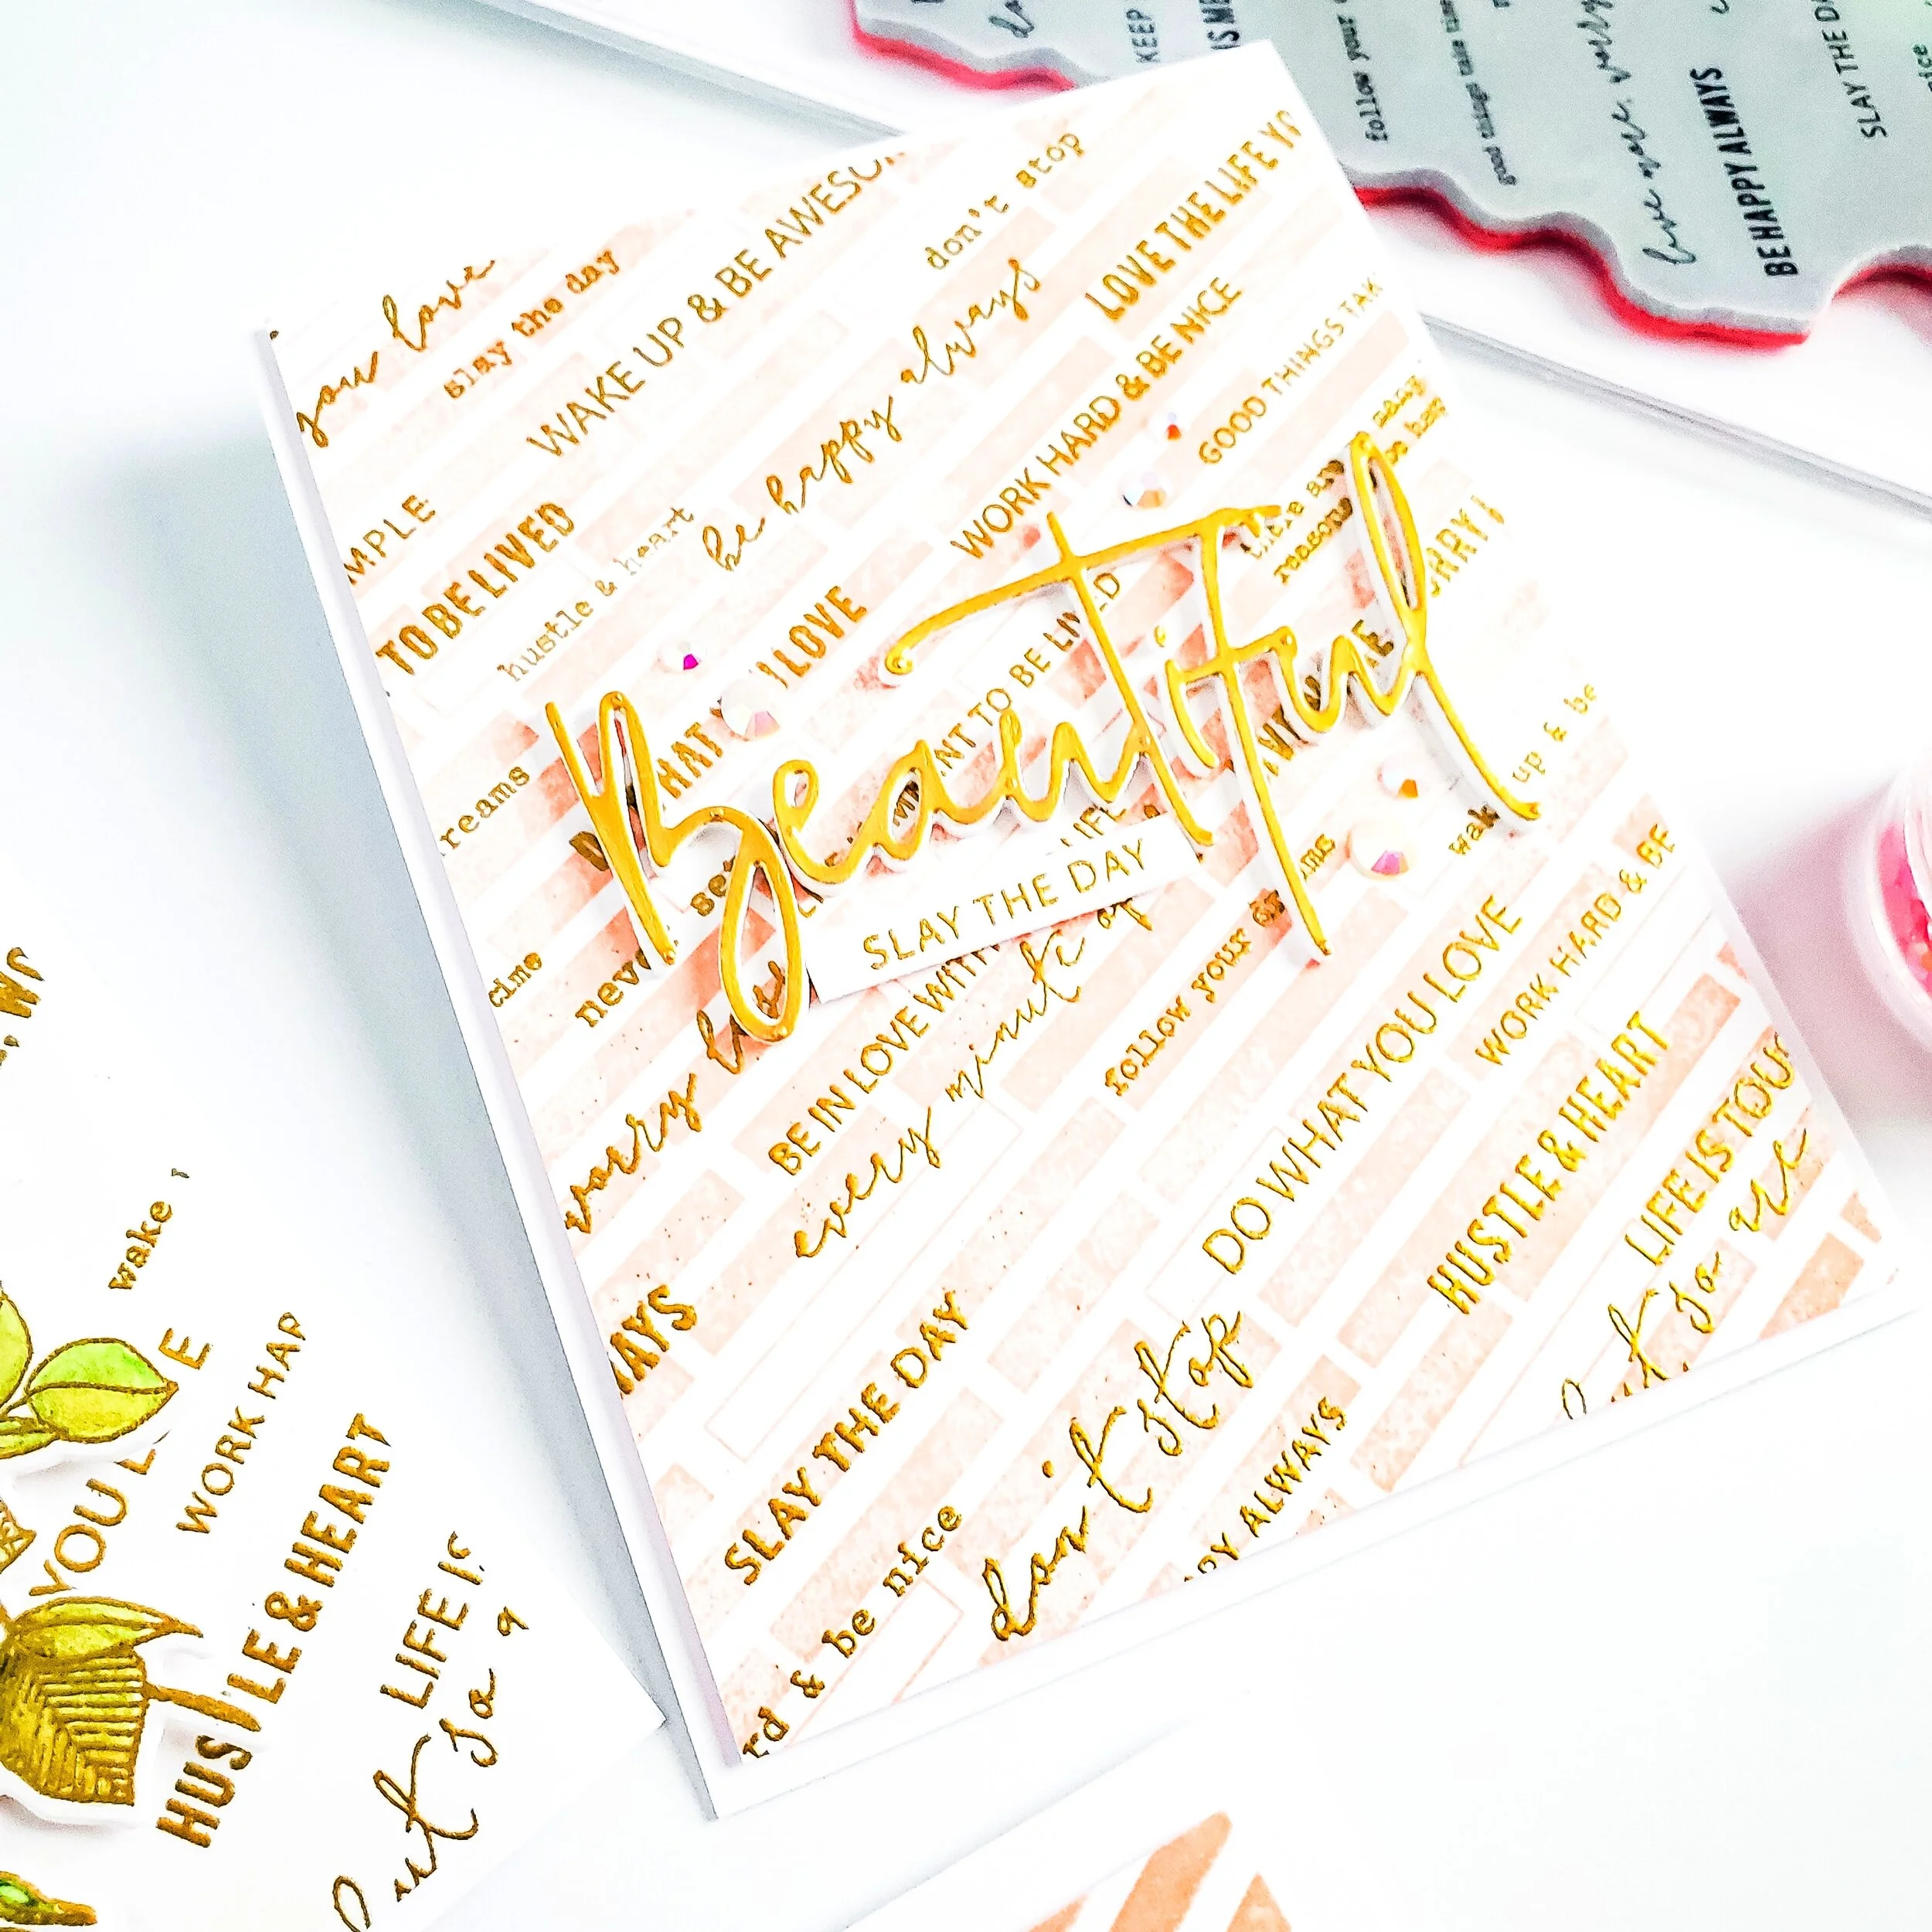
To keep it simple, I stamped the; Diagonal Bars Background Stamp with the same color distress ink that I used before. Next, I set it aside to dry because, I didn’t clear emboss it this time. So, while the card panel was drying out, I ran through the die-cutting machine the; Beautiful Word Die to die-cut it 1X out of gold cardstock and 1X out foam foam. Once, both die-cutting pieces were done, I stacked them both and I set them aside.

Lastly, I came back to my stamped card panel, and soon after I was sure that, the ink was completely dry, I added embossing tool and I stamped over it the; Do What You Love Background Stamp with embossing ink. Finally, after the gold heat embossing process was done, I trimmed the edges of the card panels off and I foam mounted it to an A2 top folding white card base. To finish the card off, I adhered the backing of the Beautiful die-cutting with liquid glue to the card panel along with a foam mounted sentiment which was part also from the gold heat embossed card panel. As, a finishing touch, I adhered pink jewels here and there for an extra sparkly look.

Well, friends! That’s all for today, I hope these cards inspire you to give the new Stamp & Die Sets a try! Don’t forget to leave a comment in the COMMENT SECTION below for a chance to win a $25.00 gift card. You can → CLICK HERE to start hopping along with us from the beginning in case you missed your first stop but, first make sure to check all the details for the GIVEAWAY as well as the awesome SHOPPING PROMO. Good luck and have fun hopping along with us for more inspiration projects as well as more chances to win.
Giveaway

Pinkfresh Studio will be giving away the full Stamp & Die Release on the Pinkfresh Studio’s Blog as well as on their Instagram Feed YAY!!! Plus, you will have lots of chances to win a $25 gift card from each stop along the way. As, per usual with blog hops - the winners will be picked from the comment sections. The winners will be announced on Monday, February 24th over at the Pinkfresh Studio → GIVEAWAY PAGE. So, you must check their page & claim the prize within 2 weeks.
Supply List
Diagonal Bars Background Stamp
Do What You Love Background Stamp
Just Because Stamp Set
Just Because Die
Partial Cut Bouquet and A Bow Die Set
Beautiful Word Die
Essentials: Jewel Mix
Sentiment Labels Wafer Dies
11x14 Strathmore Bristol Smooth Pad
Derwent Watercolor Paint Set
Distress Oxide Tattered Rose Ink Pad
Inkadinkado Embossing Powder Tool
Cougar 110# Heavy Weight Card Stock
Metallic Gold Rich Embossing Powder
WOW! Embossing Ink Pad
WOW! Heat Embossing Gun Tool
Shopping PROMO

Pinkfresh Studio will be offering FREE US or discounted international shipping on all orders $35+ From February 17-21.
Thank you and happy crafting, your time is valuable.
Don't forget to keep spreading kindness
Today and Always
Best,
Yasmin
Your imagination is Your limit.
All photography provided by Yasmin Diaz


Creativity is contagious, pass it on.
–Albert Einstein
Disclosure
I am creating this blog with the purpose of sharing how I design my cards, the information provided here is base in my own opinion and creativity. I am not an expert by any means, and I only share the way that I design my cards. Most of the products used for my blog posts are personally purchased by me. However, I did receive the products by Pinkfresh Studio along with some of the WOW! Embossing Powder used on today’s blog post. All referral links were added for you to know from where I purchased or received the items from as, all of products shared and mentioned in each of my blog posts are simply because I use, and truly love them.