
The Stamping Village - Pinkfresh Studio┃Thinking of You Inspiration Card
Happy Saturday, Friends! Today, I’d love to share with you a special card made using The Stamping Village’s latest collaboration "Thinking of You" This stamp set gives back to the community $5.00 from every stamp set that benefit the Save the Children Organization, in support of the COVID-19 battle and children needing meals. That said, today my card represents Pinkfresh Studio sentiment and the small bloom with a leaf stamps. So, without further ado let’s jump into the step by step on how I made it ↓

To begin with, I started by placing into place inside my stamping tool one the largest stencil from the Wreath Builder Template Set. Next, I lined up over the stencil a 4’’ X 4’’ inches square white card panel, and once the card panel was onto place, I place down the solid stamp image from the small bloom and I started stamping it with Ballet Slipper Ink to create a wreath. Therefore, after I’ve got the first layer stamped, I removed the stamp image and I replaced it for the second layer which creates the details to it so, moving along I repeated the stamping around the wreath, but this time using Coral Reef Ink.

So, after I had the stamping done for the bloom I went ahead, and I finished the wreath by stamping the leaf on one side of the bloom then in the other side. By the way, I’d like to mention that the leaf also has 2 layers so, to get the leaf stamped I used Fresh Pear Ink and Mint Ink.
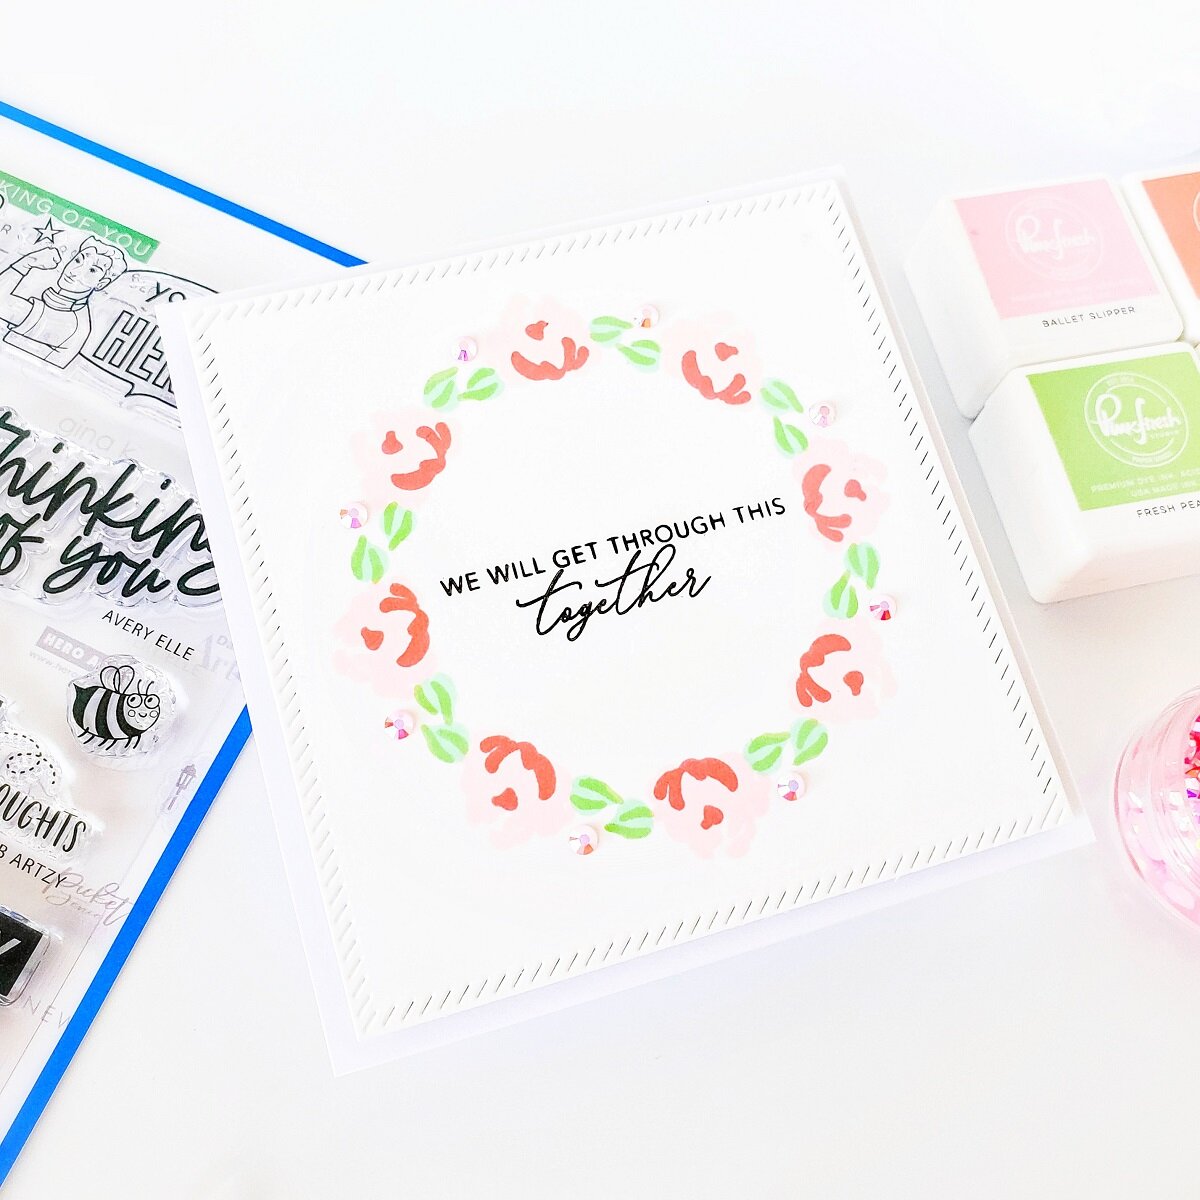
So, after I had the wreath stamped I finished the stamping by getting the sentiment stamped with Detail Black Ink right in the center of the wreath. Therefore, after I had the sentiment stamped, I removed the card panel from my stamping tool and I lined up over it the largest die from the Essentials: Diagonal stitched squares die set and I ran it through my Platinum 6 Die Cutting and Embossing Machine to add the detailed diagonal lines to it. Lastly, to add dimension, I mounted the card panel with craft foam and double-sided tape to a 4-1/4’’ X 4-1/4’’ inches white card base, and to finish it off I glued down with liquid glue pink jewels around the wreath to add a touch of Sparkle.

I hope you’ve enjoyed reading the step by step on how I’ve created today’s card with "The Thinking of You" stamp. As you can see, there’s a lot of fun ways on how you can use a small and simple stamp image. As always, I appreciate the time that takes you to read my blog posts. Below, you’ll find the supply list for the products used on today’s blog post. If, you get inspired by today’s project be sure to tag me on Instagram➝@cardsandcraftsbyyaz I’d love to see what you’re creating.
Thank you and happy crafting, your time is valuable.
Don't forget to keep spreading kindness
Today and Always
Love,
Yasmin
Supply List
Stamping village collaboration stamp set: Thinking of you
Essentials: Diagonal stitched squares die set
Detail Black Ink
Ballet Slipper Ink
Coral Reef Ink
Fresh Pear Ink
Mint Ink
Essentials: Jewels Mix
Wreath Builder Template Set
Cougar 110# Heavy Weight Card Stock
Platinum 6 Die Cutting and Embossing Machine
Your imagination is Your limit.
All photography provided by Yasmin Diaz


Creativity is contagious, pass it on.
–Albert Einstein
Disclosure
I am creating this blog with the purpose of sharing how I design my cards, the information provided here is base in my own opinion and creativity. I am not an expert by any means, and I only share the way that I design my cards. Most of the products used for my blog posts are personally purchased by me. However, I did receive the products by Pinkfresh Studio. Other than that, all referral links were added for you to know from where I purchase or receive the items from as, all of products shared and mentioned in each of my blog posts are simply because I use, and truly love them.