
Happy Sunday, Friends! On today’s blog, I’ll be sharing with you a set of dimensional & colorful “Christmas” cards made using Die Cut Shapes, Chipboard Stickers, Sequins, Die, Stamp and the Patterned Paper Pad included in OCT-2020 “Dancin’ Santa” Card Kit of the Month by Spellbinders. So, without further ado let’s jump right into the step by step on how I’ve created them ↓

As per usual with every Spellbinders card kit, I started by selecting the die cut shapes and patterned paper sheets that I was going to use to create each card so therefore, I trimmed the edges off from one of the patterned papers a bit smaller than the card base, and I adhered the backing of it down with the double-sided tape (included in the kit) to one of the A2 textured card bases which is also included in the kit.
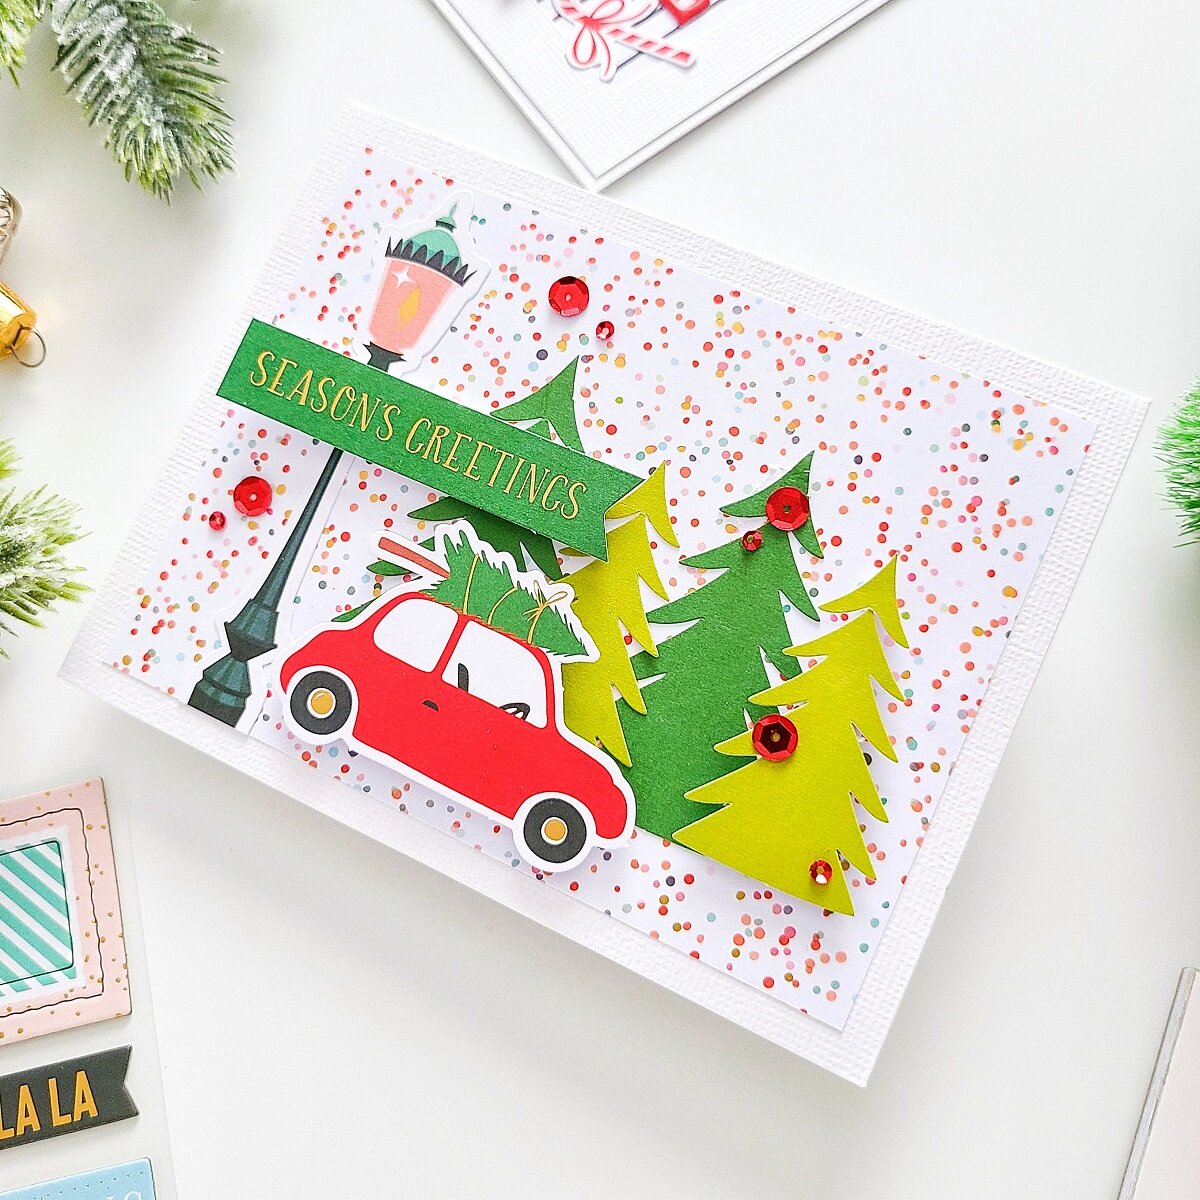
Once, I had the card base ready I started the layering for the card in a landscape form so therefore, I’ve gone ahead to adhere and mount each selected die-cut shape (as shown in the image above) using liquid glue and the dimensional squares foam included in the kit. Thus, after I’ve had finished placing each die cut shape into place, I’ve finished the card off by gluing down here and there with liquid glue a few red sequins which by the way are also included in the kit.

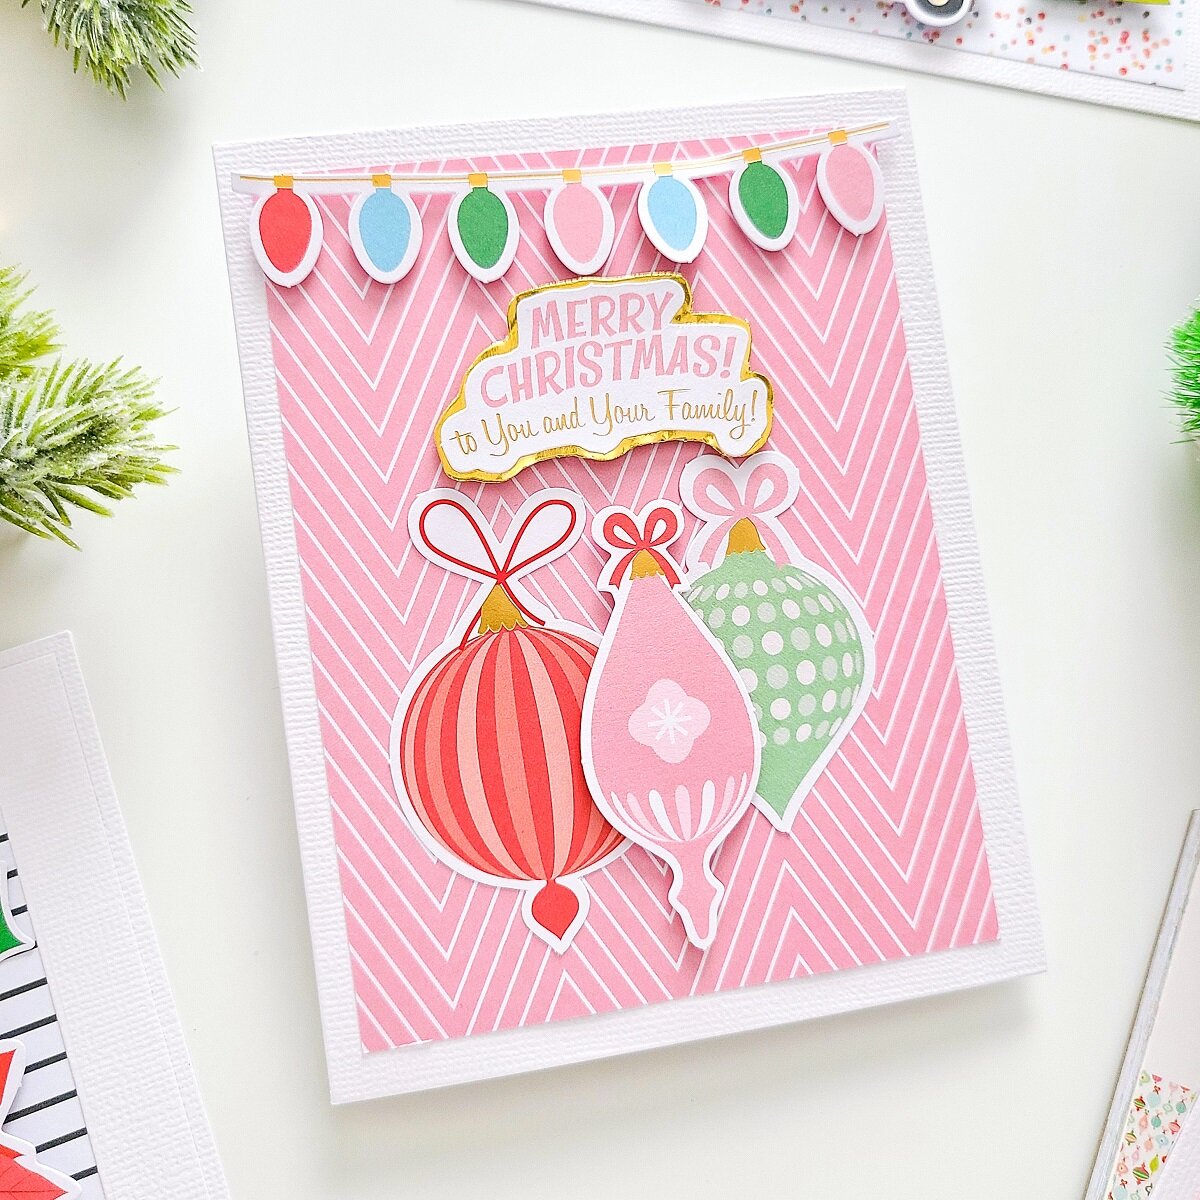
For the second example, I made a standard A2 portrait card so therefore, I’ve selected one of the patterned papers from the paper pad and I went ahead to trim the edges off from it slightly smaller than the card base. Next, I’ve gone ahead to adhere it down with double-sided tape to one of the textured card bases included in the kit.

Therefore, once I had the card base ready, I went ahead to add a bit of dimension by foam mounting a small white card panel (as shown in the image above) Moving on, after mounting the white card panel, I’ve gone ahead to glue down with liquid glue some die cut shapes and I’ve finished the card off by mounting one die cut shape as the sentiment for the card.
The third example was a quick and simple card to make so therefore, I’ve selected one of the patterned paper sheets and I’ve gone ahead to trim the edges off. Once, I’ve that step done I’ve adhered the backing of it with double-sided tape to one of the textured card bases.
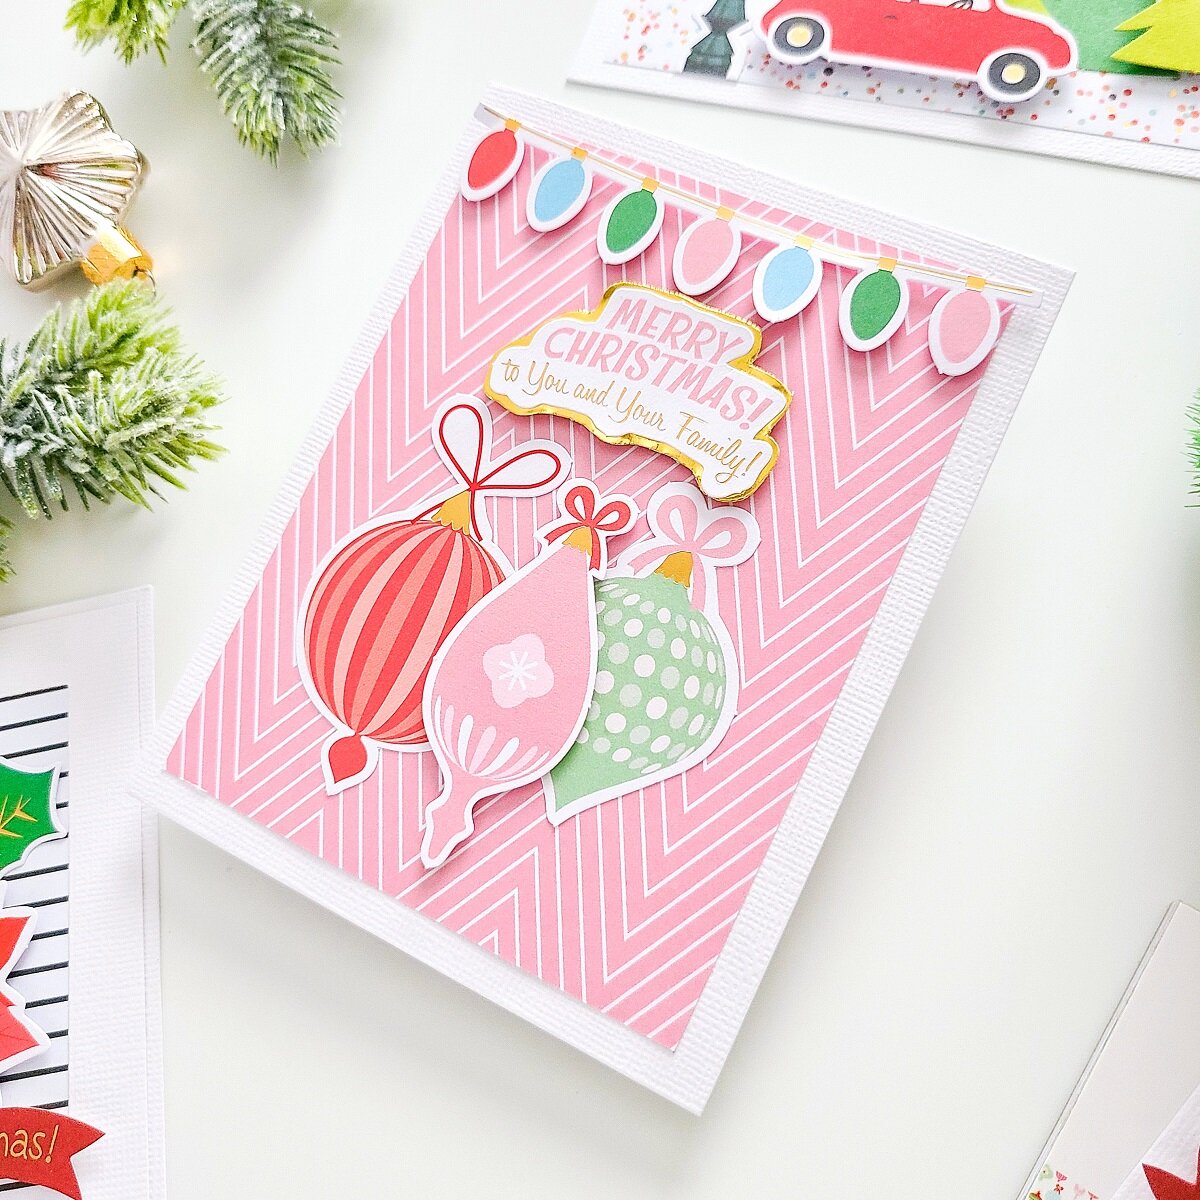
Then right after that, I’ve gone ahead to glue down with liquid and foam mount with dimensional some of the die cut shapes (as shown in the image above) Lastly, to finish the card off, I’ve used the same sentiment as the previous example but, to change things a bit first, I’ve gone ahead to gluing it down with liquid glue over a piece of gold cardstock which right afterwards, I’ve fussy cut and mounted with dimensional squares foam.

For the fourth example, I made a card on a landscape form however, instead of using a single patterned paper sheet, I’ve gone ahead to create a background panel using a piece of patterned paper, pink cardstock and a strip of gold cardstock.

Therefore, once I’ve had created the card panel, I’ve gone ahead to assemble the card with the selected die cut shapes using liquid glue and dimensional squares foam. Then, to finish the card off I’ve gone ahead to glue down with liquid glue some sequins to add a touch of shine.

For the fifth example, I made a snowy/wintry card using the snowflake and snowmen die cut shapes so therefore, I’ve gone ahead to trim the edges off from the patterned paper sheet which happened to have snowflakes like if they were meant to be together isn’t that right!? LOL.

That said, after I’ve done trimming the edges off from the card panel, I’ve gone ahead to adhere it down to one of the textured card base, and soon after that, I’ve started the assembling for the card. Thus, to do that I’ve gone ahead to get some of the snowflakes stacked while I’ve left others as is so, after I’ve gotten them stacked, I’ve gone ahead to glue them down with liquid glue to the card (as shown in the image above) Lastly, I’ve glued down one snowman while I foam mounted the small one just to add dimension. Finally, to finish the card off I’ve adhered down one of the puffy stickers using it as sentiment as well as small puffy stickers to embellish the card.

For the sixth example, I’ve made a traditional Christmas card using the poinsettia and Holly Leaves die cut shapes so therefore, I’ve gone ahead to adhered down over one of the card bases a patterned card panel which I’ve selected from the patterned paper. Next, I’ve lined up the largest and the third-to-last dies from the Nestabilities Essential Rectangles Etched Dies over a white card panel, and once I’ve them lined up, I’ve gone ahead to run them through Platinum 6 Die Cutting and Embossing Machine creating that way a white frame.

At first, I’ve got a shaker card in mind but, I’ve ended up using just the frame instead so, with that said after I’ve finished die-cutting the frame, I’ve gone ahead to adhered it down to the card and right after, I’ve mounted a cluster which I’ve create using the Poinsettia and Holly Leaves die cut shapes. Then, to finish the card off, I’ve gone ahead to adhered some of the puffy stickers and a die cut shape banner using them as the sentiments for the card.

For the seventh example, I’ve made a shaker card so therefore, I’ve trimmed down a card panel from the pink cardstock included in the kit. Next, I’ve gone ahead to inked it up using a little darker ink to add depth. Thus, after I’ve done that step, I’ve gone ahead to place the card panel inside my MISTI Stamping Tool and once I’ve had it onto place, I’ve gone ahead to add lot of Embossing Tool Powder. With being said, after I’ve done prepping the inked card panel, I’ve gone ahead to lined up 3 sentiment stamp images from the stamp set included in the kit, and once I’ve had them lined up, I’ve gone ahead to stamp them using WOW! Embossing Pad.

Therefore, after I’ve had finished stamping the sentiment, I repeated the same process but this time to stamp snowflakes around the sentiment thus, after I’ve done stamping the snowflakes, I’ve gone ahead to add WOW! Metallic Gold Rich and last but certainly not least, I’ve gone ahead to get the powder heat set using my WOW! Heat Embossing Gun Tool. Lastly, after I’ve finished the heat embossing over the card panel, I’ve gone ahead to trim the edge off it, and then I’ve created a die-cutting white frame just like I did in the previous example. Once, I’ve had the die-cut frame done, I’ve gone ahead to adhere a piece of acetate and then I started the assembling for the card. For the assembling, I stacked the inked and heat embossed card panel over a larger gold panel and then, I’ve adhered them to the card base next, I’ve added sequins and last but not least, I’ve mounted the frame using pieces of craft foam tape to add dimension. To finish the card off, I’ve gone ahead to embellish the card by gluing down some of the die cut shapes and a tiny puffy sticker.

For the eighth and last example, I’ve made another shaker card but, this time using the die set included in the kit which, create the cute Dancin’ Santa!
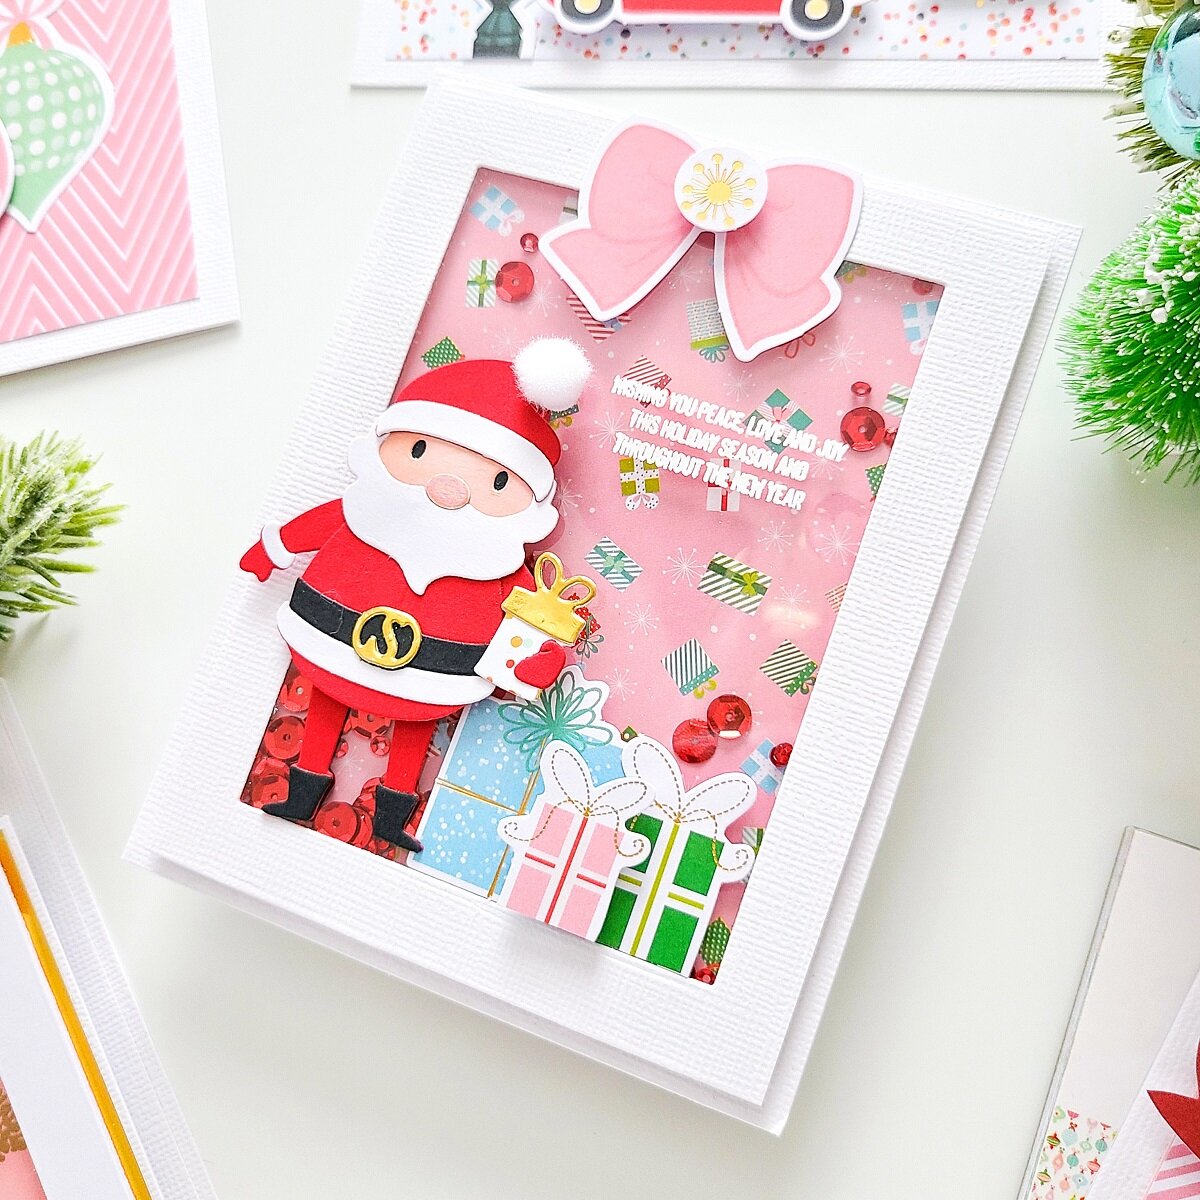
Therefore, I’ve created the shaker frame in the same way as I did for the previous example however, instead of stamping and heat embossing I’ve used one of the patterned paper. Thus, to make the Dancin’ Santa, I’ve gone ahead to die-cut each piece out of Gold, Red, White, Black and Skin color cardstock.

Finally, after I’ve finished die-cutting each piece, I’ve gone ahead to assemble the Dancin’ Santa and I’ve adhered it down to the card (as shown in the image above) To add a fun touch, I’ve glued down with hot glue a tiny white pom-pom to the Christmas hat and I’ve embellished the card with die cut shapes. Then, as a finish touch, I’ve gone ahead to white heat emboss a sentiment and with that being said friends, I hope that you’ve enjoyed reading about how, I’ve created this set of dimensional & colorful “Christmas” cards made using Die Cut Shapes, Chipboard Stickers, Sequins, Die, Stamp and the Patterned Paper Pad included in OCT-2020 “Dancin’ Santa” Card Kit of the Month by Spellbinders. As always, I appreciate the time that takes you to read my blog posts. Below, you’ll find the supply list for the products used on today’s blog post. And, if you get inspired by today’s projects and you give it a try, be sure to tag me on Instagram➝@cardsandcraftsbyyaz I’d love to see what you create.
Thank you and happy crafting.
Stay Awesome & Beautiful
— Today & Always —
Love,
Yasmin


More INFORMATION
FAQ About Spellbinders Kits
Your imagination is Your limit.
All photography provided by Yasmin Diaz


Creativity is contagious, pass it on.
–Albert Einstein
Disclosure
I am creating this blog post with the purpose of sharing the way that I design my cards, the information provided here is based in my own opinion and creativity. I am not an expert by any means, and I only share the way that I design my cards. Most of the products use on my blog posts are personally purchased by me. However, I did receive the products by Spellbinders and WOW! Embossing Powder. Please, keep in mind that all referral links are added for you to know from either I purchase or receive the items from as, all of products shared and mentioned in each of my blog posts are simply because I use, and truly love them.