
Pinkfresh Studio Ink Pad Release Blog Hop
Happy Monday Friends! Today, I’m delighted to join Pinkfresh Studio new Ink Pads release blog hop! So, today I’d like to invite you to come and, hop along with us! If… you’re already hopping along, you should have arrived here from →Vicky Papaioannou’s but, in case you missed any stop along the way, no worries as, I’ll be listing down below the full lineup list which, starts with Pinkfresh Studio’s Blog. With that being said, let’s jump into the blog post as, I have two cards that, I’ve created featuring some of the colors from the Ink Cubes Sets ↓
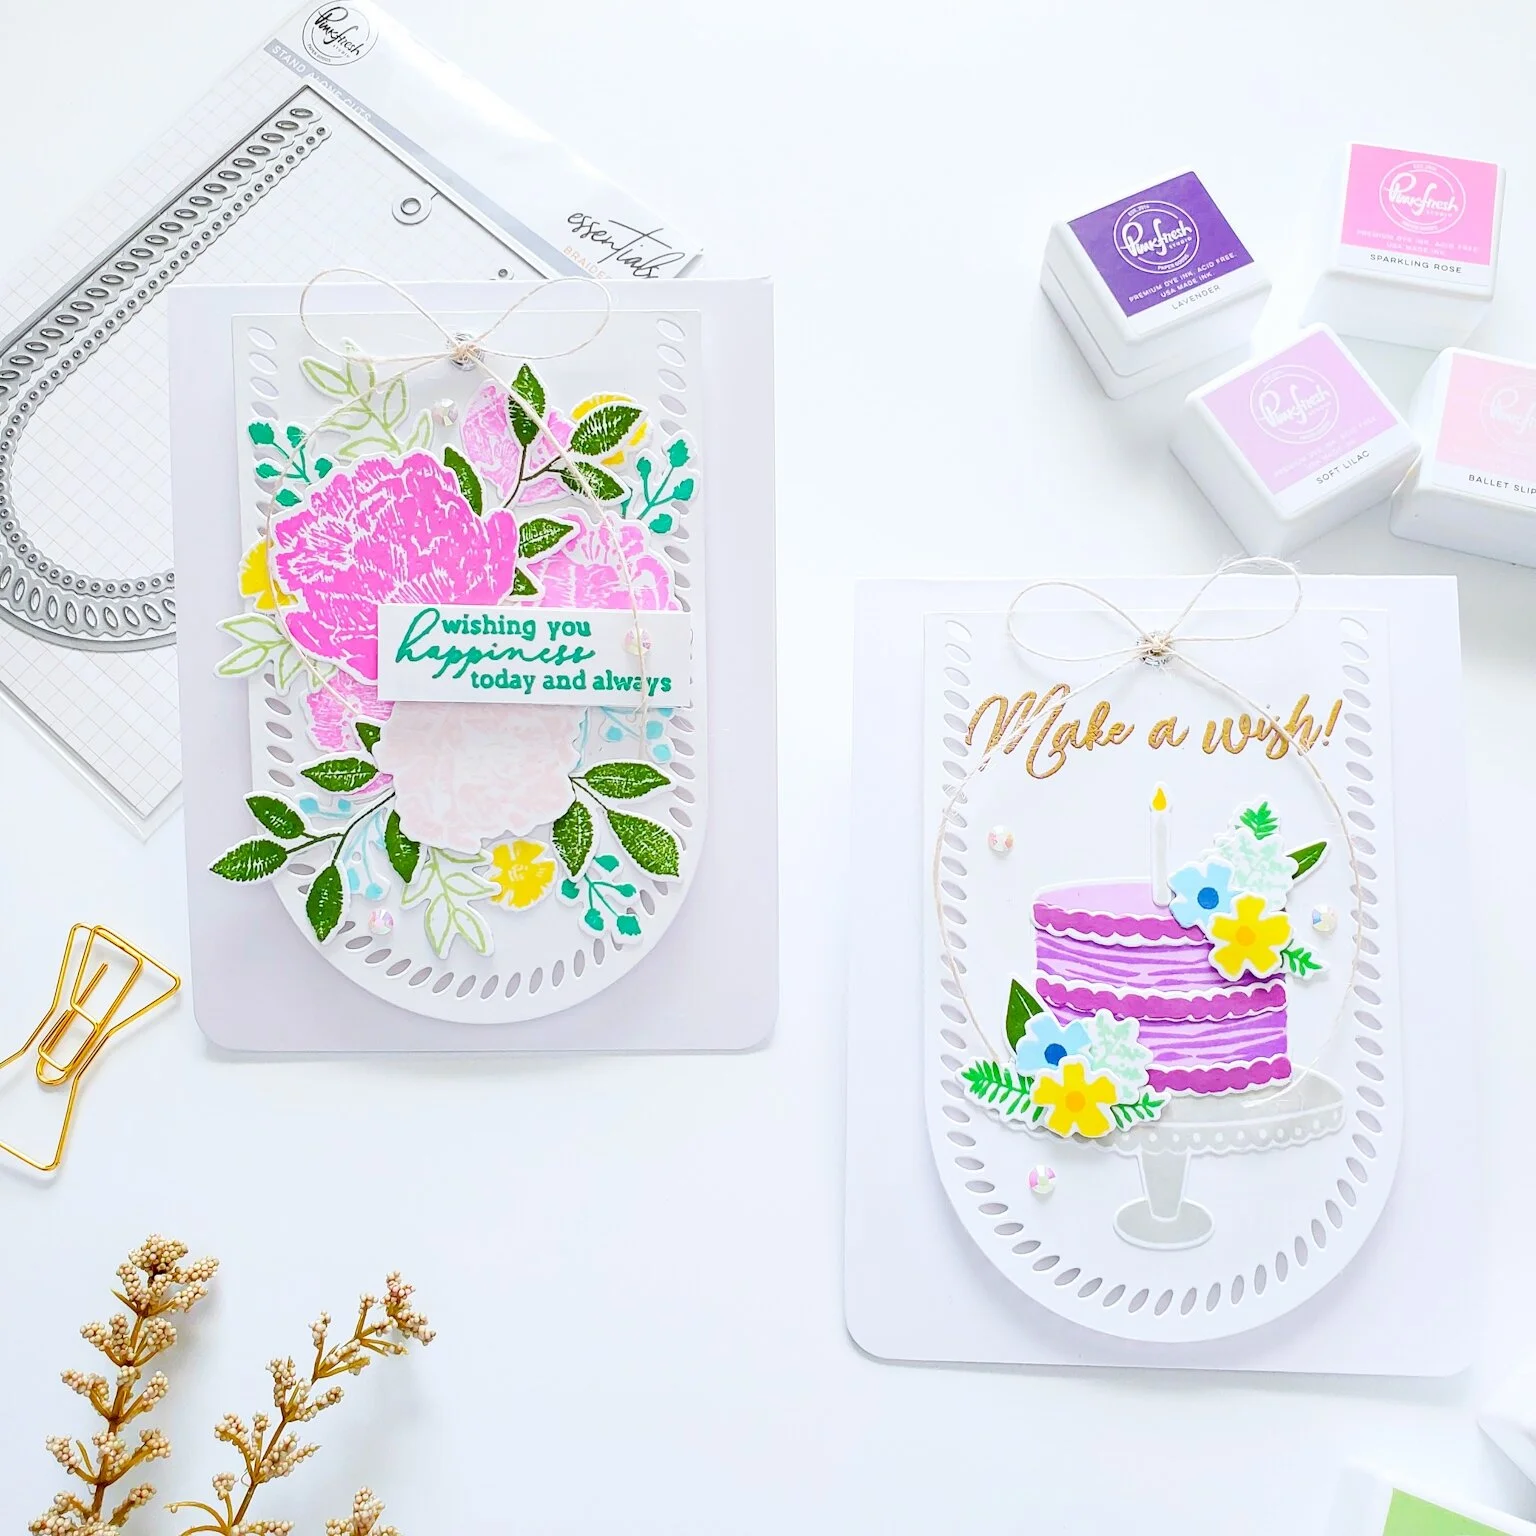
To create these cards, I started by scoring and folding in half two-top folding A2 standard size white card bases once they were folded, I set them aside. Next, I ran through the die-cutting machine the Braided Tag Die Set along with a white card panel 2X. Once, I had both die-cutting tags cut out of the card panels, I set them aside and I started the stamping.

For the first card, I stamped on a white card panel the roses from the Embroidered Blossoms Stamp Set with Bubble Gum, Sparking Rose and Ballet Slipper from the Fairy Dust Ink Cube Set. Next, I stamped the leaves with Olive and Fresh Pear from the Over the Hills Ink Cube Set. After the leaves, I stamped the berries with Ocean Breeze and Aquamarine from the Island Oasis Ink Cube Set. Lastly, I stamped a few little flowers with Lemon Whip from the Rise and Shine Ink Cube Set. Once, I was done with the stamping, I ran the stamped images through the die-cutting machine along with their coordinated dies from the Embroidered Blossoms Die Set. Right after when all die-cutting were cut out of the white card stock, I set them aside and I started the layering for the card.
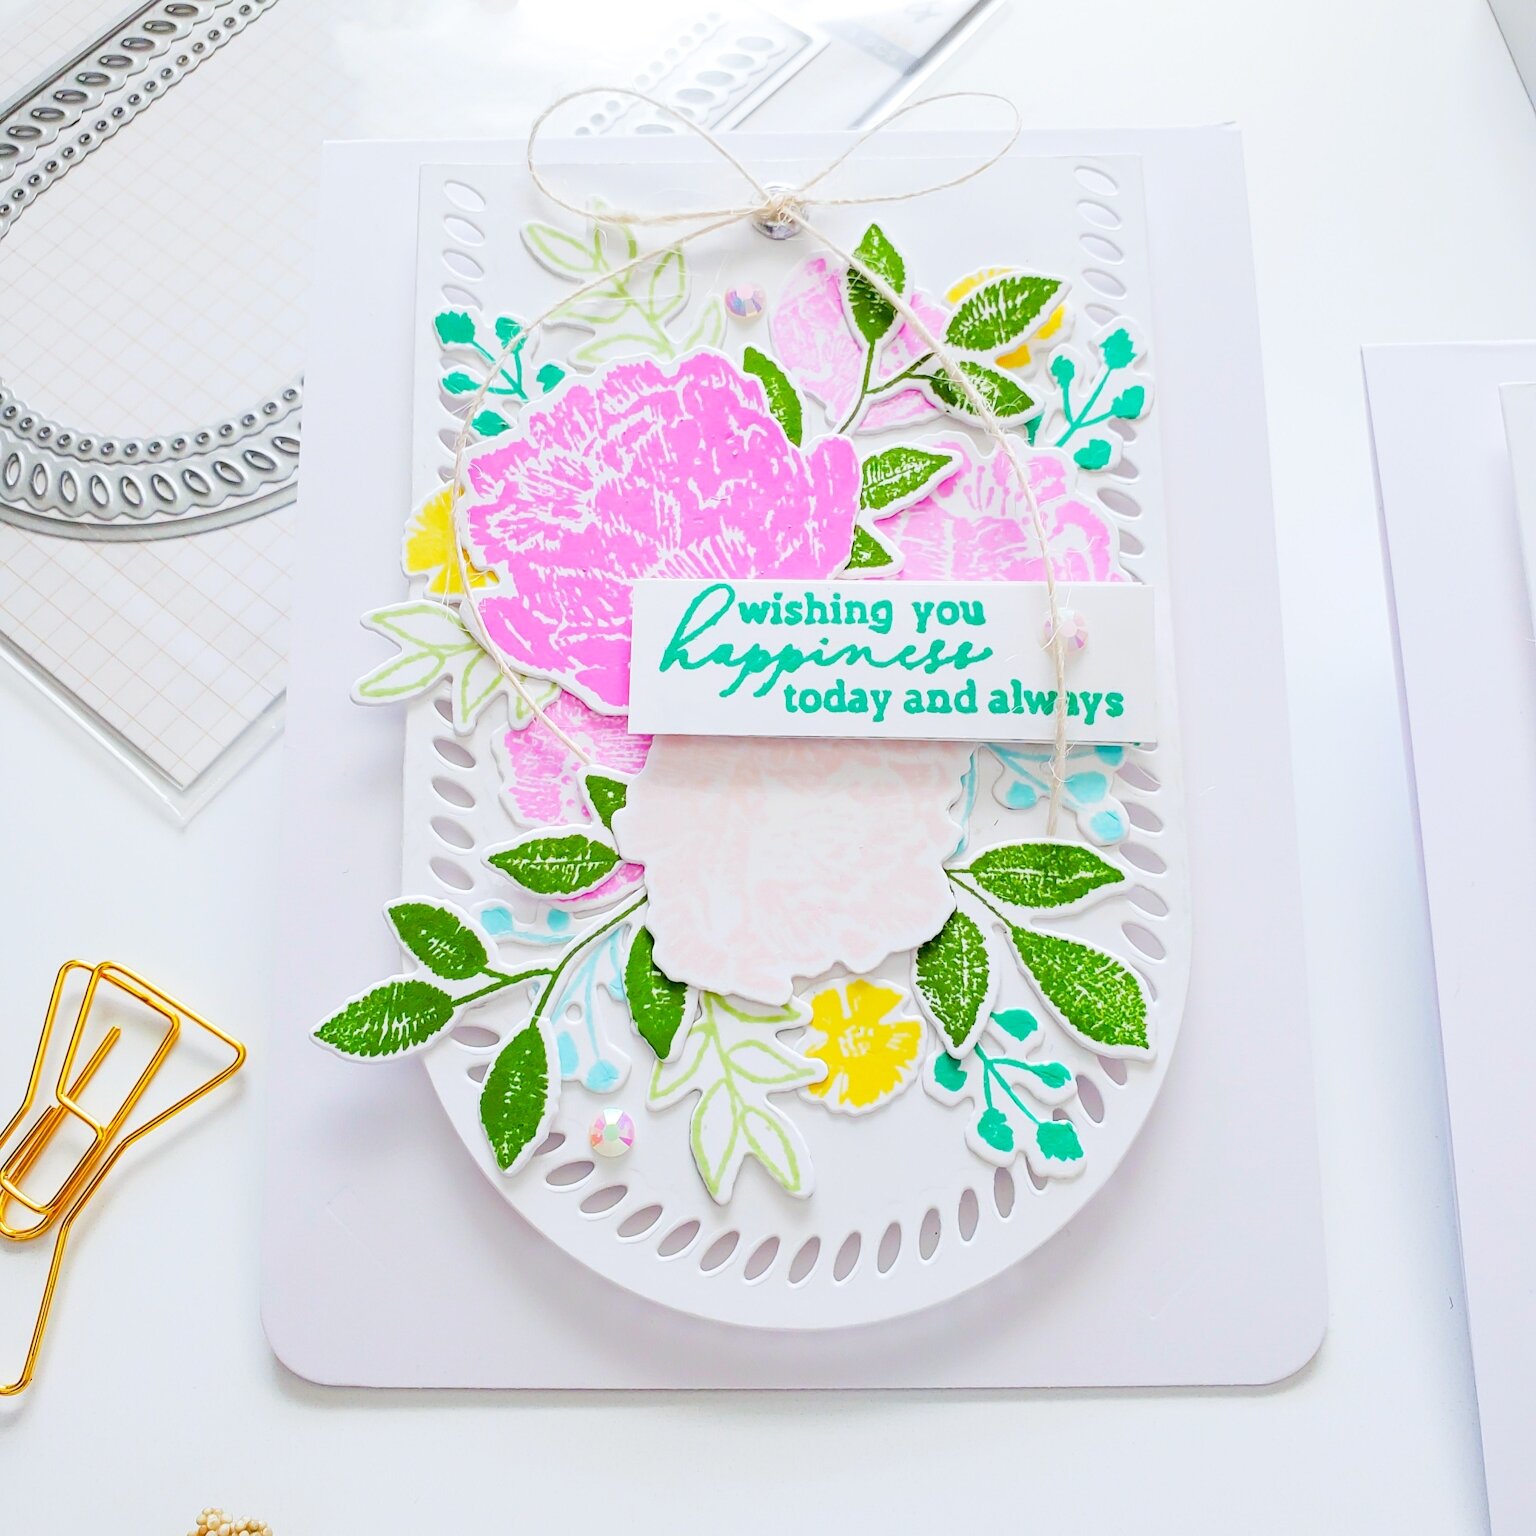
For the card layering, I started adding a silver eyelet to the little hole created from the die. Next, I tied a bow from a piece of Ivory Burlap String and, I adhered the bow on top of the eyelet as, you can see in the picture above. Right after that, I adhered the backing of the tag with foam mounting tape to the top folding white card base. Then, I adhered one by one the die-cuttings that, I’ve previously made until, I created a floral cluster on top of the tag. To create dimension, I adhered some of the die-cutting with liquid glue and others with foam mounting tape. Lastly, I stamped on a piece of white card stock a sentiment from the Folk Hummingbird Stamp Set with Aquamarine. To finish the card off, I adhered here and there some Jewels Mix.

To make the second card, I stamped on a piece of white card stock the base layer of the cake from the Make a Wish Stamp Set with Soft Lilac, the inner detailed cake layer with Lavender and the topping with Candy Violet all 3 colors from the Soul of Provence Ink Cube Set. Then, I stamped some leaves with Meadow and Mint from the Garden Stroll Ink Cube Set. Last but not least, I stamped some tiny little flowers with Sweet Mustard and Marigold from the Rise and Shine Ink Cube Set and some with Sky Blue and Storm from the Morning Sky Ink Cube Set. To finish the stamping off, I stamped the base for the cake with Misty Coast from the Urban Raincoat Ink Cube Set. Once the stamping was done, I ran the stamped images along with their coordinated die from the Make a Wish Die Set through the die-cutting machine to die-cut all images out of the white card stock.

As, for the card layout, I gold heat embossed directly on the tag a sentiment from the Make a Wish Stamp Set with Metallic Gold Rich Embossing Powder as you can see, I kept it very simple by adding the silver eyelet and the burlap bow same as, the dimension for the card base. As, for the design itself, I adhered the vase for the cake to the lower part of the tag then, I adhered the backing of the cake and its toppings to the vase, as well as the flowers and the leaves. Finally, to finish the card off, I adhered here and there some jewels and the candle which I stamped and die-cut it out of white card stock. With that being said, I hope these cards inspire you to give these designs and the new Ink Pads a try! Don’t forget to leave a comment in the comment section below for a chance to win a $25.00 gift card more information below.
Blog Hop Full List
Pinkfresh Studio
Amanda-Jayne Baldwin
Anett Gelencsér
Angelica Conrad
Ashlea Cornell
Ashley Horton
Caly Person
Cathy Zielske
Channin Pelletier
Elsie Robinson
Emily Midgett
Erica Thompson
Heather Hoffman
Ivana Camdzic
Jana Maiwald-McCarthy
Jessica Frost Ballas
Jung AhSang
Kelly Lunceford
Kristina Pokazenieva
Laura Bassen
Lea Lawson
Missy Whidden
Natasha Valkovskaya
Nathalie DeSousa
Nichol Spohr
Rebecca Luminarias
TaeEun Yoo
Vicky Papaioannou
Yasmin Diaz ← (You Are Here)
Zsoka Marko ← (Next Stop)
Vincenza Gudor
Giveaway

Pinkfresh Studio will be giving away the Full Sized Ink Pad release on the Pinkfresh’s Blog, and the Full Mini Cube release on their Instagram Feed.
Plus, you will have the chance to win a $25 gift card from each stop along the way. You’ll find the full lineup list down below, the more comments the more chances you’ll have to win. As per usual with blog hops - the winners will be picked from the comments.
The winners will be announced on Monday, Oct 21st over at the Pinkfresh Studio GIVEAWAY PAGE. So, you must check their page & claim the prize within 2 weeks.
Supply List
Braided Tag Die Set
Make a Wish Stamp Set
Make a Wish Die Set
Embroidered Blossoms Stamp Set
Embroidered Blossoms Die Set
Folk Hummingbird Stamp Set
Fairy Dust Ink Cube Set
Rise and Shine Ink Cube Set
Morning Sky Ink Cube Set
Island Oasis Ink Cube Set
Over the Hills Ink Cube Set
Soul of Provence Ink Cube Set
Garden Stroll Ink Cube Set
Urban Raincoat Ink Cube Set
Jewels Mix
Ivory Burlap String
Inkadinkado Embossing Powder Tool
Cougar 110# Heavy Weight Card Stock
Metallic Gold Rich Embossing Powder
WOW! Embossing Ink Pad
WOW! Heat Embossing Gun Tool
Thank you and happy crafting, your time is valuable.
Don't forget to keep spreading kindness, Today and Always.
Best,
Yasmin
Your imagination is Your limit.
All photography provided by Yasmin Diaz


Creativity is contagious, pass it on.
–Albert Einstein
Disclosure
I am creating this blog with the purpose of sharing how I design my cards, the information provided here is base in my own opinion and creativity. I am not an expert by any means, and I only share the way that I design my cards. Most of the products used for my blog posts are personally purchased by me. However, I did receive the Ink Cube sets by Pinkfresh Studio and, some of the WOW! Embossing Powder products used for this blog. Please, keep in mind that, all referral links were added for you to know from where I purchased or received the items from as, all of products shared and mentioned in each of my blog posts are simply because I use, and truly love them.