
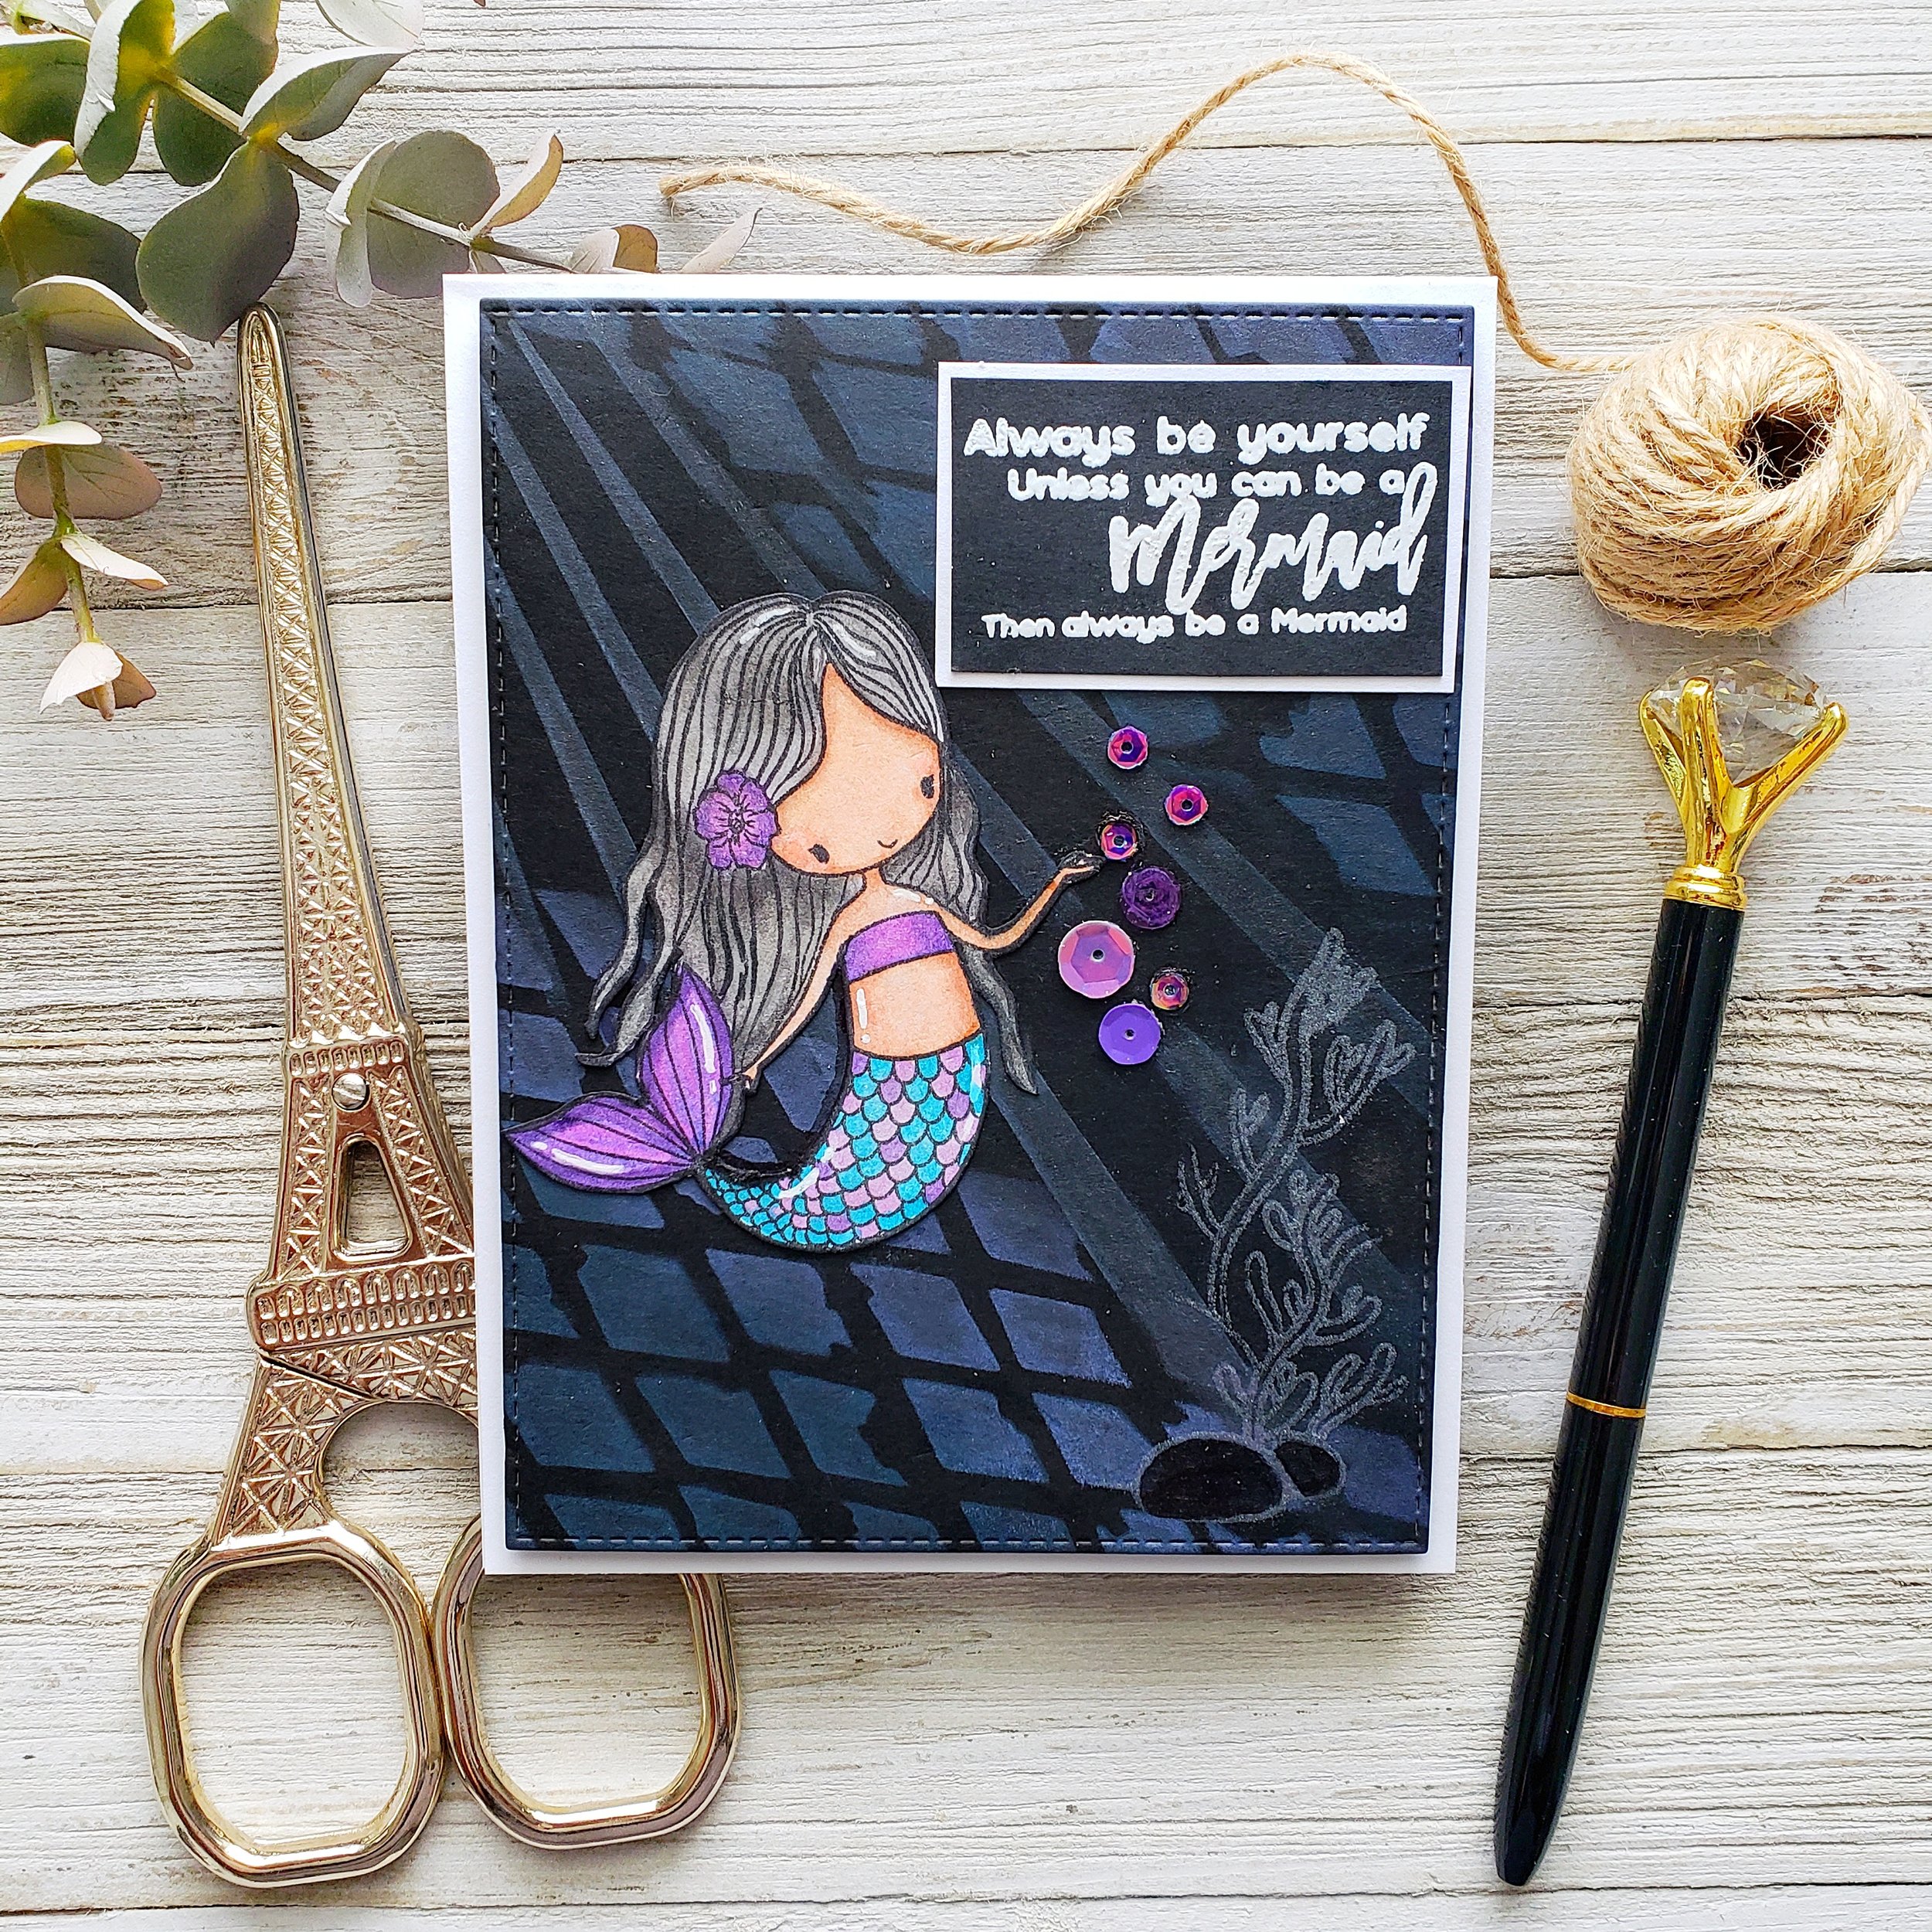
Mermaid Card
Hello dear Friends, first of all I want to start this Blog by Thanking You for stopping by. Then, I would like to share a Mermaid card that I've created during the Weekend. Inspired by all of you and all of those beautiful under the Sea scenes. So let's get started.

Background
First, I started by inking up the Diamond in the Rough Stencil on top of a black cardstock piece with Wilted Violet and Mermaid Lagoon Distress Oxides Inks by Rangers creating the illusion of fish scales on the corners of the background. Then, I left it dry out while I was stamping and coloring.
![20180811_163309-01[1].jpeg](https://images.squarespace-cdn.com/content/v1/5b46b1ad506fbeb9b8850ffd/1534117981228-IFLTW9ACCG43GCYDZXHO/20180811_163309-01%5B1%5D.jpeg)

Stamping
Second, for the stamping. Today I'm featuring these beautiful Mermaid stamp sets by Picket Fence Studios. The Mermaid and sentiment used for this card are from the I am a Mermaid set. And, the coral is from the Little Coral Girl stamp set. So, I stamped the Mermaid in a piece of 80# Neenah Classic Crest Solar White as I was going to color it with Copic Markers.

Coloring/embellishment
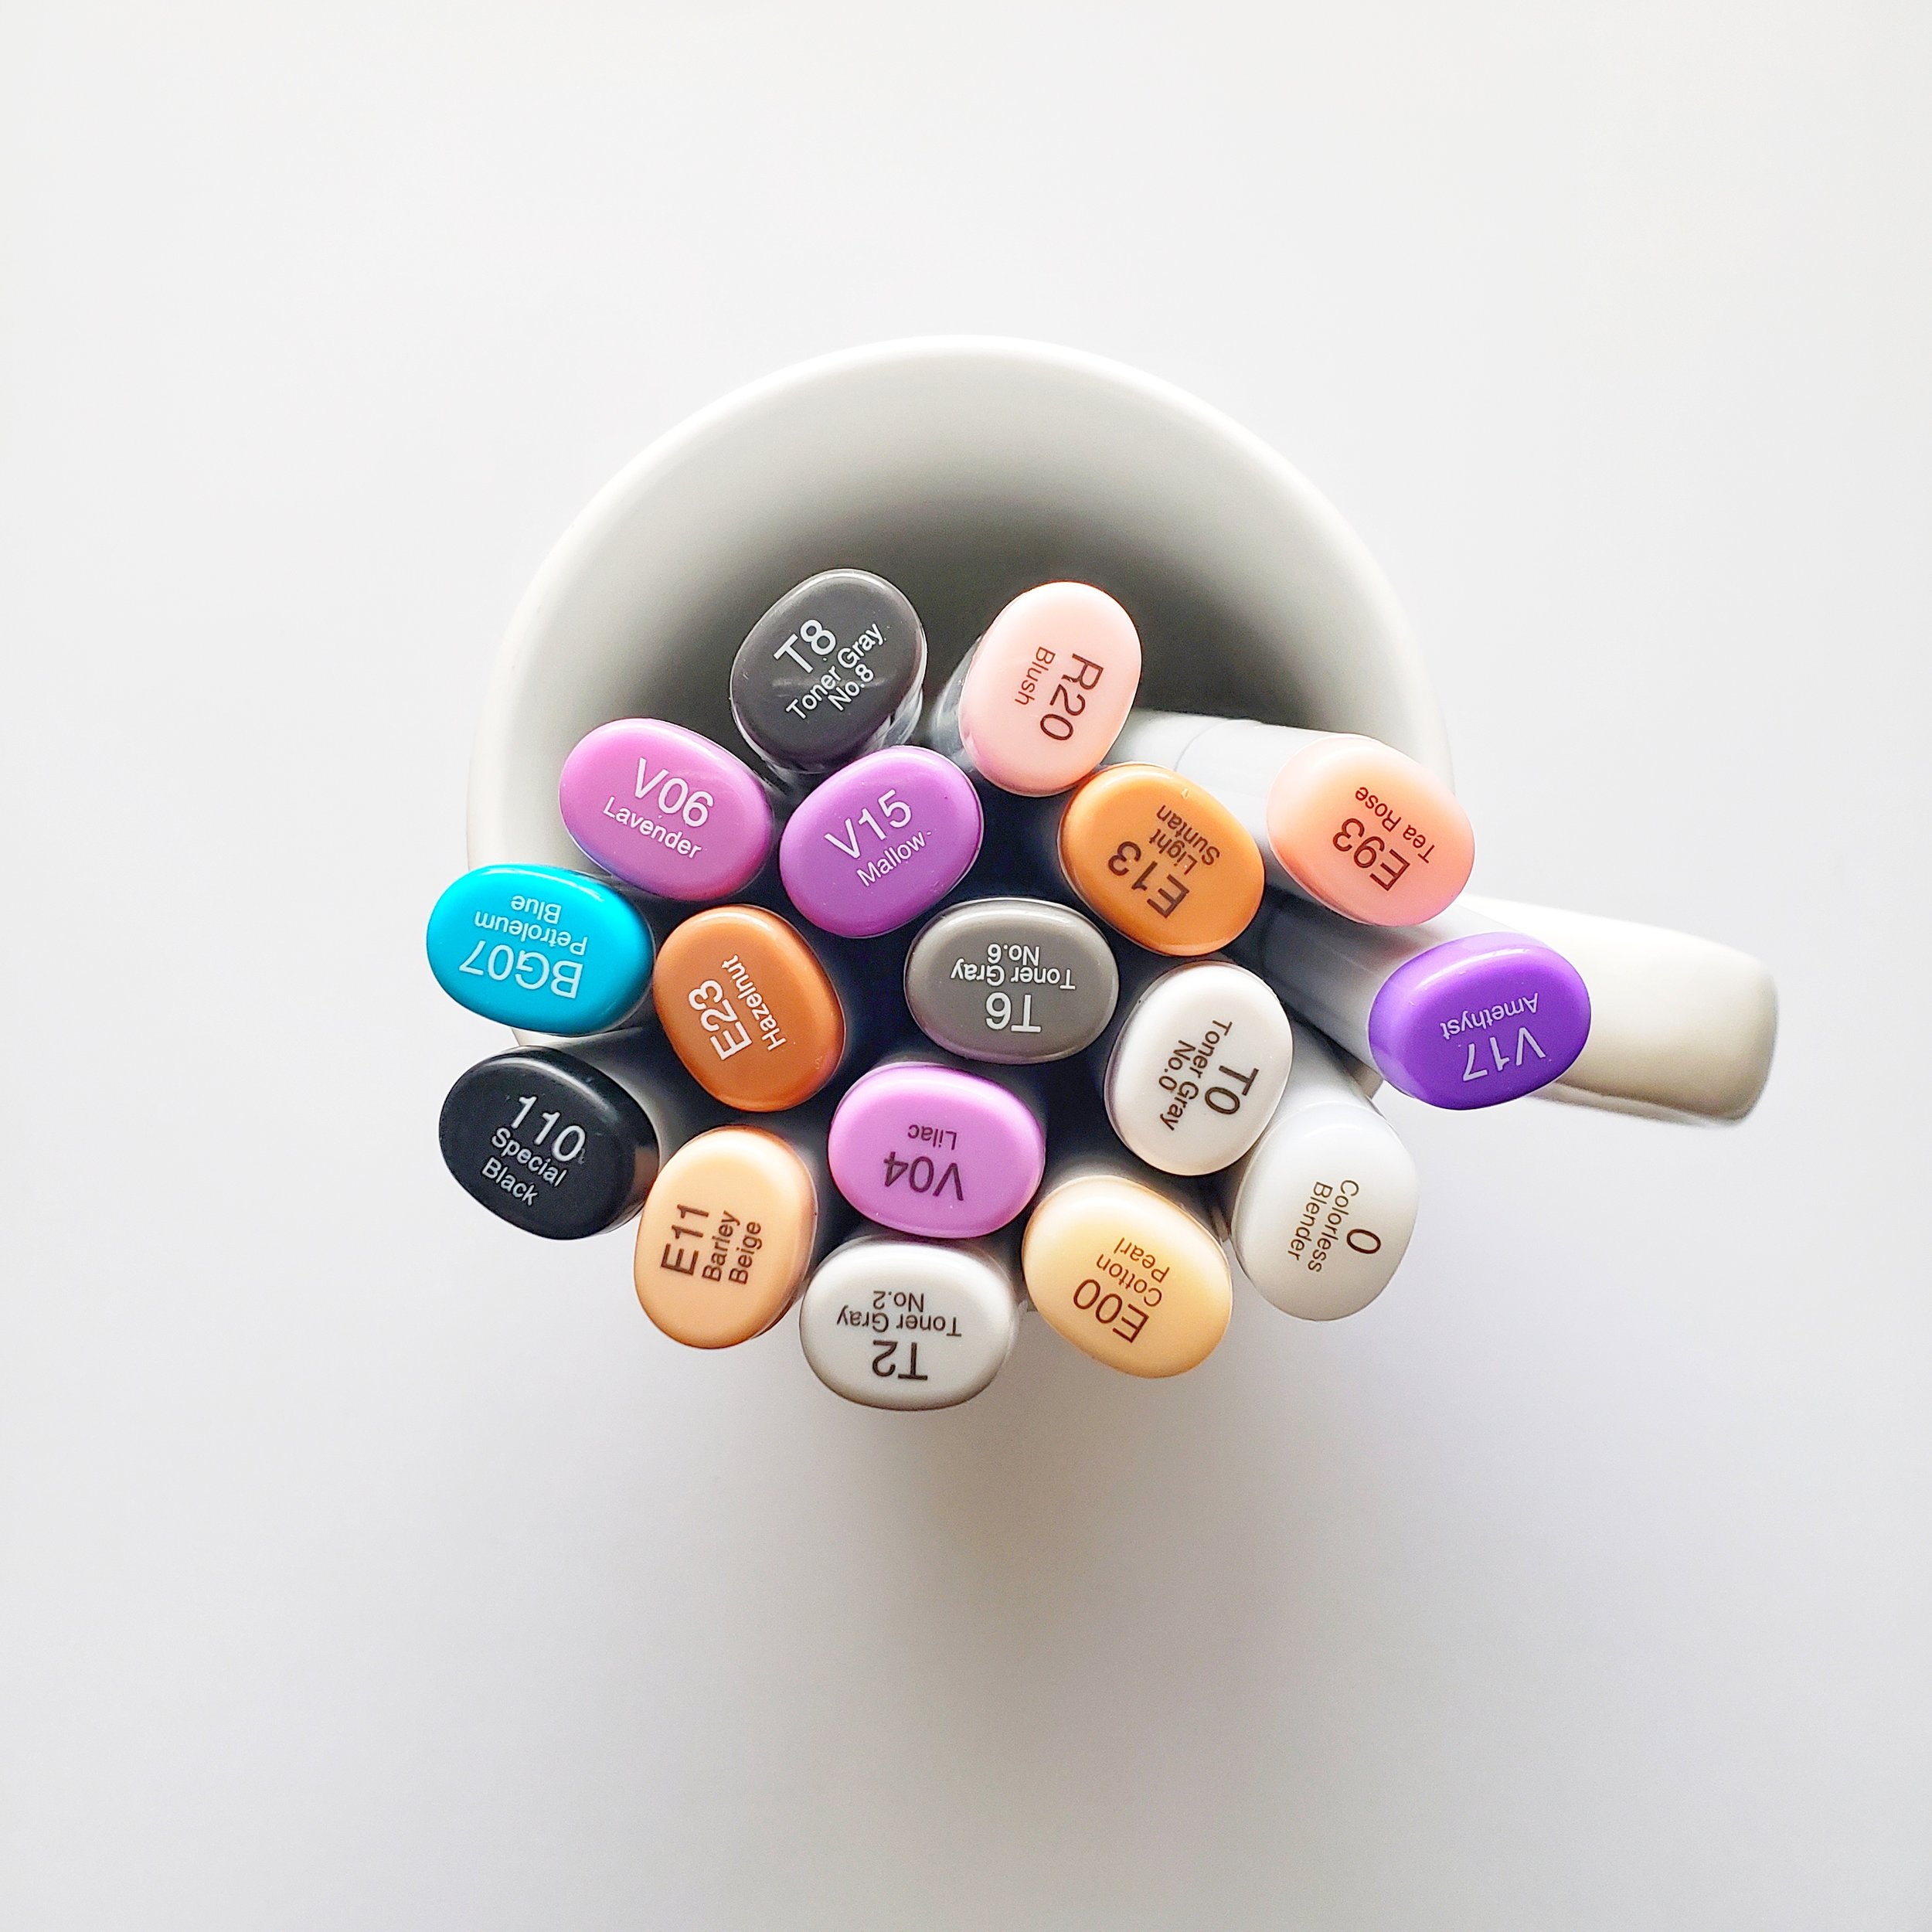
Third, this was probably the most challenging coloring that I've ever done throughout the cardmaking learning path. So, I know for sure that I still have so much to learn about coloring with Copics. But, for now these are the colors that I used to color the Mermaid .
Earth E00, E11, E13, E23, E93
Violet V04, V06, V15, V17
Tone T0, T2, T6, T8
BG07
Black 110 and of course! 0
For, the embellishment I used Happy Hour Mix sequins also by Picket Fence Studios. And, for the sentiment I white heat embossed it with the Clear Ultra Slow Drying Pad by WOW along with Fine Detail White Embossing Powder by Gina K Designs.

Layout
Before adhering anything on top of the panel. I inked up the Light Wide Rays stencil by Honey Bee Stamps (from their 4 piece Ocean Builder scene stencils set) with Versacolor Ultimate Pigment Ink in White to add light rays in the middle of the card panel. Then, I heat embossed the coral image with clear embossing powder. Because, there isn't under the sea scene without corals right?
Now, for the layering. First of all, I adhered with liquid glue the backed of the of the mermaid that I fussy cut after the coloring to the card panel. Then, I stamped the bubbles like if she was throwing them under the sentiment. But, unfortunately that did not go well so I ended up adding the sequins. Which, I think they look better than what I was expecting. For the sentiment I adhered a piece of white cardstock to make it stand out from the inked background. And, to finish it up I adhered the card panel to a 110# Neenah Classic Crest Solar White card base.
Your imagination is Your limit.
I hope you get Inspired and give this design a try! Just keep in mind, that you can create the same design with any stamp set or any combination of stencils and colors.
Thank You, your time is valuable. Don't forget to spread kindness, Today and Always.
Best,
Yasmin
All photography provided by Yasmin Diaz
Creativity is contagious, pass it on.
–Albert Einstein


Disclosure
I am no affiliated or sponsored by any company mentioned here. All products are personally purchased by me. I am creating this blog with the purpose of sharing how I design my cards. The information provided here is based in my own opinion and creativity. I am not an expert and I only share the way that I design my cards. I am sharing the products mention here, Because, I Use and Love them.