
Happy Sunday, crafty friends! On today’s blog I’d like to share with you this set of “Shaker Tag & Matching Card” made using a full array of stamp and die sets by Pinkfresh Studio. So, without further ado let’s jump right into the step by step on how I’ve made them ↓
To begin with, I started by lining up over a white card panel the large tag die from the Essentials: Shaker Tags and once I had them lined up, I ran them through my Platinum 6 Die Cutting and Embossing Machine. Therefore, after I had the first die-cutting tag done, I repeated the same step 3 more times to get 3 more white die-cutting tags. So, once I had that done, I lined up over one of the white die-cutting tags one of the large shaker window dies and I ran them through the die-cut machine.
Therefore, after I’ve had the shaker window over the die-cutting tag, I placed one of the die-cutting tags over my scoring board and I went ahead to score a lined over it at 1/4 of an inch mark. So, after I had that done, I folded the scoring line and I went ahead to get adhered a strip of doubled-sided tape. Then, right after that I peeled off the backing of the double-sided tape and I carefully got adhere a second die-cutting tag creating that way not only a hinge but, also creating the card base with the shape of a tag.
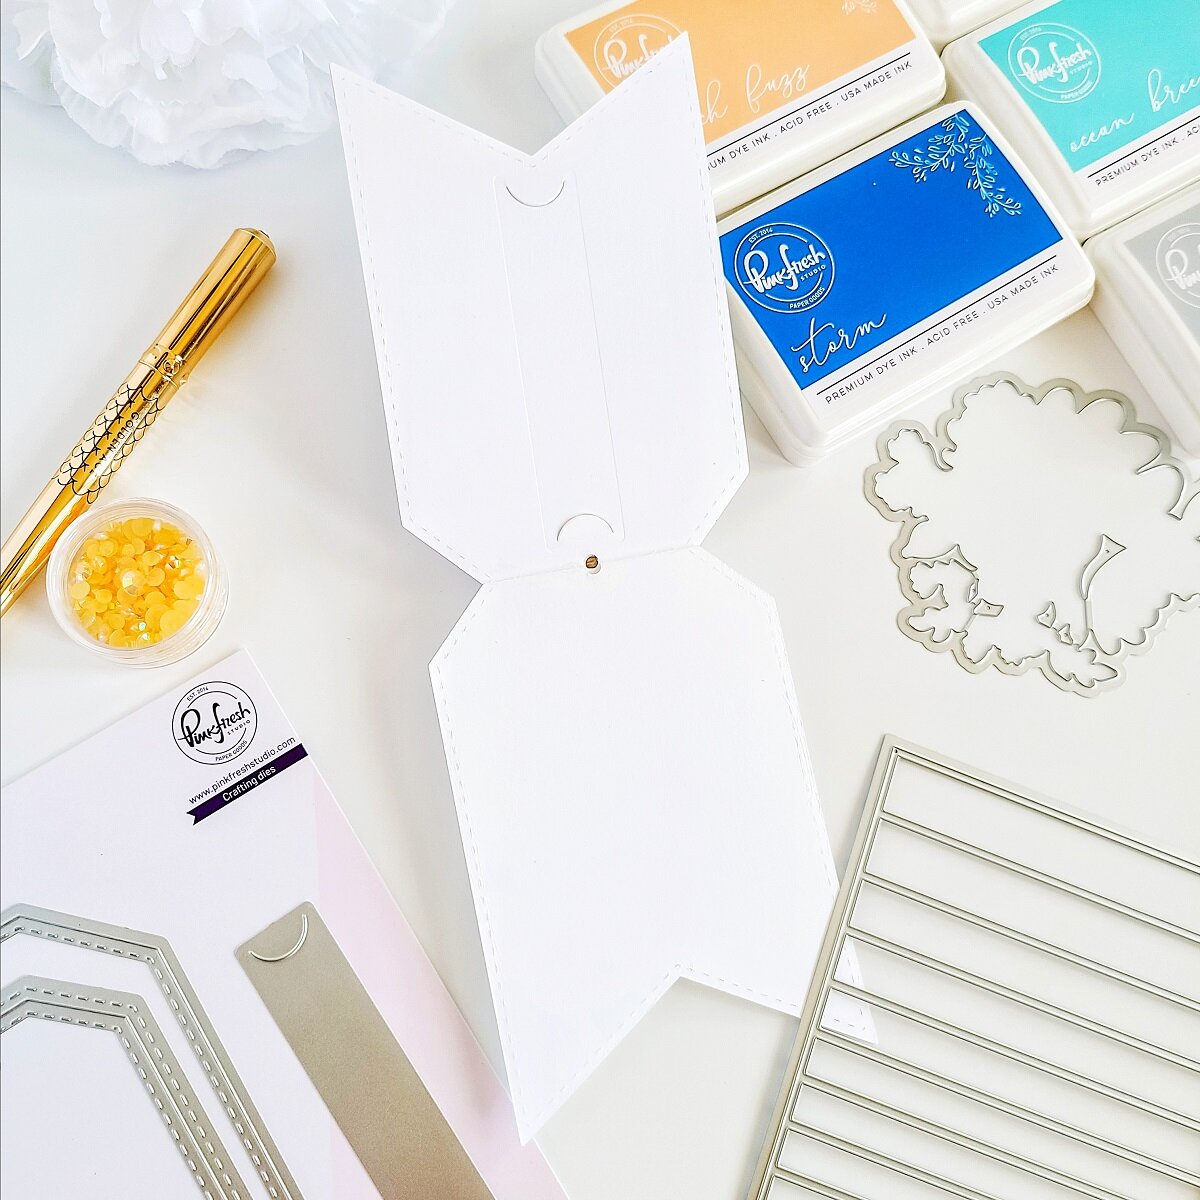
Thus, after I had the card base done, I lined up the gift card notch die over the top side of the card base and I ran it through the die-cut machine, and once I had that done , I set the card base aside and I proceeded to get the stamping and embellishment done.

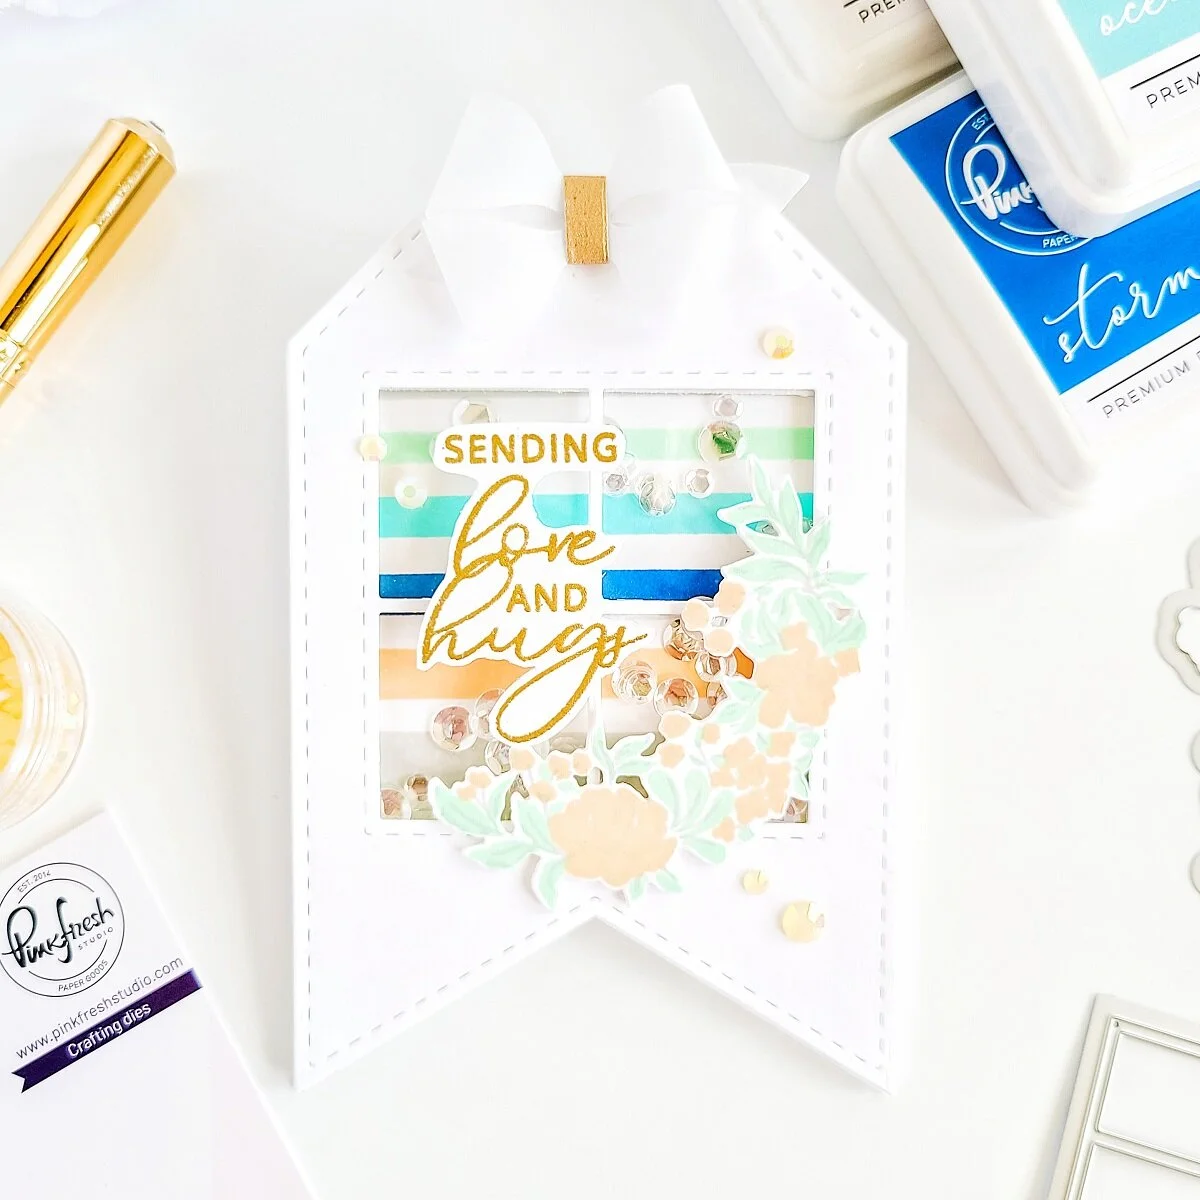
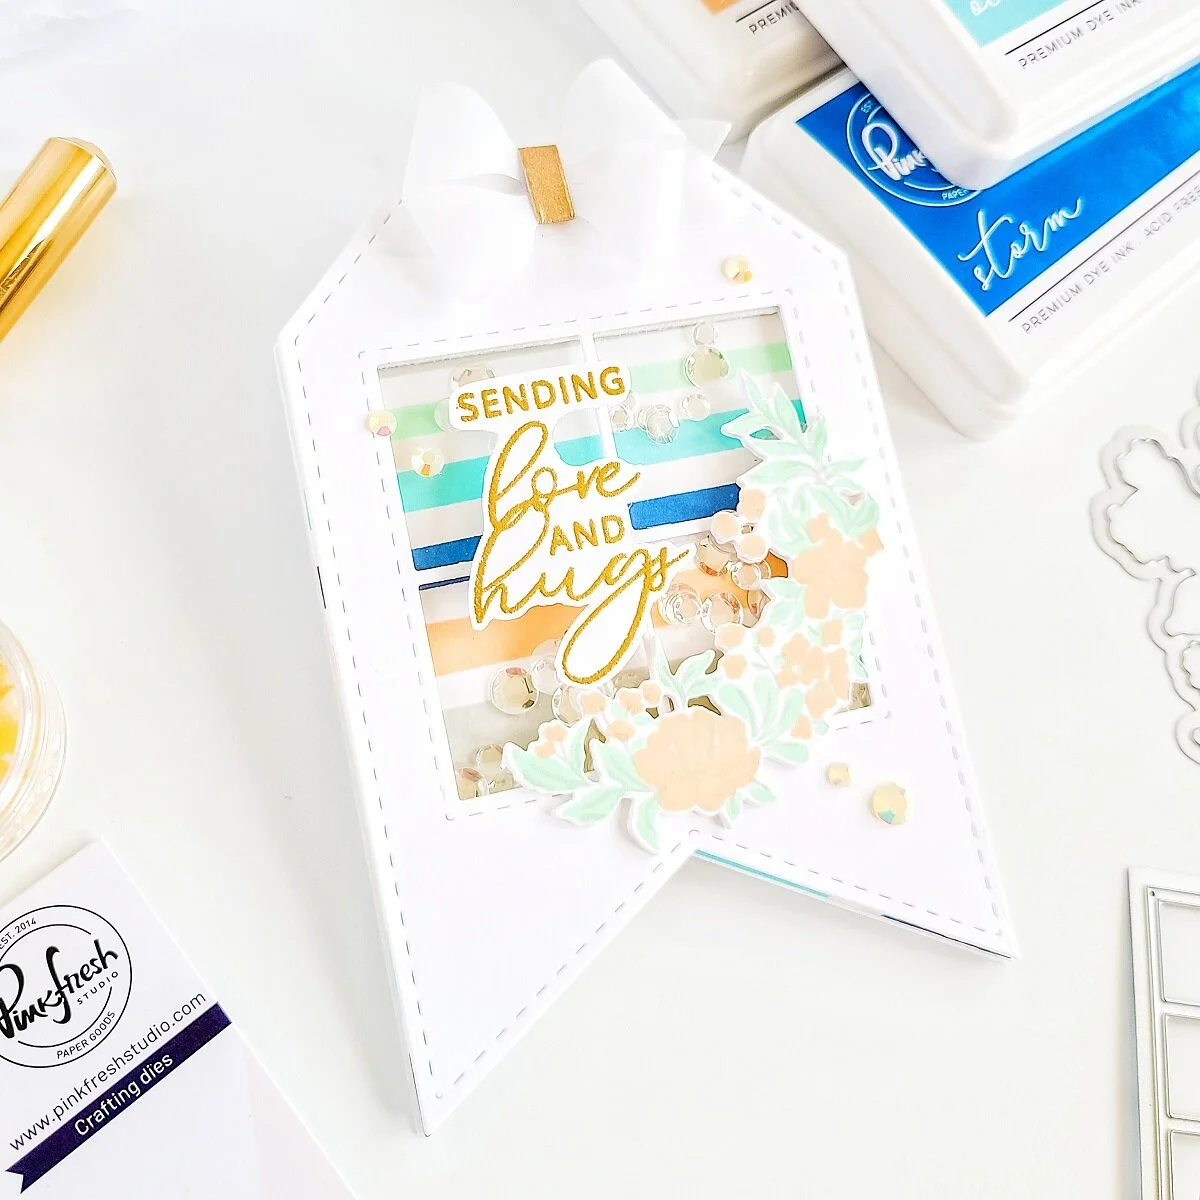
Moving on, for the stamping I went ahead to place one of the die-cutting tags inside the stamping tool and then, I lined up over it the Color Block: Gradiating Stripes Cling Stamp. Once both were lined up, I carefully got each of the stripes from the stamp, stamped with the following color inks: Misty Coast, Peach Fuzz, Mint, Ocean Breeze and Storm. Therefore, once I had the stamping done, I removed the tag from the stamping tool, and I went ahead to get it adhered with double-sided tape over the tag-card base. Lastly, after I had that done, I adhered with double-sided tape a piece of acetate to the last die-cutting tag, and once I had that done, I added crystal sequins over the card base, and I finished the shaker-shaped card base by mounting with craft foam and double-sided tape the die-cutting tag with the shaker window. Finally, after I’ve finished the shaped-card base, I added the last touches by gluing down a sentiment (as shown in the image above) which by the way, I had previously stamp, gold heat emboss and fussy cut out of a piece of white cardstock, as well as a floral piece which I also stamped and die-cut it out of white cardstock using one of the floral images from the Charming Floral Wreath Stamp Set and its coordinated die from the Charming Floral Wreath Die Set.
NOTE: The sentiment used in the shaker tag is included in the Sending Love and Hugs Stamp Set.
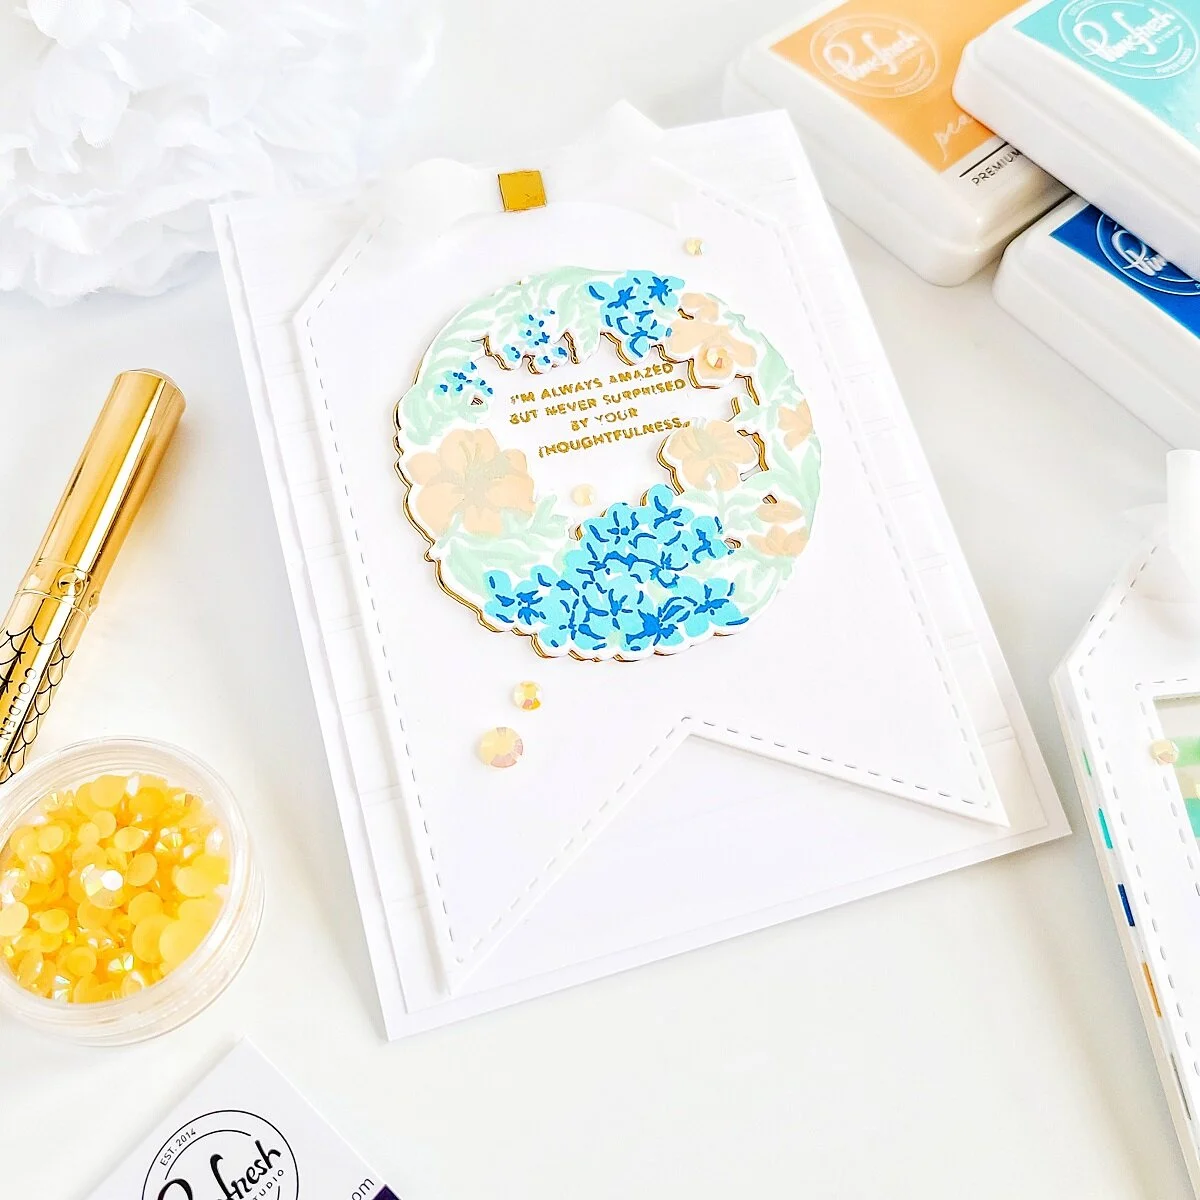
For the matching card, I lined up over a white card panel the Color Block: Gradiating Stripes Die and once I had them lined up, I went ahead to run them through the die-cut machine not to die-cut it out but, to get a dry emboss impression so I could add texture to the card panel. So, once I had that done, I trimmed the edges down from it and I went ahead to get it adhered with double-sided tape to an A2 top folding white card base. Thus, right after that I mounted with craft foam and double-sided tape a die-cutting white tag to add dimension, and then I set the card base aside to get the stamping and die-cutting done.
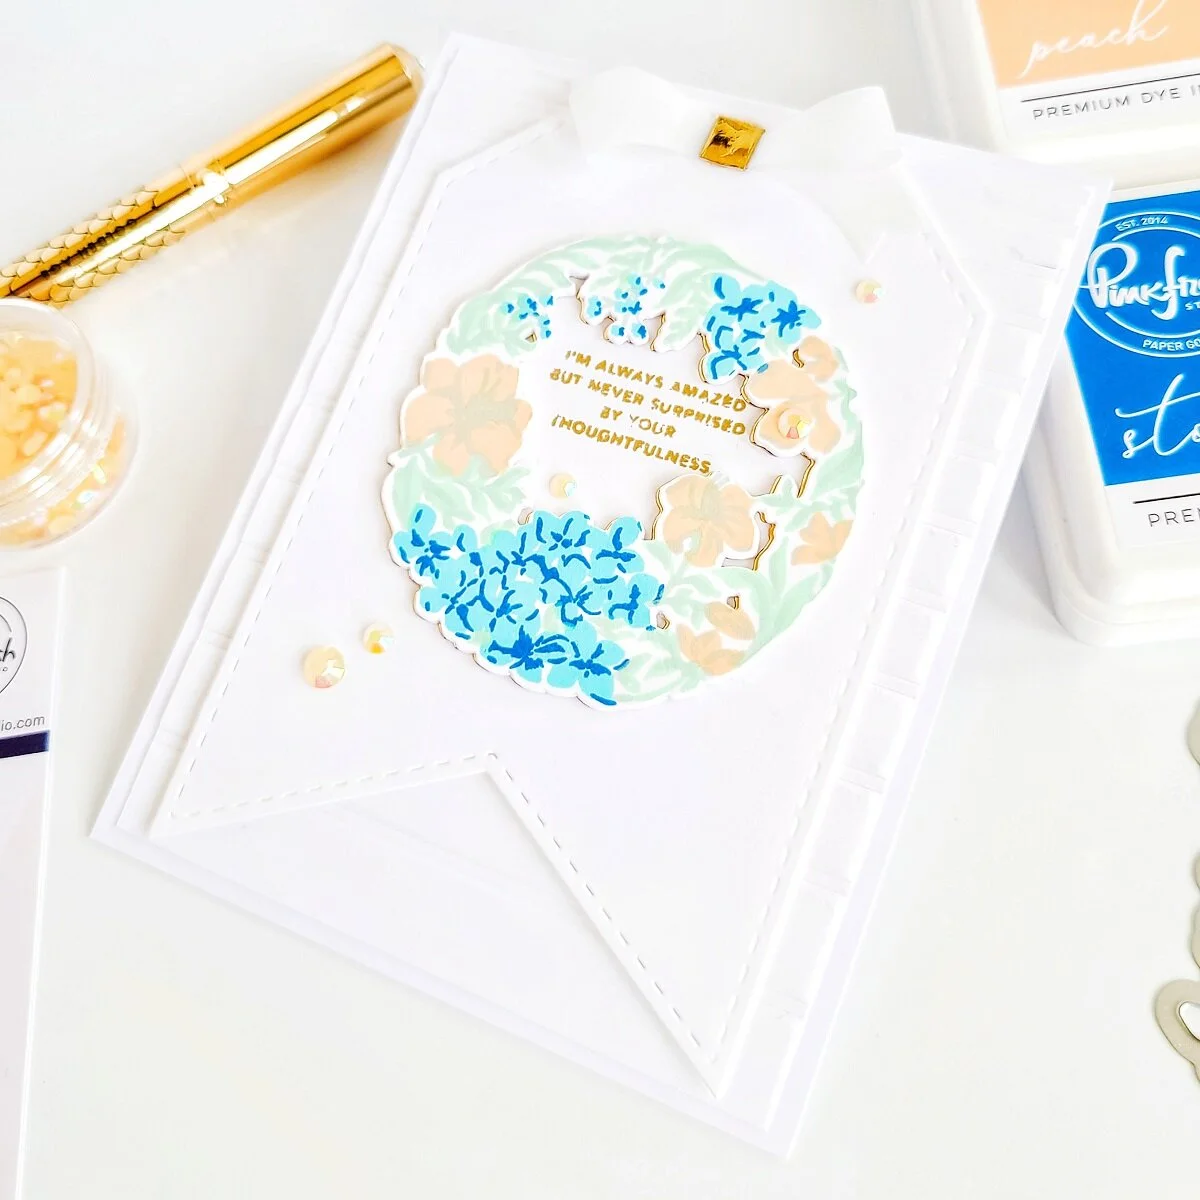
For the stamping, I went ahead to stamp the wreath from the Every Good Thing Stamp Set using the same color inks so, once I had the stamping done, I lined up the coordinated die from the Every Good Thing Die Set and I run them through the die-cut machine to cut it out of the cardstock. Therefore, once I had that step done, I went ahead to die-cut a second wreath out of gold cardstock and once I had that done, I glued down a bit offset to the right with liquid glue the stamped wreath over the gold wreath. Lastly, I glued down the wreath over the card base, and last but not least, I finished the card off by stamping and gold heat embossing a sentiment inside the wreath.

Finally, after I had finished the shaker tag and matching card, I decided to add the last touches to them so, for that I glued down with liquid glue here and there jewels and a translucent bow to each tag which I’ve had previously die-cut and assembled using the beautiful Artistic Bows Die Set, translucent vellum and glitter gold cardstock. With that being said, I hope you have enjoyed reading the step by step on how I’ve created this set of “Shaker Tag & Matching Card” using stamp and die sets by Pinkfresh Studio. As always, I appreciate the time that takes you to read my blog posts. Below, you’ll find the supply list for the products used on today’s blog post. And, If you get inspired by today’s projects… be sure to tag me on Instagram➝@cardsandcraftsbyyaz I’d love to see what you’re creating.
Thank you and happy crafting.
Stay Awesome & Beautiful
— Today & Always —
Love,
Yasmin
Supply List
Essentials: Shaker Tags
Charming Floral Wreath Stamp Set
Charming Floral Wreath Die Set
Every Good Thing Stamp Set
Every Good Thing Die Set
Sending Love and Hugs Stamp Set
Color Block: Gradiating Stripes Cling Stamp
Color Block: Gradiating Stripes Die
Artistic Bows Die Set
PFS-Ink Pads
Essentials: Jewel Mix
WOW! Metallic Gold Rich
WOW! Embossing Pad
WOW! Heat Embossing Gun Tool
Embossing Powder Tool
Crystal Confetti
Tool ‘n One
MISTI Stamping Tool
Platinum 6 Die Cutting and Embossing Machine
Cougar 110# Heavy Weight Card Stock
Your imagination is Your limit.
All photography provided by Yasmin Diaz


Creativity is contagious, pass it on.
–Albert Einstein
Disclosure
I am creating this blog with the purpose of sharing how I design my cards, the information provided here is base in my own opinion and creativity. I am not an expert by any means, and I only share the way that I design my cards. Most of the products used for my blog posts are personally purchased by me. However, I did receive the products by Pinkfresh Studio and WOW! Embossing Powder. Other than that, all referral links were added for you to know from where I purchase or receive the items from as, all of products shared and mentioned in each of my blog posts are simply because I use, and truly love them.