
Dixon Green Greenery Greeting Cards
Happy Sunday, wonderful crafters! On today’s blog I’d like to share with you four greenery cards that I’ve made using the beautiful WOW! Dixon Green embossing powder. And…let me tell you, I really had so much fun creating these cards as I loved so much the blend of colors that this powder added to the trees and leaves so without further ado, please keep on reading the post. ↓
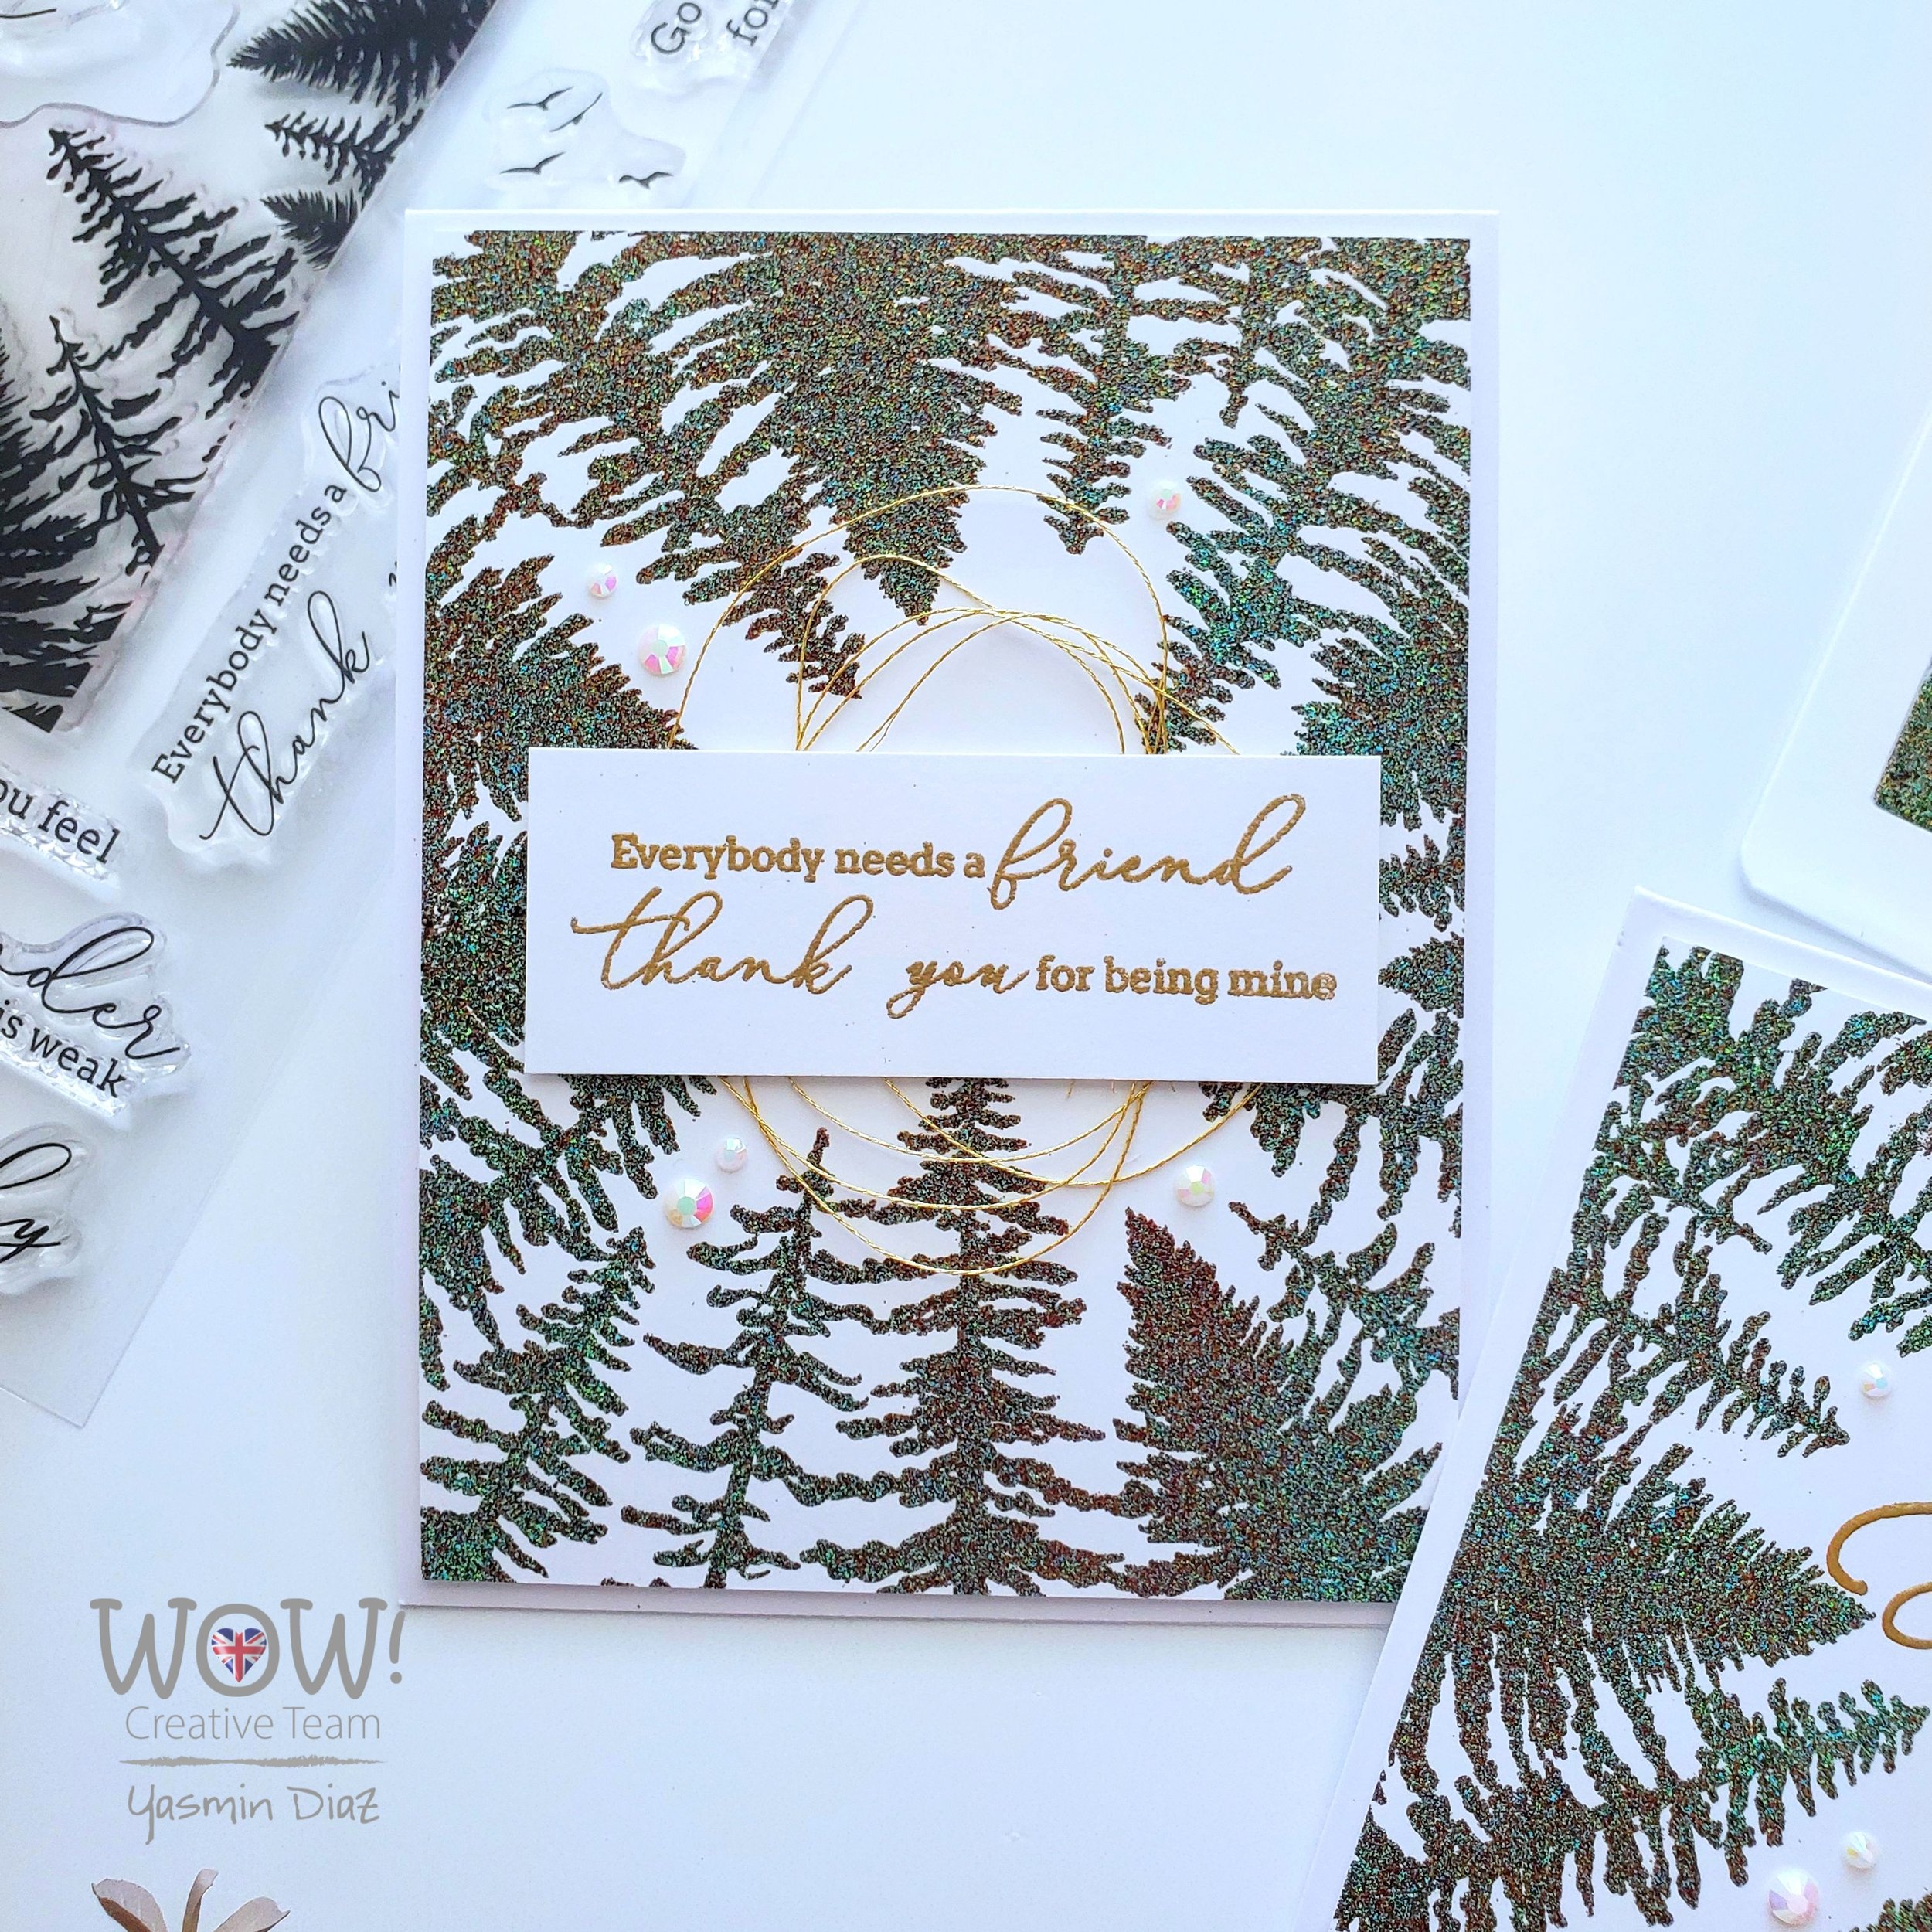
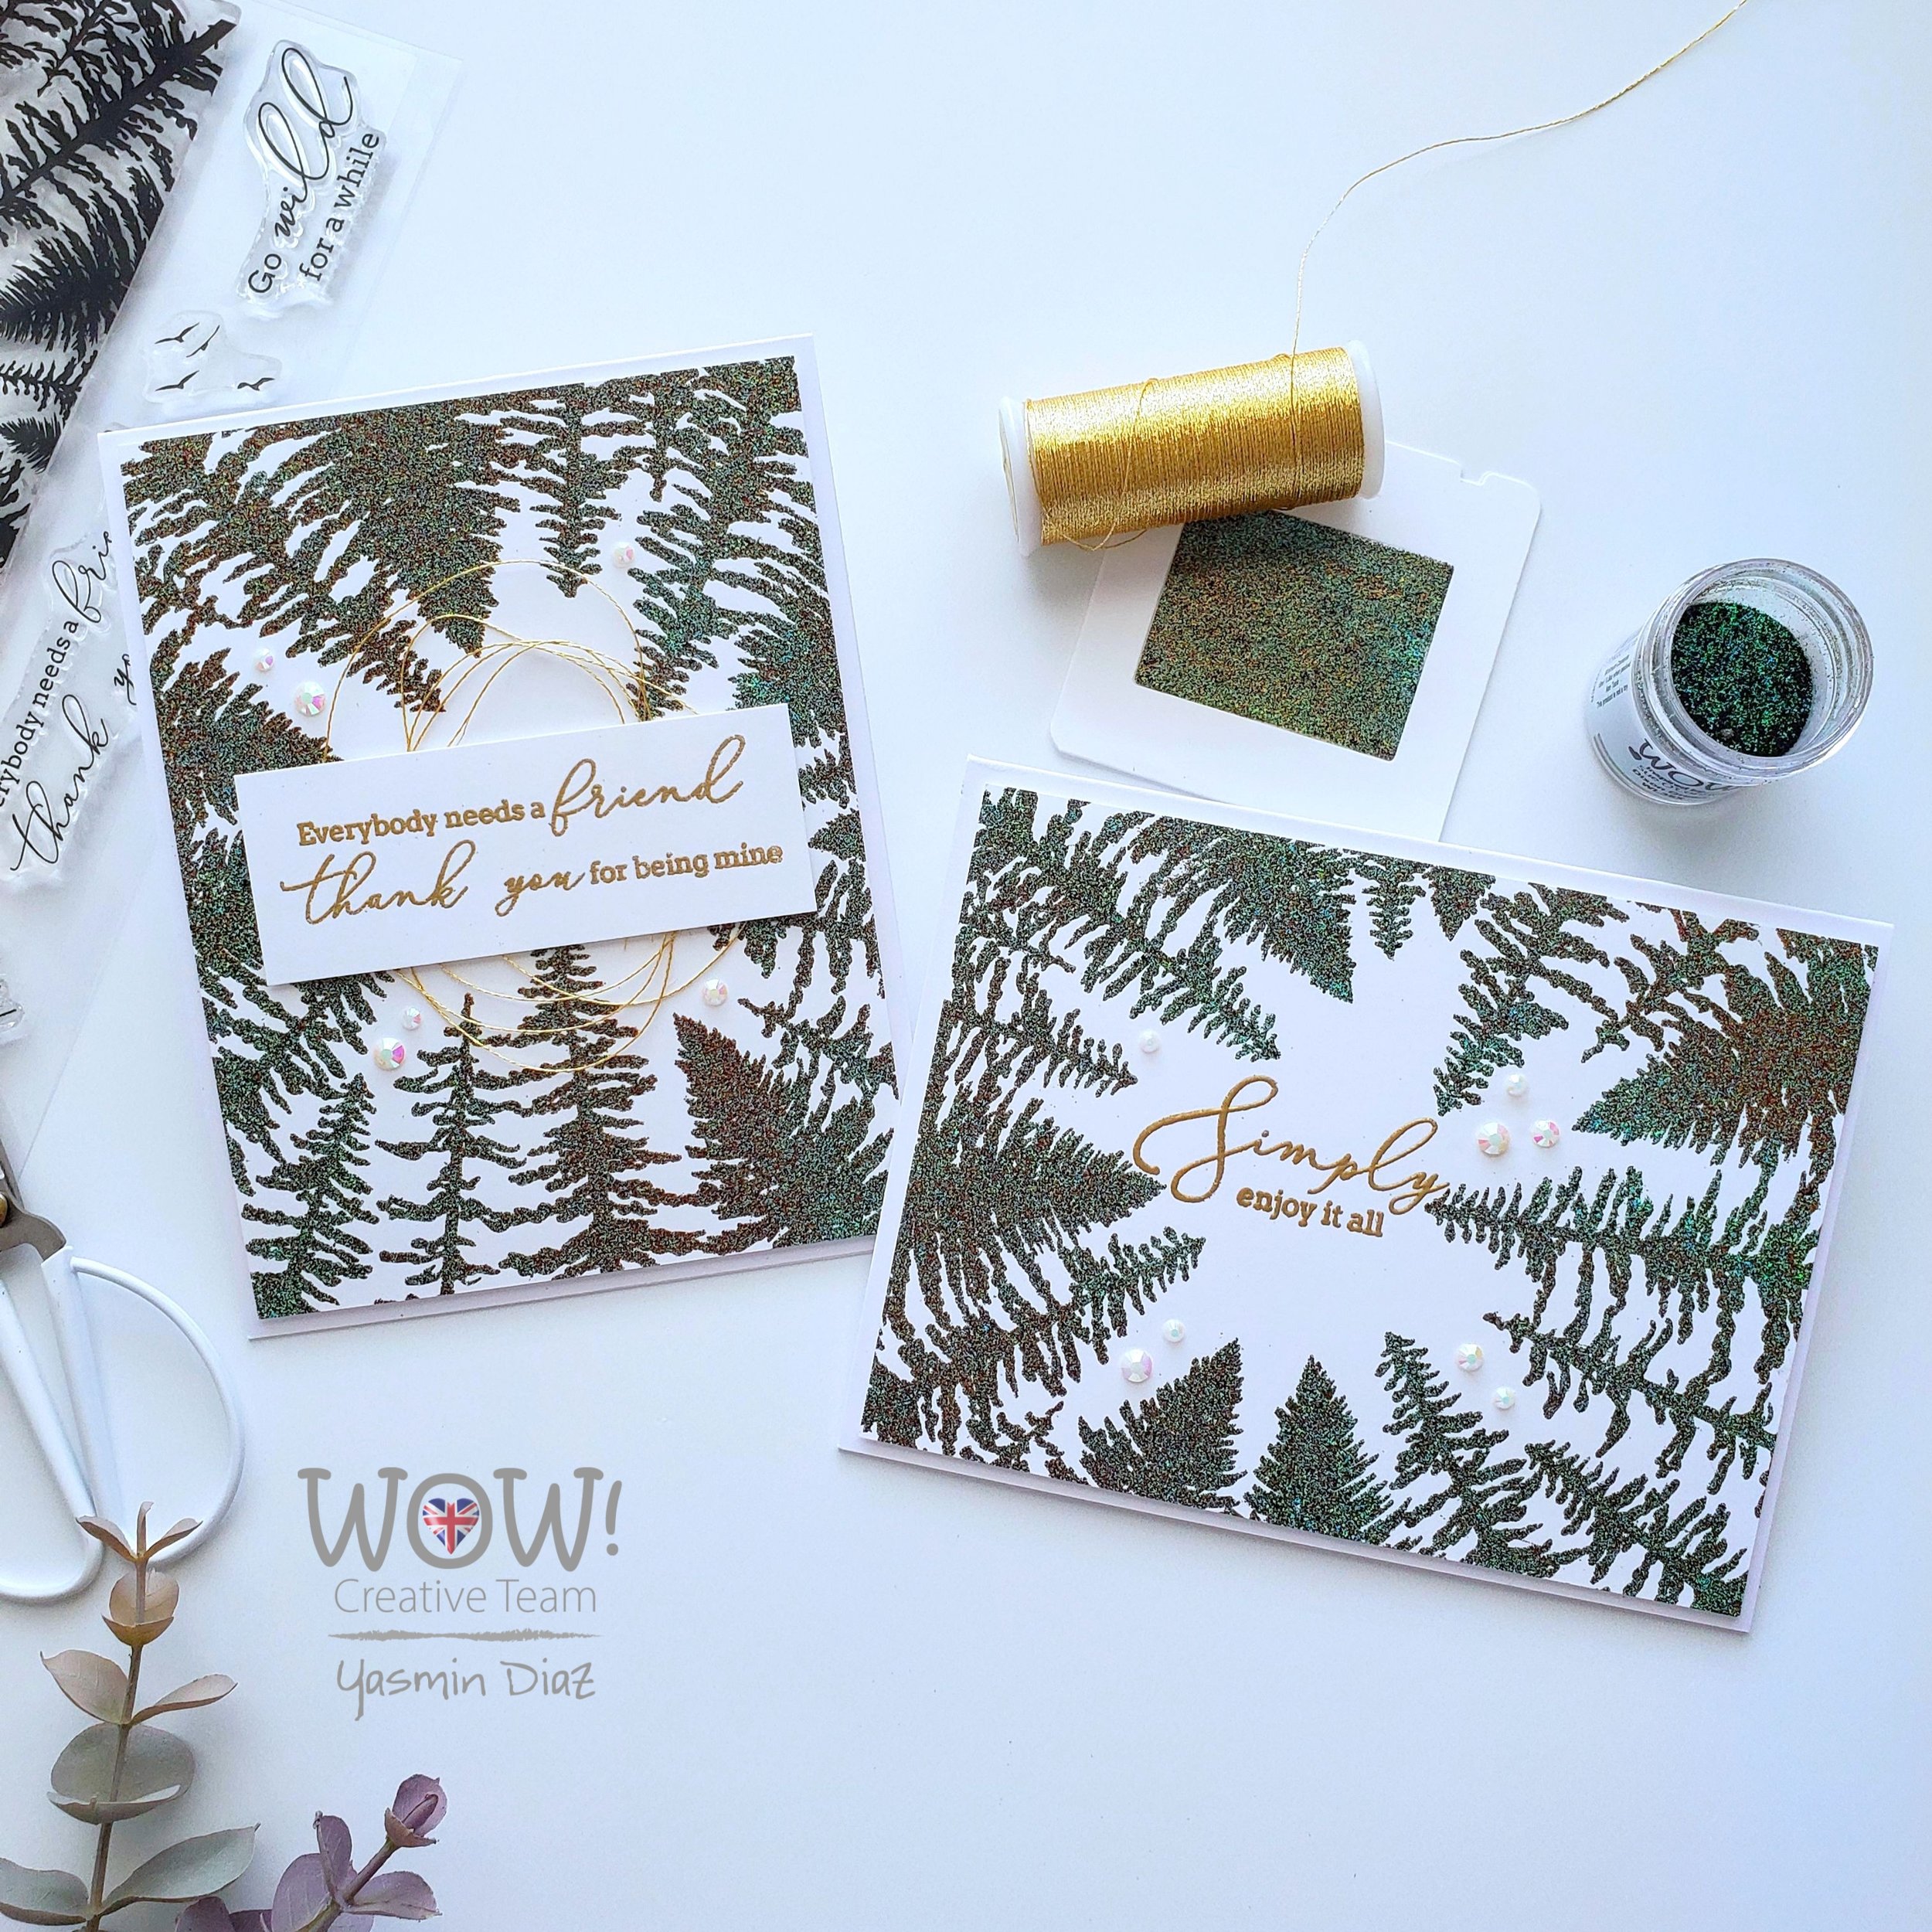
To begin with for the first and second example, I started by applying Embossing Powder Tool to, two A2 size white card panels as, I was going to stamp and emboss on top of them using Through the Trees Stamp Set and Embossing Ink Pad. I don’t think that I’ve ever mentioning here on any of my blogs the importance of using an embossing tool before adding any powder to you cards as, this step helps for you not to have extra powder in places where you haven’t stamp your images. So, once the stamping was done, I covered the whole stamping with WOW! Dixon Green embossing powder and I heat set it with the Heat Embossing Gun Tool. Right after when I was done heat setting them, I trimmed the edges of the card panel as usual and I adhered the backing of the first card panel to an A2 top folding white card base with craft foam tape adding a little bit of dimension. In the meantime, I gold heat embossed a sentiment from the same stamp set with Metallic Gold Rich embossing powder and I trimmed the edges of it. Lastly, I added a piece of Metallic Embroidered Thread to add a touch of gold to the card and to finish the card off, I adhered the backing of the sentiment with craft foam tape right in the center of the card and I adhered some Jewels here and there for a touch of sparkle as you can see in the picture above.

For the second example from the first set of cards, I gold heat embossed a sentiment from the same stamp set with the same gold embossing powder in the card panel that I previously ready. However, for this card I went for a landscape design as you can see in the picture above. Once the gold heat embossing was set it, I adhered the card panel to an A2 side folding white card base with craft foam tape to add dimension. Finally, to finish the card off I adhered a few Jewels here and there for a touch of shine.

To create the second set of cards, I started by running through the die-cutting machine two white card panels to die-cut each of them with the Leaves Card Cover Die. Once the die-cutting panels were done, I kept one of the card panels in white for a white on white look and, the second I heat embossed it by using the WOW! Dixon Green embossing powder for a greenery look.

So, for the first example from this set, I adhered in the backing of each embossed leaf pieces of craft foam tape because, I wanted to raise the level by creating dimension in between the card panel and the leaves. Once, all leaves had tape I adhered the backing of them to an A2 white card panel. Then, I trimmed the edges of the card panel a bit smaller than a regular a2 size card base and, I wrapped around in one of its sides a piece of Ivory Burlap String which I finished with a tied bow as you can see in the picture above. Right after that, I adhered the backing of the card panel to an A2 top folding white card base and I set it aside. In the meantime, I stamped, gold heat embossed and die-cut it two sentiments from the Friendship Stamp & Die Bundle. Last but certainly not least, I adhered the backing of the sentiments to the card with craft foam tape to level the dimension with the leaves.

For the second card from this set as I mentioned earlier, I kept it simple by white on white the tone of the card panel. But, as the opposite from the first example, I used the WOW! Dixon Green to, heat embossed one of the sentiments just to add a pop of color to the card other than that I kept the same design as you can see in the picture above.

Well, I’m glad if you made it to the end of the post as, I hope these cards inspire you to give the designs a try! As always, I appreciate the time you take to read my blog posts. I’d love to know your thoughts about my card designs, any feedback is appreciated. And…don’t forget down below you’ll find the supply list for the products used on this blog post.
Thank you and happy crafting, your time is valuable.
Don't forget to keep spreading kindness, Today and Always.
Best,
Yasmin
Supply List
Through the Trees Stamp Set
Friendship Stamp & Die Bundle
Leaves Card Cover Die
Bridal Mix Jewels
WOW! Dixon Green
WOW! Metallic Gold Rich
WOW! Embossing Ink Pad
WOW! Embossing Ink Pad Refill
WOW! Heat Embossing Gun Tool
Inkadinkado Embossing Powder Tool
May Arts Ivory Burlap String
Metallic Embroidered Thread
Cougar 110# Heavy Weight Card Stock
PLEASE NOTE
As being a WOW! Designer Team Member, WOW! has provided me a special code for all my lovely Subscribers to use. So, don’t forget to take the advantage of a 10% off all purchase for both WOW! US & UK online stores by simply using my code: WOWDTYD
To make it easier for you, here are the links for both websites weather you’re a US or UK user.
WOW! US
WOW! UK

Your imagination is Your limit.
All photography provided by Yasmin Diaz


Creativity is contagious, pass it on.
–Albert Einstein
Disclosure
I am creating this blog with the purpose of sharing how I design my cards, the information provided here is base in my own opinion and creativity. I am not an expert by any means, and I only share the way that I design my cards. All the products used for this blog post were personally purchased by me. However, I did receive some of the WOW! products used in this blog. Please keep in mind, that all of the referral links were added for you to know from where I purchased or received the items from as all of the products shared, and mentioned in each of my blog posts are simply because I use, and truly love them.