
Baby Shower Thank You Card
Hello and welcome to another blog crafty friends.
I hope your day is full of happiness and joy! On today’s blog I would love to share with you this pretty simple and sweet Thank You card that I’ve created in celebration of my Sister-in-law baby shower. I create this to give a special thank you message to her guests for their company and warm wishes at her baby shower. Don’t you think that a handmade message is an absolutely lovely gift for anyone to receive either for a baby shower or for any special occasion?
So Let’s Get Started

To begin with I started by creating a very simple sky for the background as my intention was not about to create a whole scene. And for that I inked up a piece of Bristol paper using a stencil and an ink blending tool with Tumbled Glass distress oxide, as you can see in the picture above.
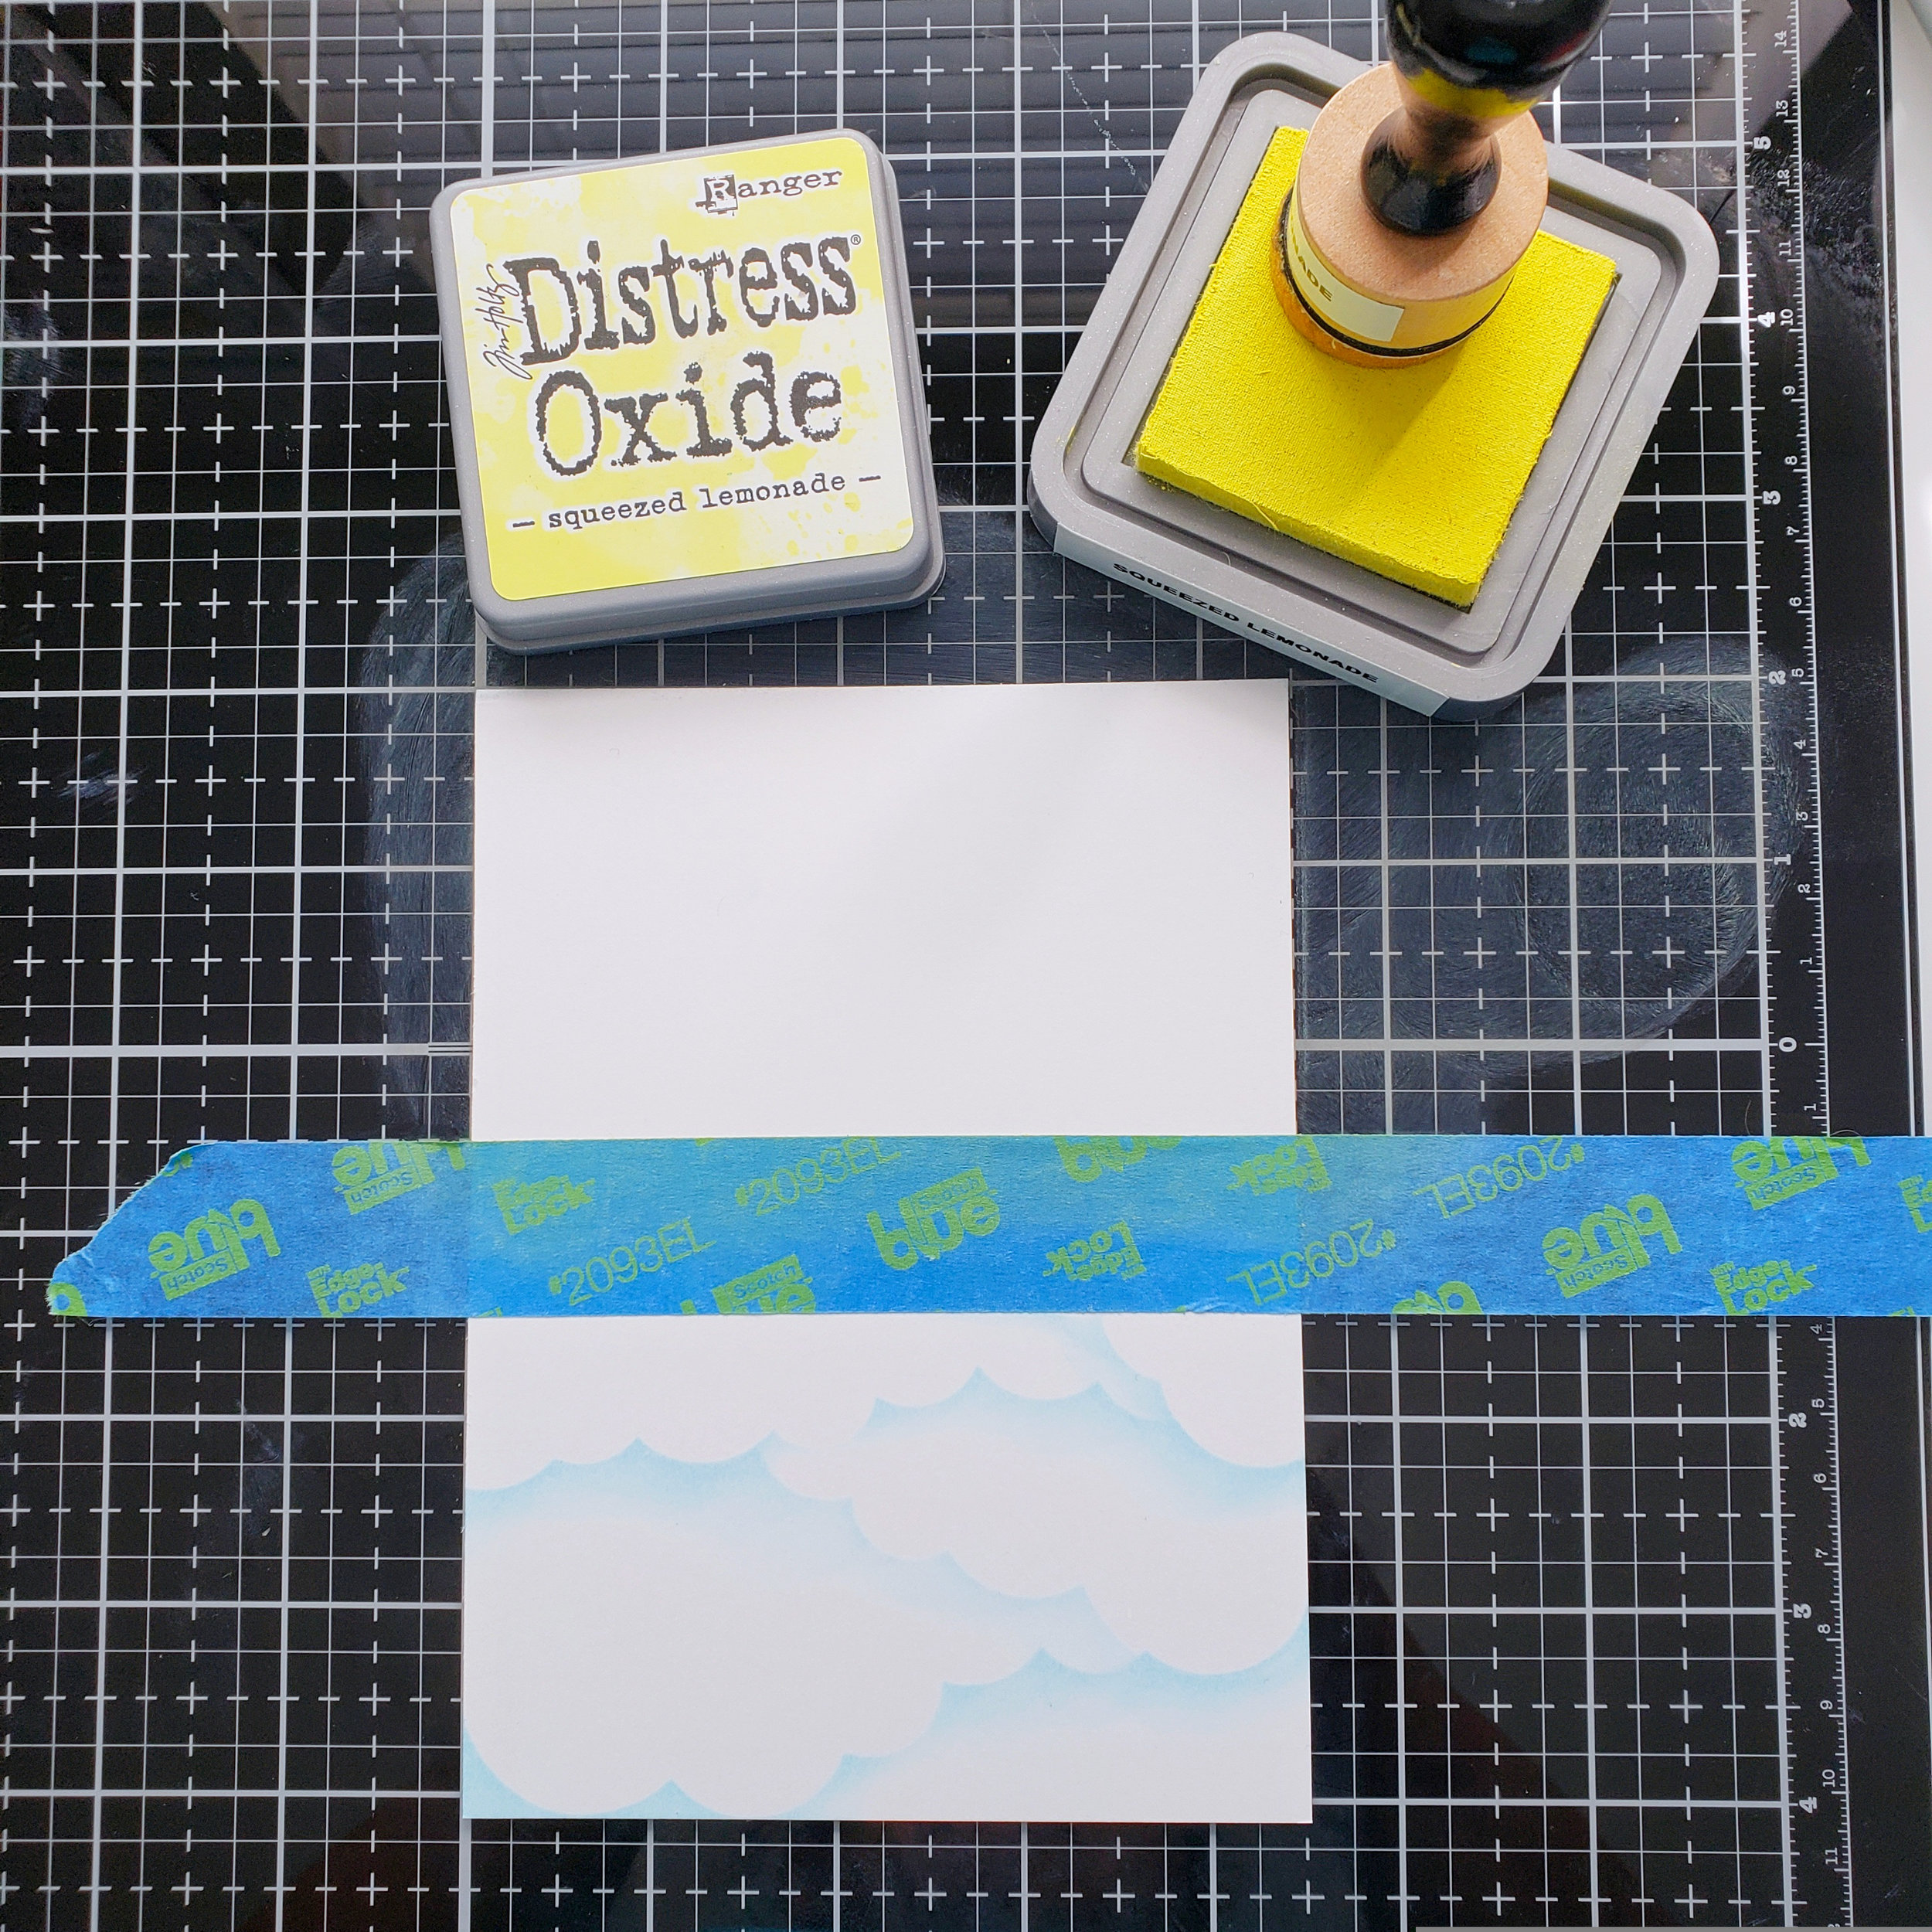
Then I rotated up side down the paper and I inked up the bottom part of the background with another ink blending tool and Squeezed Lemonade distress oxide ink. I chose yellow as a complementary color for the background.

Once, the background was all inked up. I used a stitched frame die to cut a standard A2 size card panel. And before I adhered it to the card base, I adhered a piece of ribbon between the the sky and the solid yellow color, creating a separation in between. Then, I adhered the backed of it to a white card base.

For the image I stamped the elephant from the stamp set with a copic friendly black ink. Then I did a simple coloring with copic markers in soft colors. Also, I used a white gel pen for highlights.
Here are the colors that I used:
T0, T2, N0, N2, R20 as you can see I used 2 completely different set of toners and grays. Because believe or not I ran out of ink from one of the grays copic markers. I know right!? So, this is a very helpful recommendation in case you have in mind to create 20 cards at once just like I did. A Must “have a re-inker ready to refill your copic color choices.”
Once I was done coloring, I used a die cutting machine and the coordinated die to die cut the cute elephant.
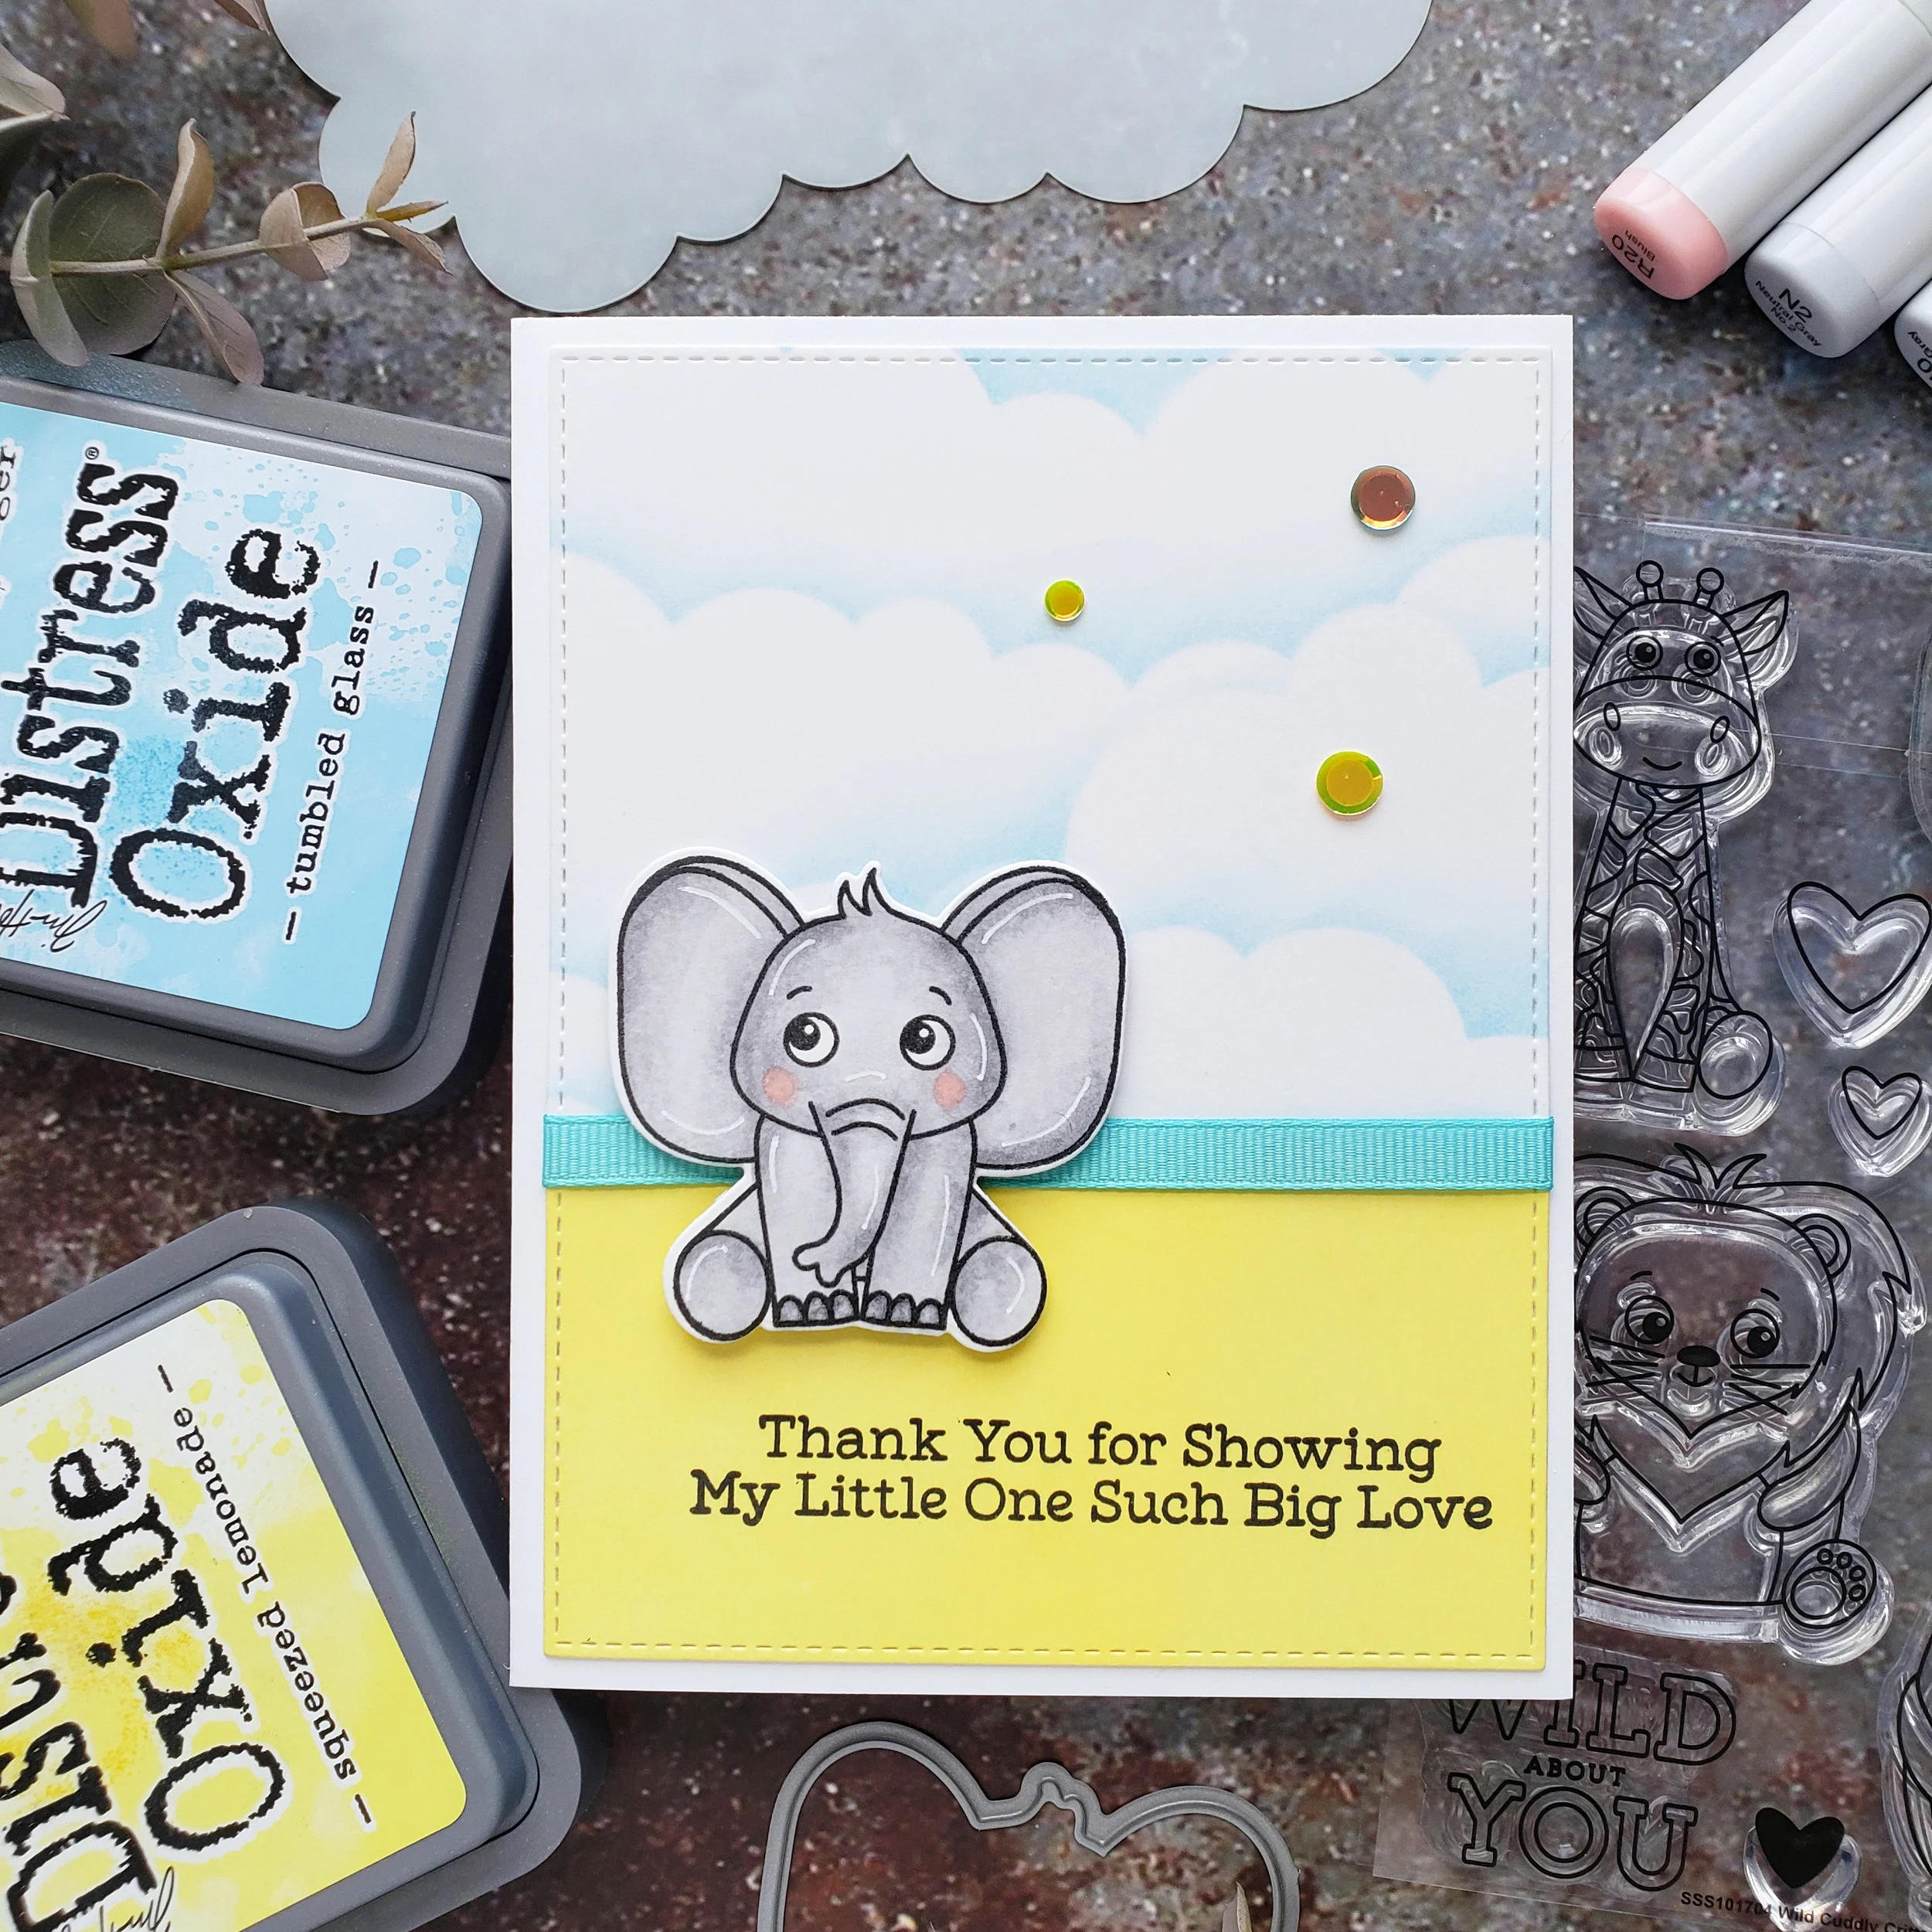
To finish it up, I adhered the backed of the elephant image with foam mounting tape to the card and I added a few confetti mix here and there just to add a little bit of shine to the background.
Happy Crafting! I’ll be adding down bellow the detailed list of the products that I used to create this card, for you to easily find from where I purchased them from.
SUPPLIES
STAMPS & DIES
Wild Cuddly Critters
Wild Cuddly Critters Dies
Hello Little One
Stitched Rectangle Die
STENCILS
MFTS Cloud Mix-adables
INKS
Tumbled Glass
Squeezed Lemonade
Jet Black Amalgam Ink
INK BLENDING TOOL
COLOR MEDIA
Copic Colors Markers
PAPERS
Neenah Classic Crest Solar White 110lb
Bristol Strathmore Smooth Surface
EMBELLISHMENTS
Summer Sun Confetti Mix
GLUE
Craft Glue by Creatology
Thank You, your time is valuable. Don't forget to spread kindness, Today and Always.
Best,
Yasmin
Your imagination is Your limit.
I hope you get Inspired and give these designs a try. Just keep in mind, that you can create the same design by using any combination of stamp and dies of your own creativity!
All photography provided by Yasmin Diaz


Creativity is contagious, pass it on.
–Albert Einstein
Disclosure
I am no affiliated or sponsored by any company mentioned here. All products are personally purchased by me. I am creating this blog with the purpose of sharing how I design my cards. The information provided here is based in my own opinion and creativity. I am not an expert and I only share the way that I design my cards. I am sharing the products mentioned here. Because, I Use and Love them.